Page 64 MZC-88 Installation Instructions
7. Press the numbers 9-7-5. The LED will flash twice after the 5.
8. Press and release the remote key to learn be learned to (i.e., the INPUT button for the POWER ON code). The LED will
flash rapidly, awaiting the command to be stored.
NOTE: About 5 seconds are allowed to act at this point. If the remote times out, repeat the procedure from Step 6.
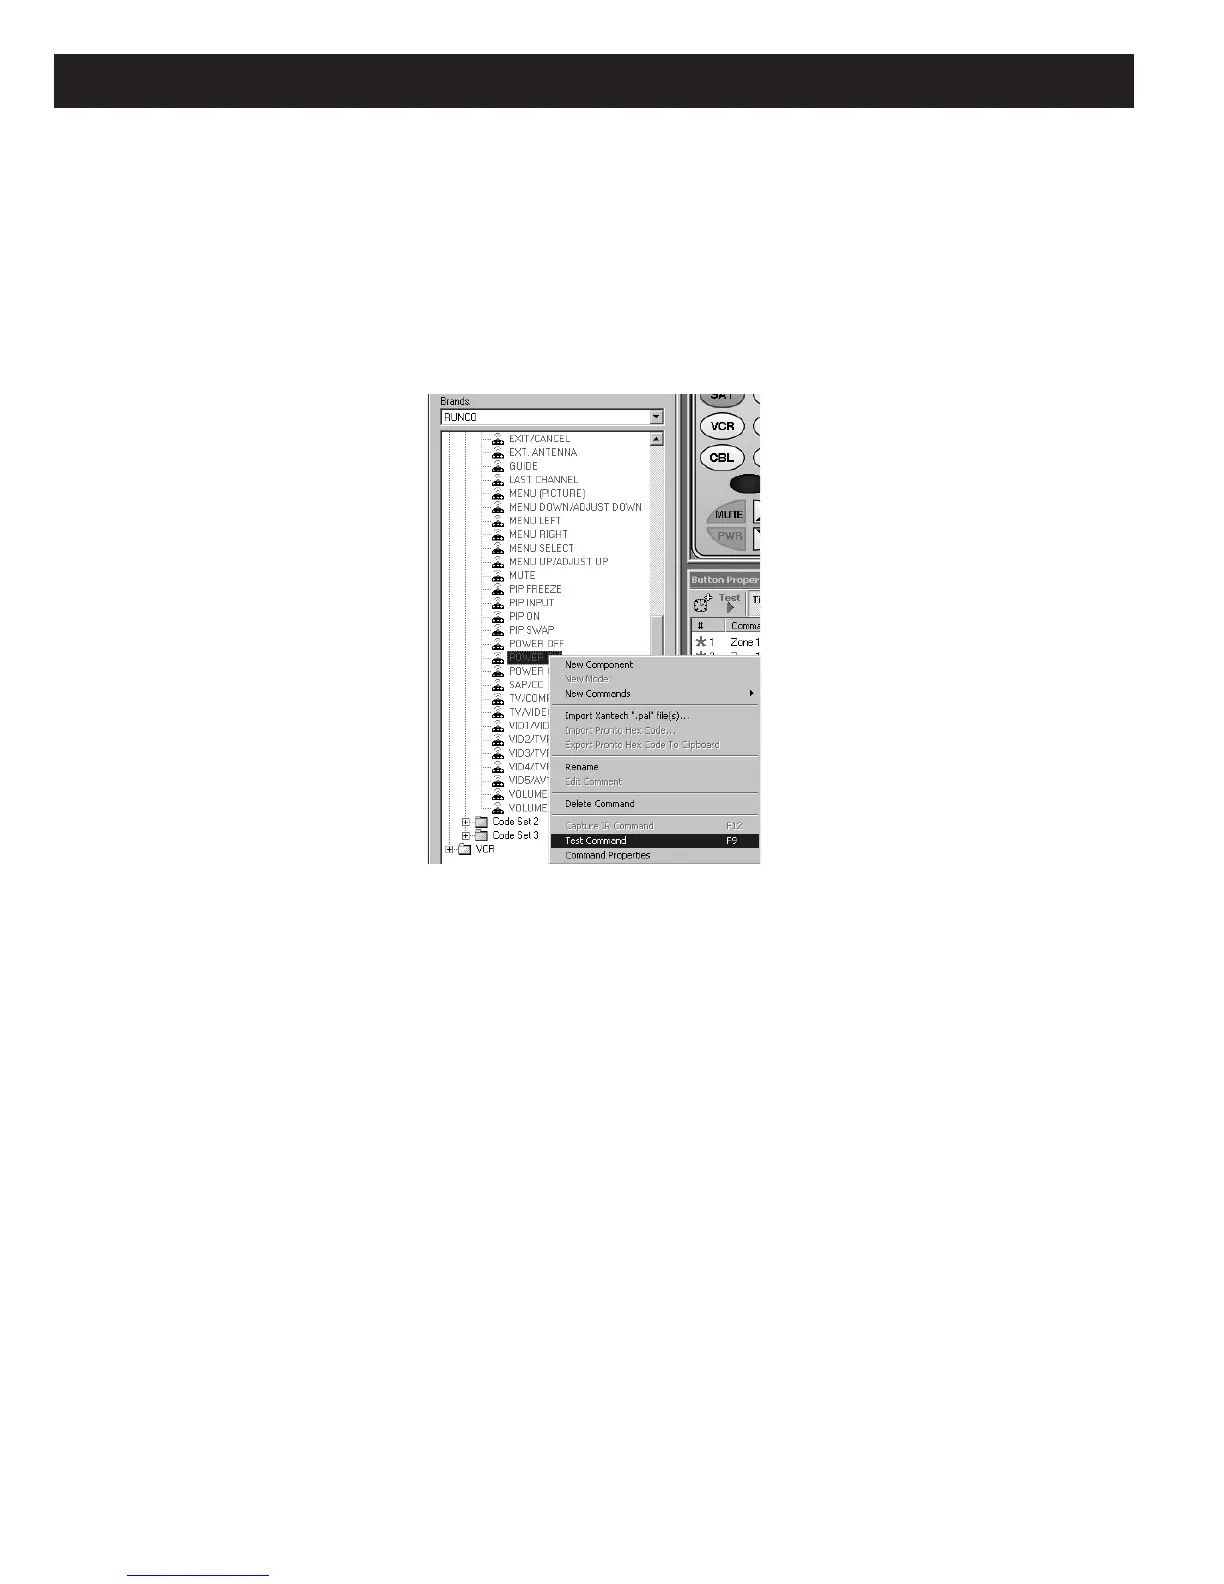
9. In EZ-Tools, left click the desired code (in this case POWER ON) and press F9 (or right click the command then left click
“Test Command” in the pop-up). (Refer to Figure 52) This will transmit the IR Code to the learning remote.
Figure 52
Using Test Command (F9) to “Teach” Learning Remotes
10. If successful, the LED on the remote will stop flashing and blink twice. If unsuccessful, the LED will stop flashing and
blink one time long.
11. Repeat steps 6 or 8 through 10, as needed, for all remaining keys to be programmed.
TEMPLATES
To save time on new projects, use “Save As” in the EZ-Tools File Menu to save existing projects under different file names.
Doing so allows existing files to be used as “Templates” for new projects that have similar programming.
In addition, EZ-Tools provides for the use of specific Templates to shorten individual Source and Icon Layout programming
times within any given project.
Source Templates
The Source programming that has been done for any MZC-88 project saved in EZ-Tools, can be exported for use in other
MZC-88 projects. When doing this, every command, macro, etc., that has been programmed under a Source bank for all
Numeric and Function keys, will be saved as a Template, including any commands under the Source key itself.
When Imported into a new project, the programming can be used as is, or small changes can be made, as necessary, to fit
the particular needs of the new project. Proceed as follows:

 Loading...