Page 62 MZC-88 Installation Instructions
5. Press the numbers 9-7-5. The LED will flash twice after the 5.
6. Press and release the remote key to be learned to (in this case, the INPUT button). The LED will flash rapidly, awaiting
the command to be stored.
NOTE: About 5 seconds are allowed to act at this point. If the remote times out, simply
repeat the procedure from Step 4.
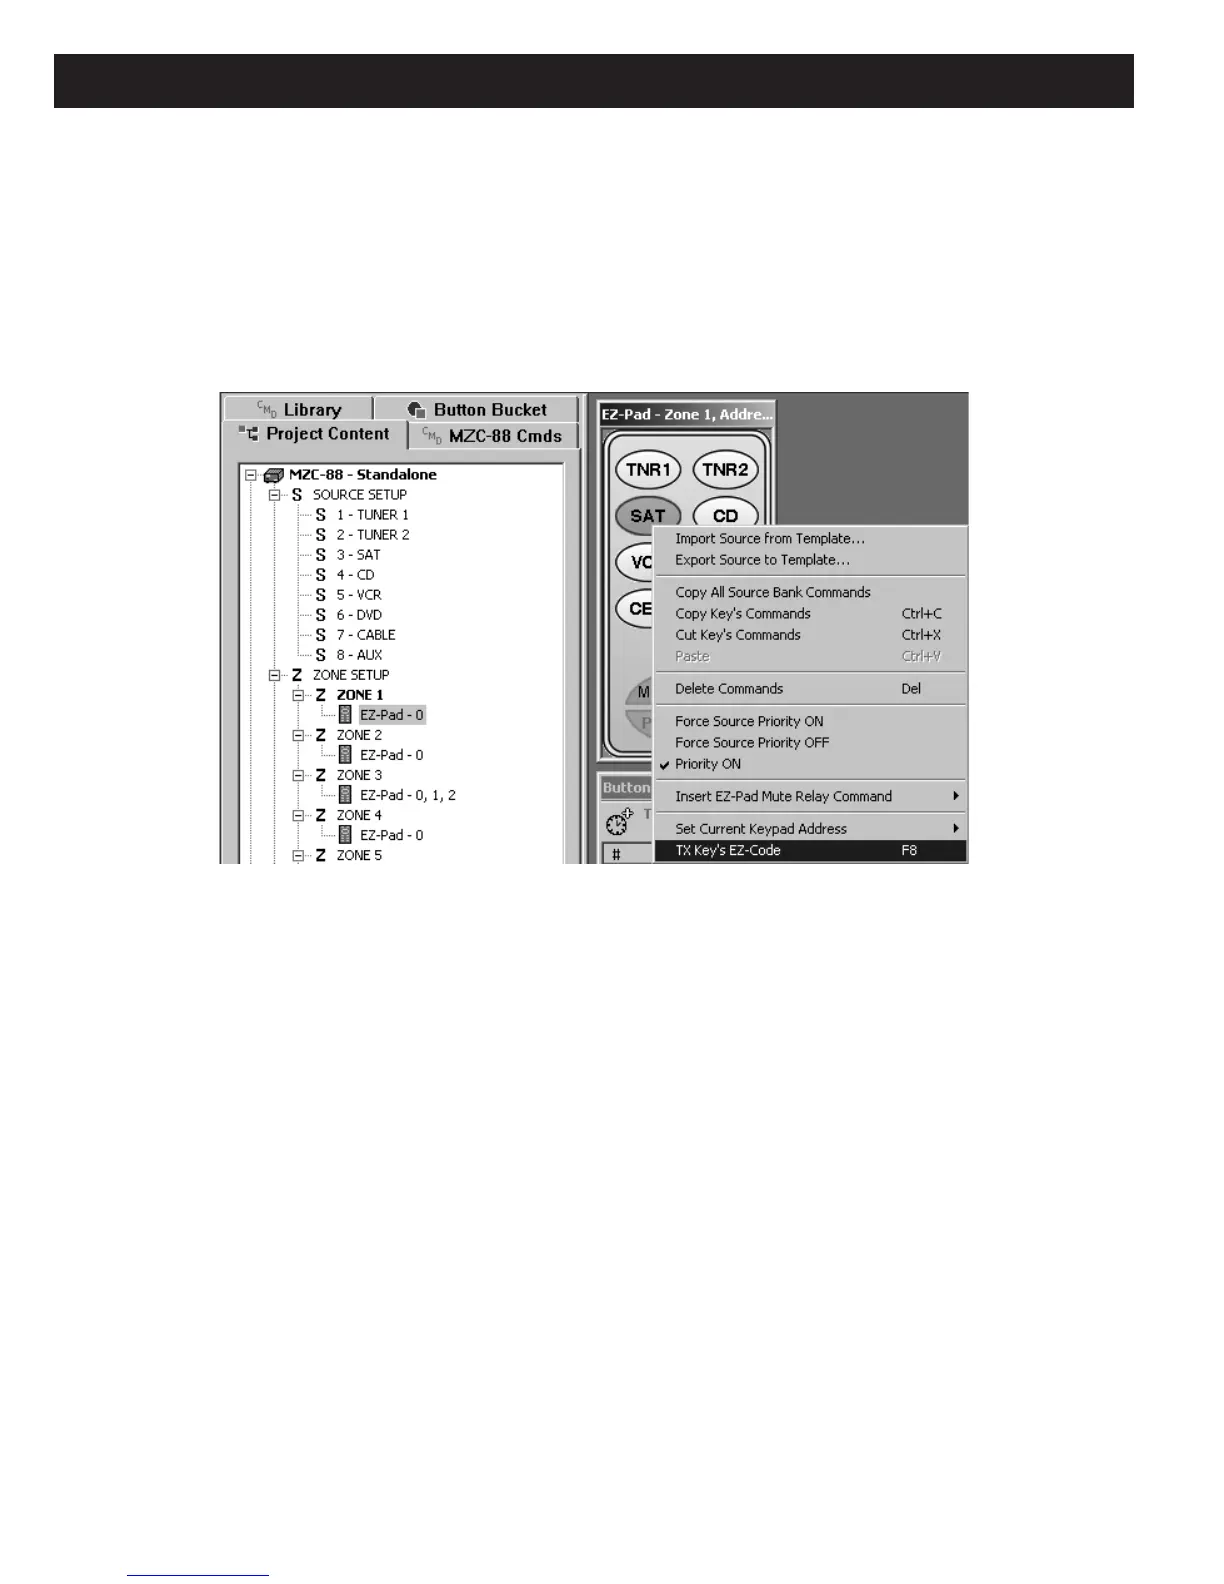
7. In EZ-Tools, left click the desired key (in this case the Source key SAT) and
press F8 (or right click the Source key then
left click “TX Key’s IR Code” in the pop-up). This will transmit the SAT key’s IR EZ-Code to the learning remote. (Refer to
Figure 50)
Figure 50
Transmitting Key’s EZ-Code to learning Remote (or Press F8)
8. If successful, the LED on the remote will stop flashing and blink twice. If unsuccessful, the LED will stop flashing and
blink one time long.
9. Repeat steps 6 through 8 for all remaining function keys for control of that particular Source. If the learn mode times
out, repeat from step 4.
10. Repeat from step 6 for each additional Source key and all related function keys. If the Learn mode times out, repeat
from step 4 to select the new Source.
NOTE 1: The EazyR-2 is not capable of recording IR commands under the Source buttons and that is the reason for
using the INPUT button in step 6. After programming, selecting a Source on the EazyR-2 and issuing the commands
under that Source, is therefore a 2-step process. First, press the desired Source button (to select the bank), then press
INPUT to execute the Source power-up and other commands that may exist under the like Source key of the EZ-Pad.
The EZ-Pad Source key will light up to track and show your selection.
NOTE 2: Each EZ-Pad zone has its own zone-related EZ-Codes. Therefore, an EazyR-2 remote, after programming, will
only control that one zone. An additional EazyR-2 remote, programmed for each specific zone, is required, for control in
other zones.
 Loading...