Service Information
66
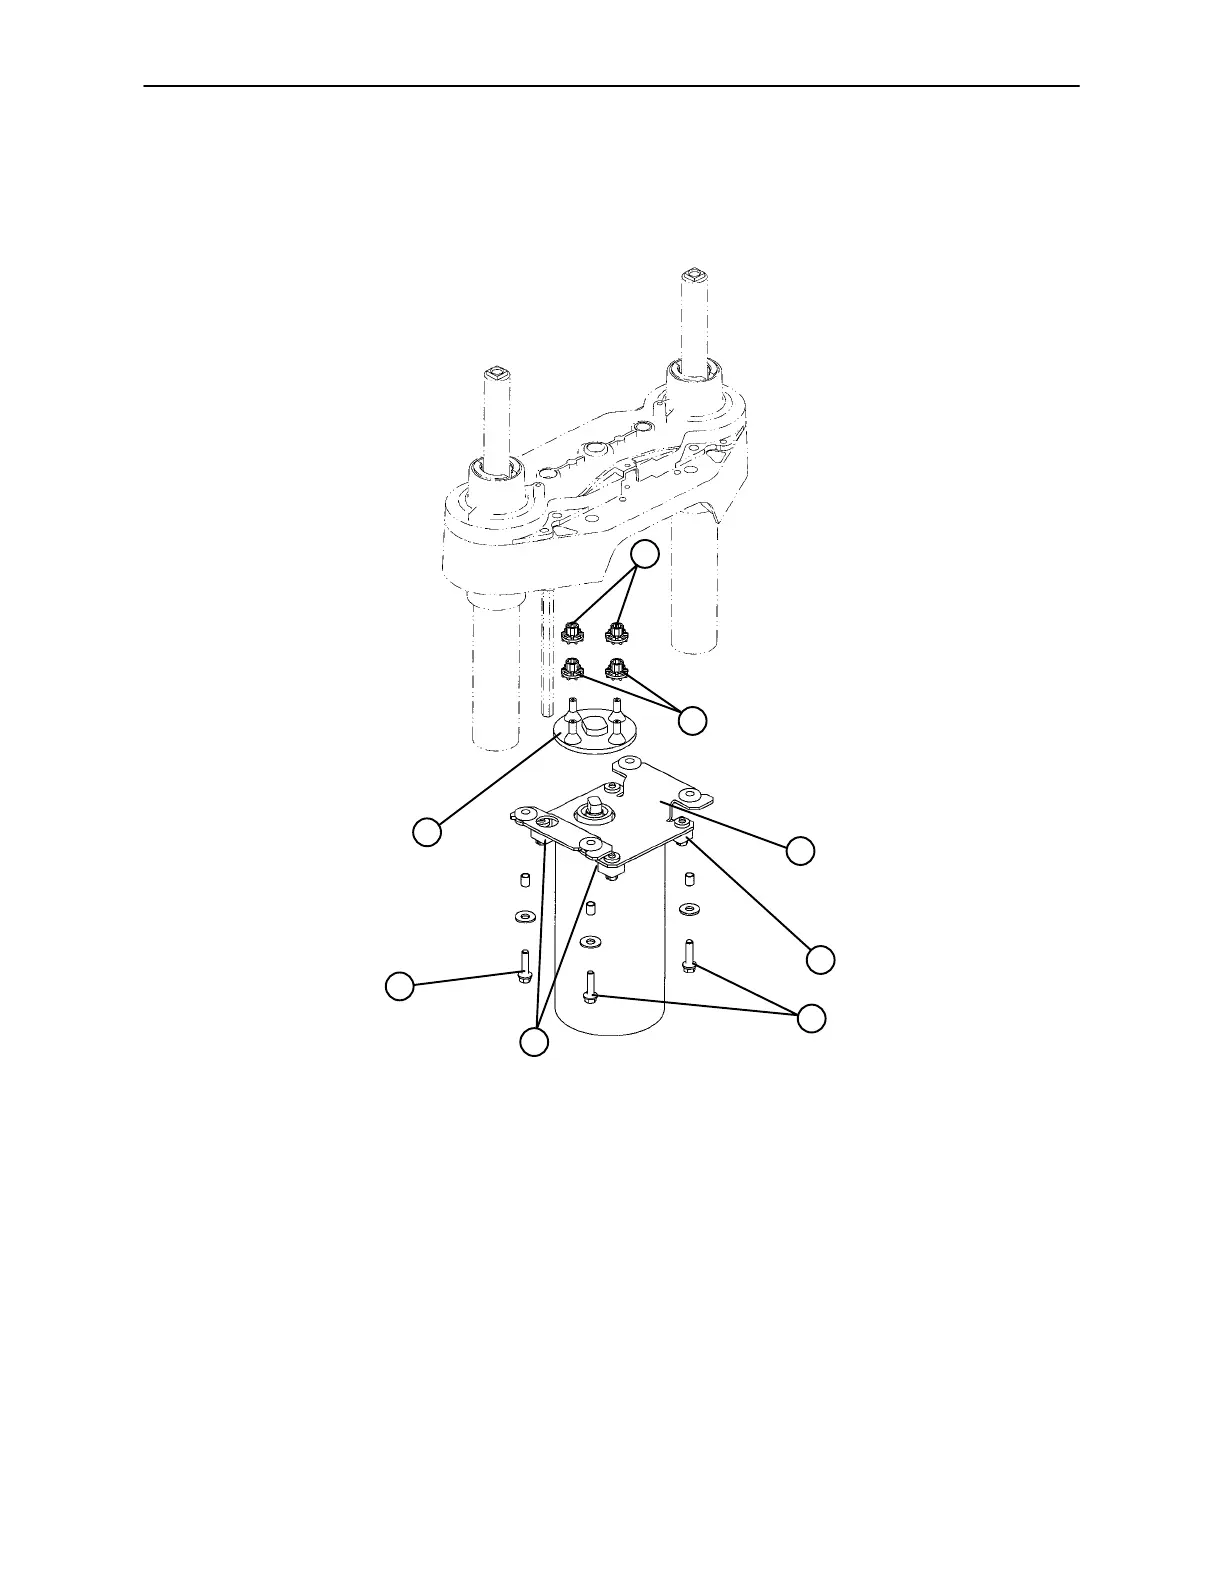
LIFT MOTOR ISOLATION PLATE REPLACEMENT
Required Tools:
7/16” Open End Wrench 5/16” Nut Driver or 5/16” Socket Wrench 3/8” Socket Wrench (w/6” ext.)
C
D
A
B
C
B
E
E
Procedure:
1. Unplug the bed power cord from the wall socket.
2. Using a 5/16” socket wrench, remove the five bolts securing the lower lift cover and remove the cover.
3. Using a 3/8” socket with a 6” extension, remove the four bolts (C) holding the lift motor isolation plate to
the lift housing and carefully lower the isolation plate to the floor.
4. Remove the motor coupler (A) and bushings (B).
5. Using a 3/8” socket, remove the bolts and washers (E) from the motor and remove the isolation plate (D).
6. Reverse the above steps to install the new isolation plate and reattach all components to the bed.
NOTE
When reinstalling the lift motor, the drive shaft on the motor will have to be turned to be aligned with the cou-
pler. Use a 7/16” open end wrench to turn the drive shaft of the motor.

 Loading...


