Service Information
77
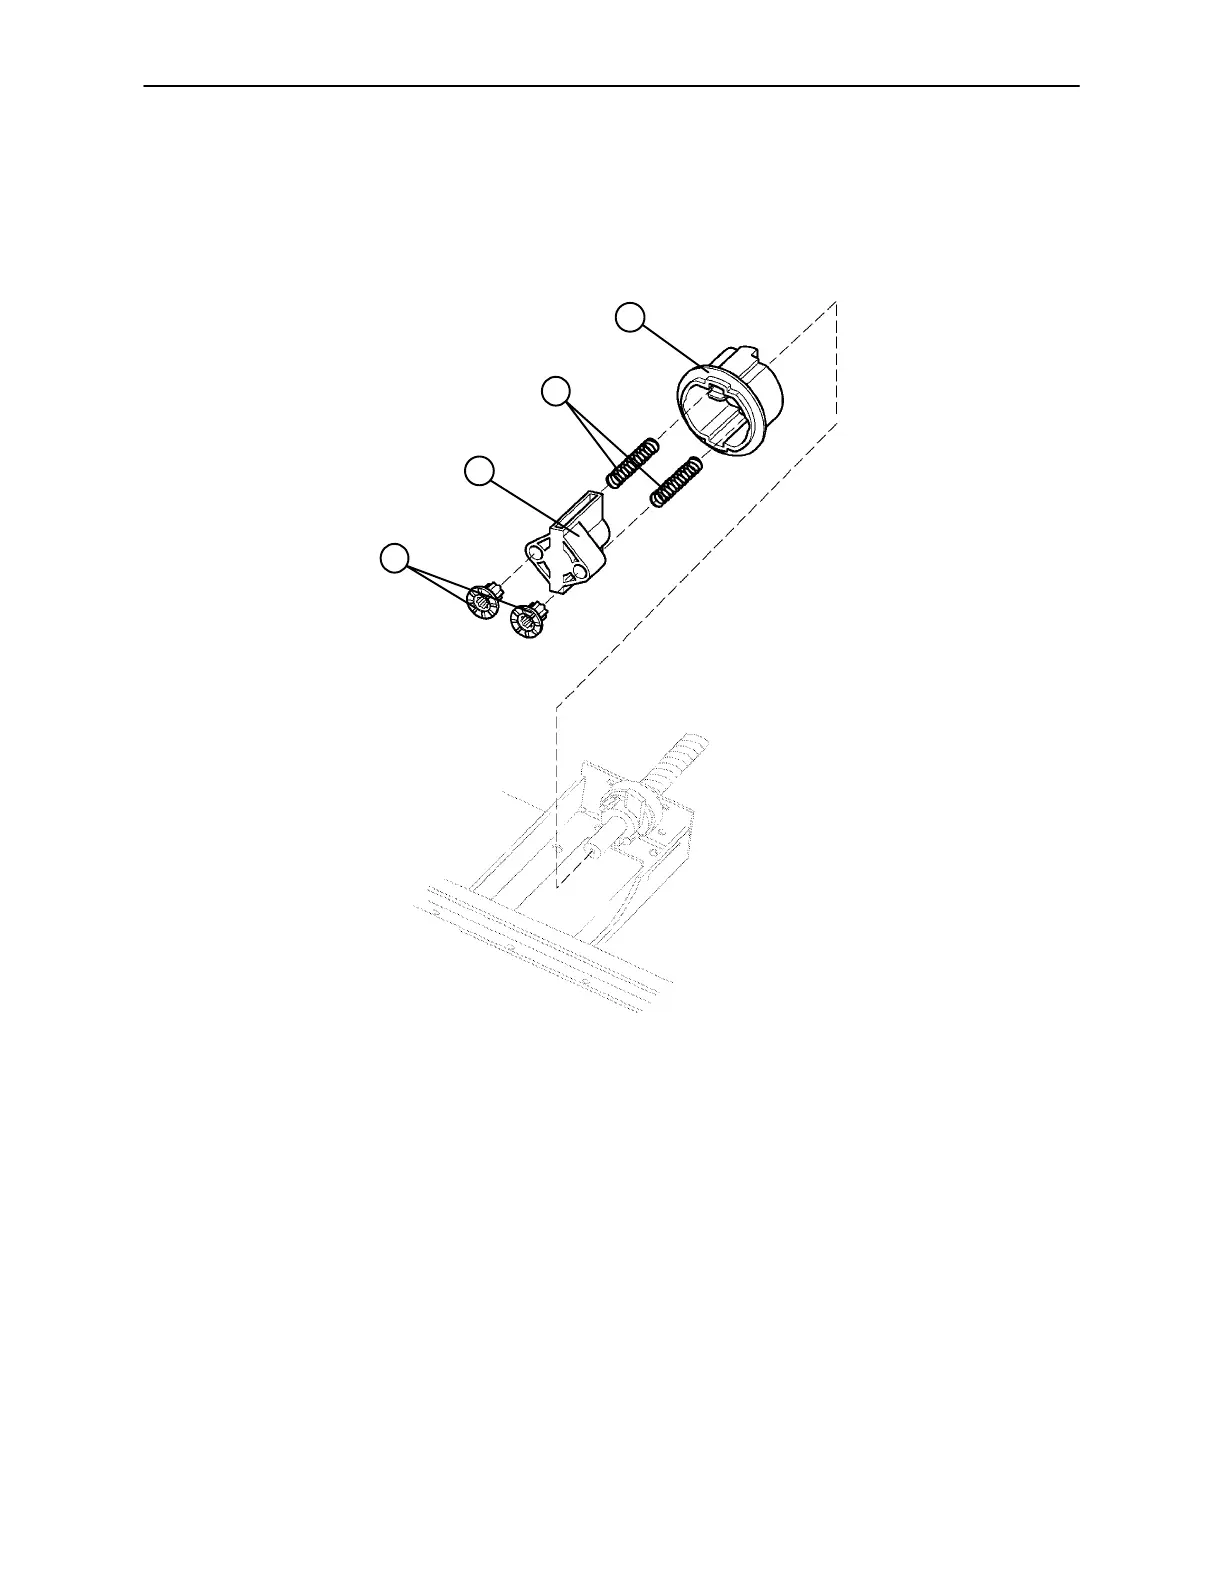
HEAD MOTOR DRIVE ISOLATOR AND CPR DECOUPLER REMOVAL AND REPLACEMENT
Required Tools:
3/8” Socket Wrench Needle Nose Pliers
A
B
C
D
Procedure:
1. Refer to page 76 for the ”Head Motor Removal and Replacement” procedure to access the isolator,
springs and decoupler.
2. Pull the drive isolator (C) with the bushings (D), springs (B) and CPR decoupler (A) off the drive screw
and remove it from the litter.
NOTE
These parts are spring−loaded. Use caution when removing them so they won’t drop to the floor.
3. To reinstall, put the decoupler (A) on the shaft.
4. Using needle nose pliers, bend the end of the springs (B) out slightly to help hold the springs in the isolator.
Put the springs in the isolator and install it on the shaft.
5. Reinstall the head motor (see page 76).
6. Run the Fowler up and down several times to test it before returning the bed to service.

 Loading...


