Service Information
74
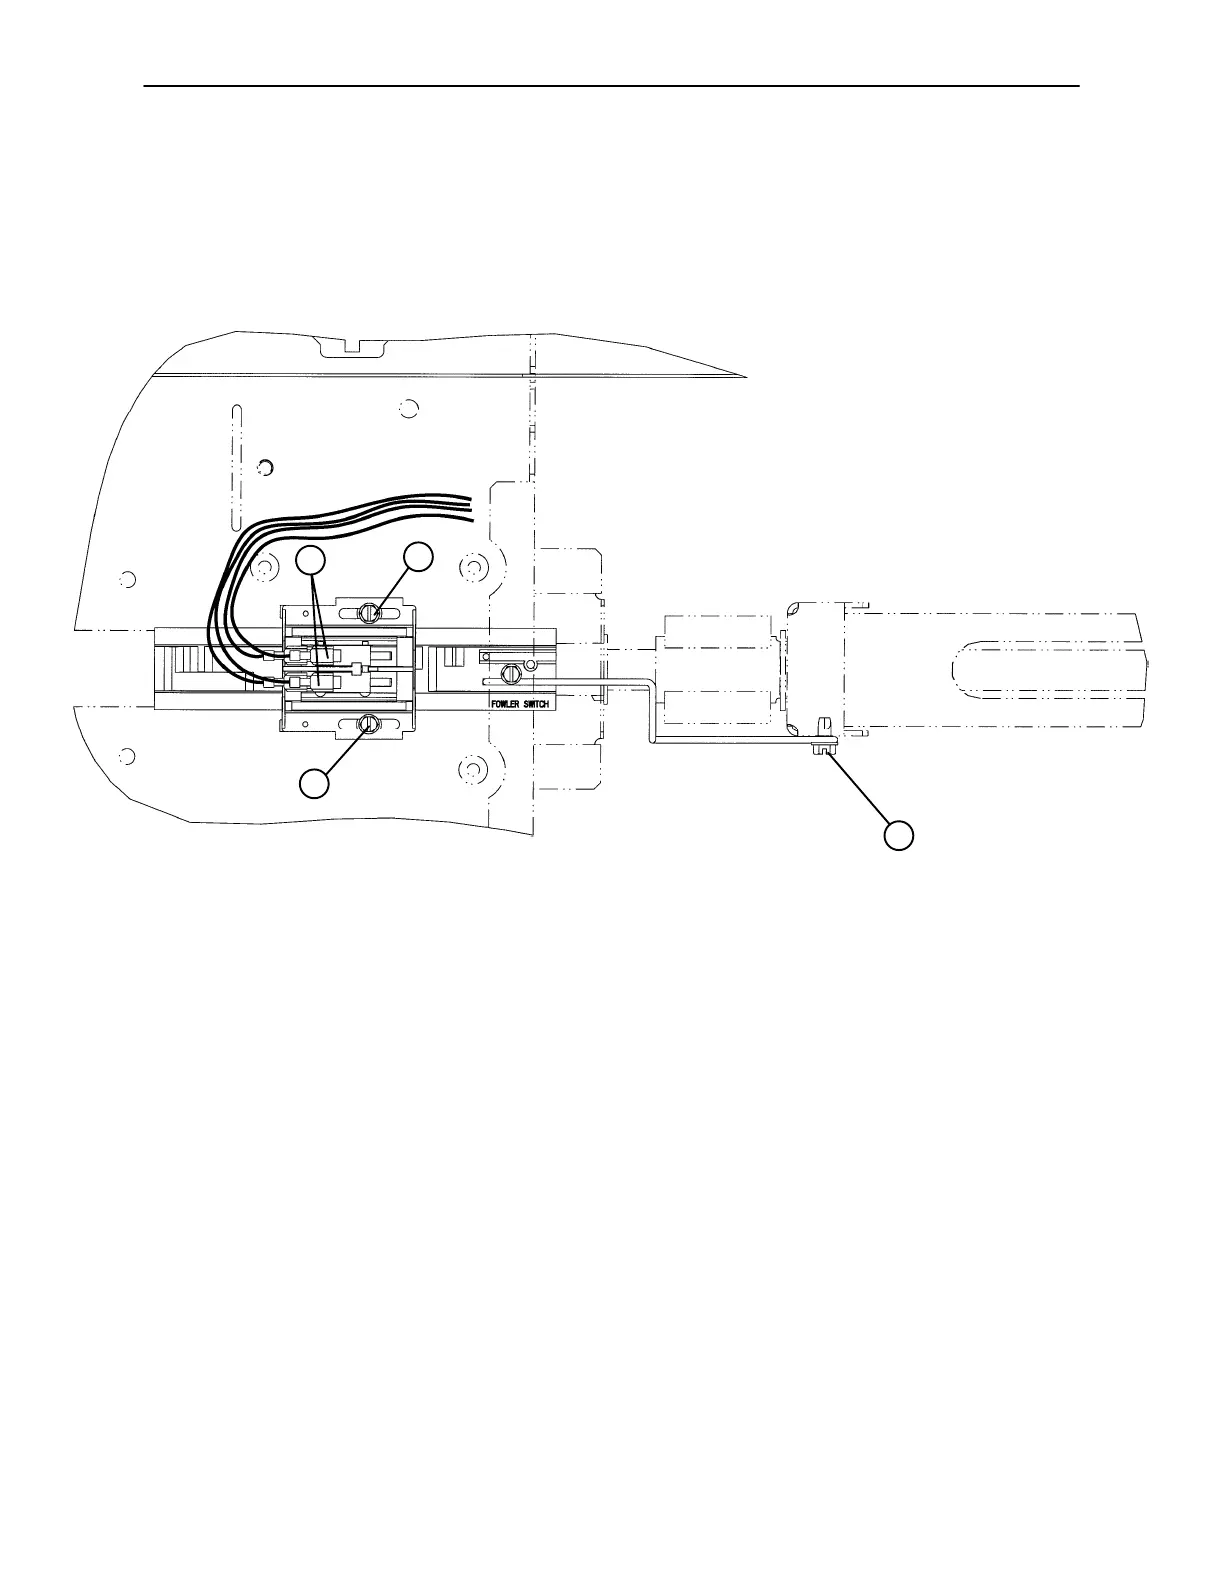
HEAD MOTOR CAM AND CAM GUIDE REPLACEMENT
Required Tools:
5/16” Nut Driver 3/8” Socket Wrench T27 Torx
A
B
C
C
Procedure:
1. Run the Knee Gatch fully up. Unplug the bed power cord from the wall socket.
2. Using a T27 Torx, remove the screw holding the foot end litter cover to the frame and remove the cover.
3. Using a 3/8” socket wrench, remove the two bolts holding the motion interrupt pan to the litter and remove
the pan.
4. Using a 5/16” nut driver, remove the screw (A) holding the cam retention wire to the ball nut assembly.
5. Disconnect the cables (B) from the micro switches. Take note of the locations of the cables so they will
be connected properly to the replacement cam.
6. Using a 5/16” nut driver, remove the two screws (C) holding the cam and cam guide to the support bracket
and remove the cam and cam guide with the attached micro switches from the bed.
7. Reverse the above steps to install the replacement cam and cam guide/micro switch assembly.
8. Refer to page 75 for ”Limit Setting − Head Motor”.

 Loading...


