Maintenance Procedures − Foot Board
96
FOOT BOARD INTERFACE PLUG REPLACEMENT
Required Tools:
#2 Phillips Screwdriver
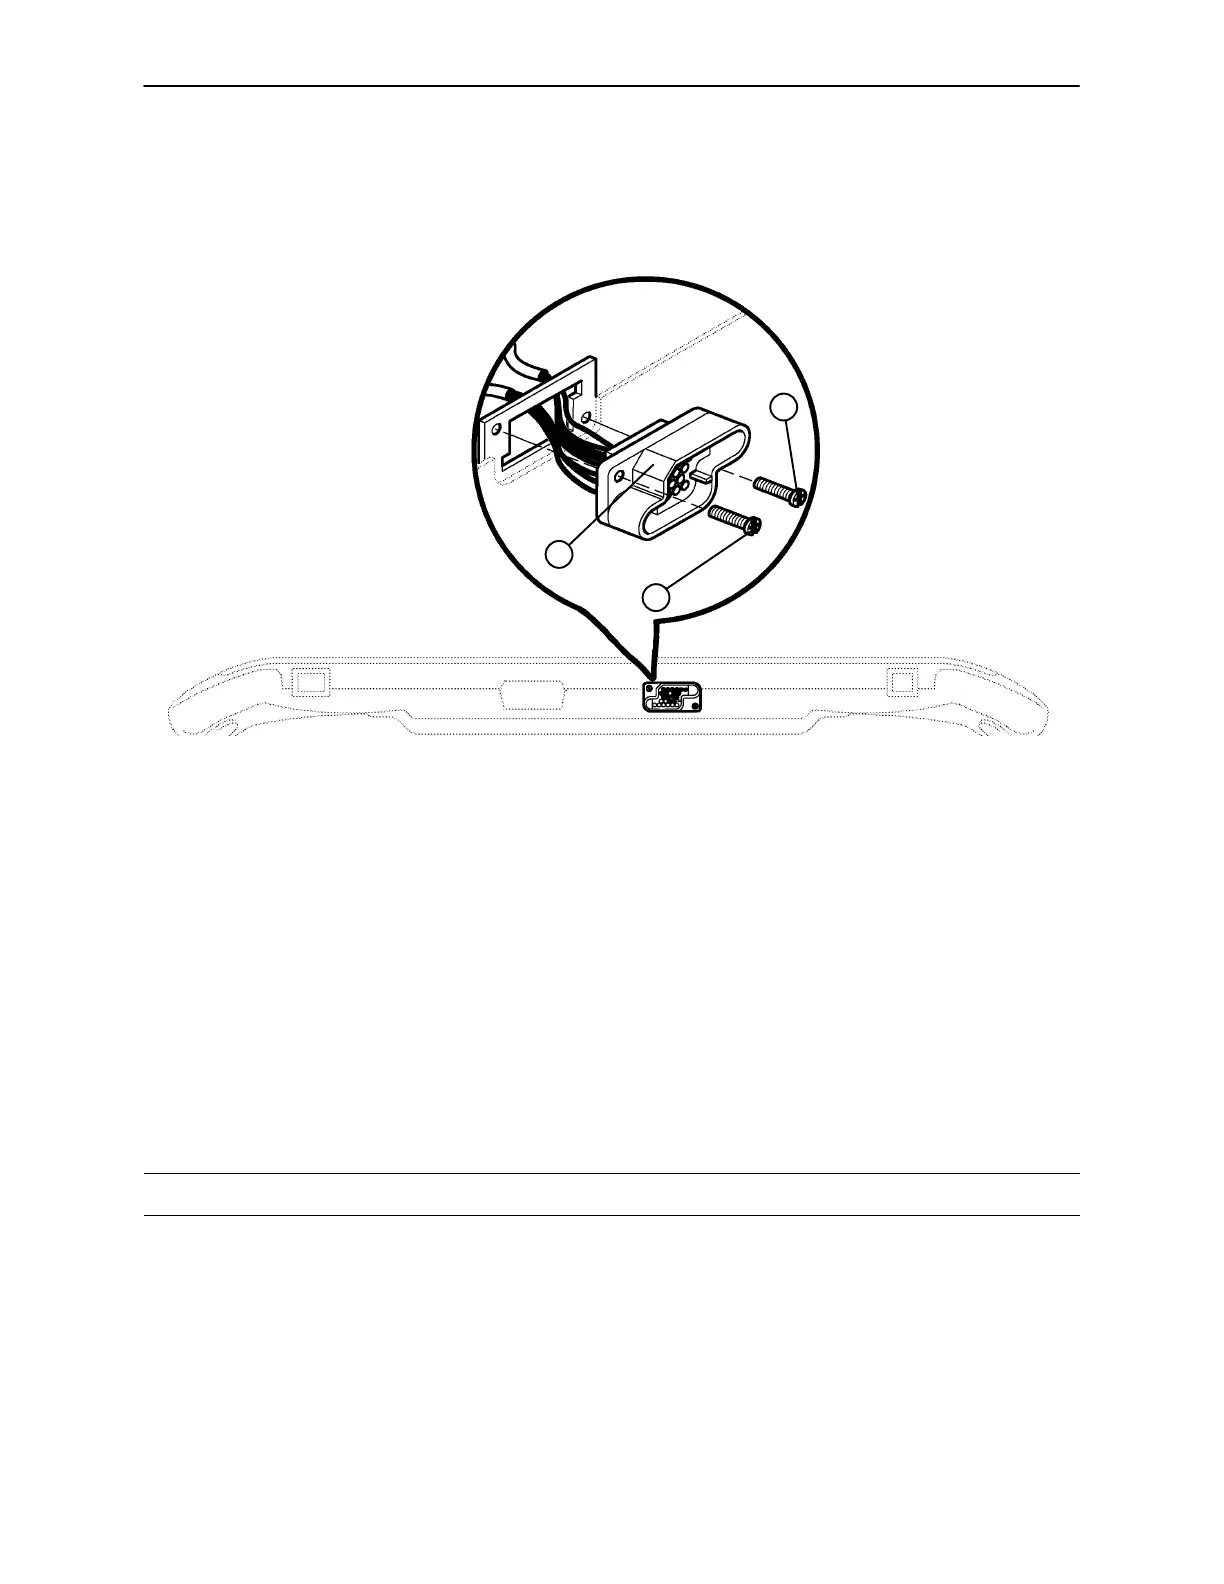
BOTTOM VIEW OF FOOT BOARD
A
B
A
Procedure:
1. Unplug the bed power cord from the wall socket.
2. Remove the foot board from the bed to access the bottom of the board.
3. Properly ground yourself (see page 39 for static discharge precautions).
4. Using a #2 Phillips screwdriver, remove the eight screws holding the foot board door to the foot board
and remove the door.
5. Using a #2 Phillips screwdriver, remove the two screws (A) holding the plug to the foot board.
6. Disconnect the cable from the foot board module cable. Note proper placement of the cable so it will be
reconnected properly.
7. Reverse the above steps to install the new interface plug.
CAUTION
Be sure to install the plug with the flat edge (B) at the top left, as shown in the illustration, or the foot board
interface plug will not mate properly with the bed. Damage to the plug or the foot board could result.

 Loading...


