9-20 SPARCclassic/SPARCclassic X/SPARCstation LX Service Manual • November 1993
FIGURE 9-15 Replacing the Disk Drive Mounting Bracket
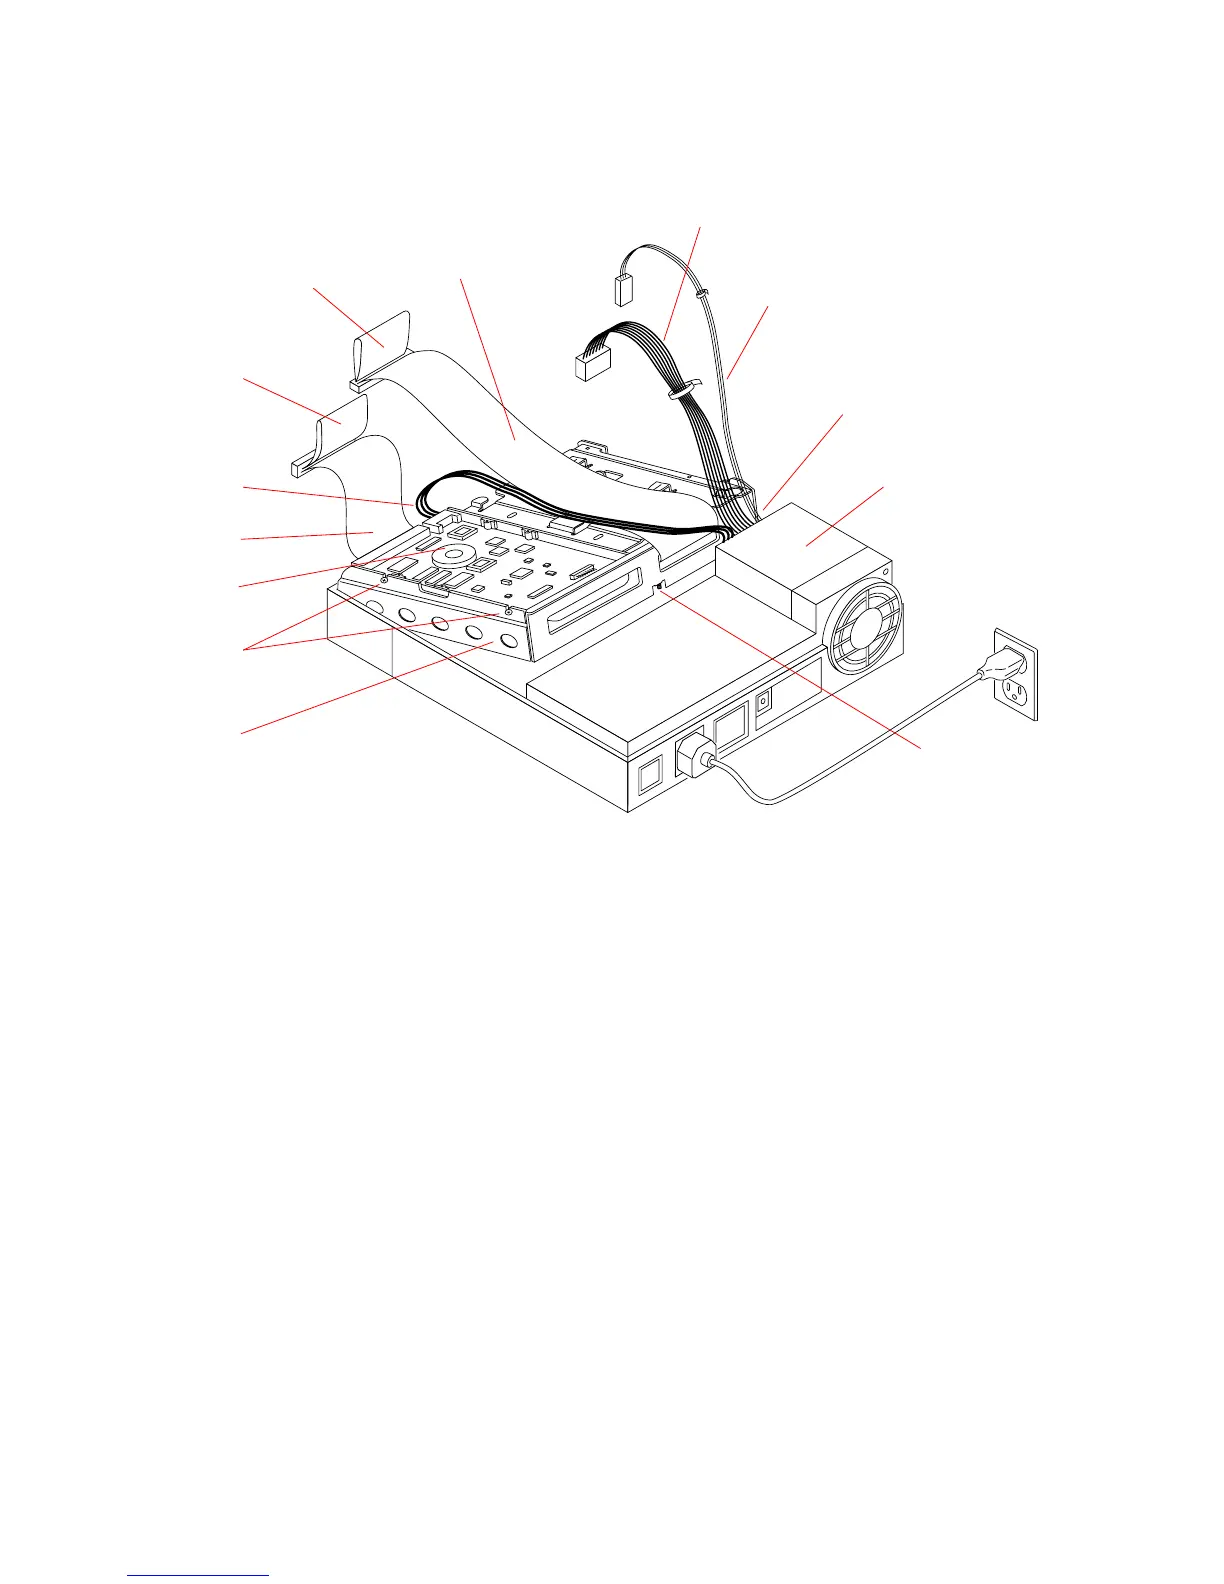
4. Reconnect the cables (see FIGURE 9-15).
Each connector is keyed to fit only one way. For connector locations on the main
logic board, see Chapter 11 “Main Logic Board and Component Replacement.”
a. Connect the power cable to the hard disk drive.
b. Secure the diskette drive data cable (if present) and the power supply wiring
harness in the cable management guides above the diskette drive
(see
FIGURE 9-12).
c. Connect the hard disk data cable and the diskette drive data cable (if present)
to their respective connectors on the main logic board (see
FIGURE 9-15).
d. Connect the internal power cable and the keyboard soft power-on cable to their
respective connectors on the main logic board.
5. Refer to Chapter 7 “Internal Access” to perform the following procedures:
■ Detaching the wrist strap
■ Closing the system unit
Hard drive
Hard drive
Hard disk drive
Drive bracket
Drive mounting
Pull tab
Diskette drive
Main logic
Diskette drive
Power supply
UNIT TOP
data cable
power cable
screw holes
bracket
power cable
data cable
power cable
Keyboard soft
power-on cable
(hidden from view)
Pull tab
Captive
screw