9-22 SPARCclassic/SPARCclassic X/SPARCstation LX Service Manual • November 1993
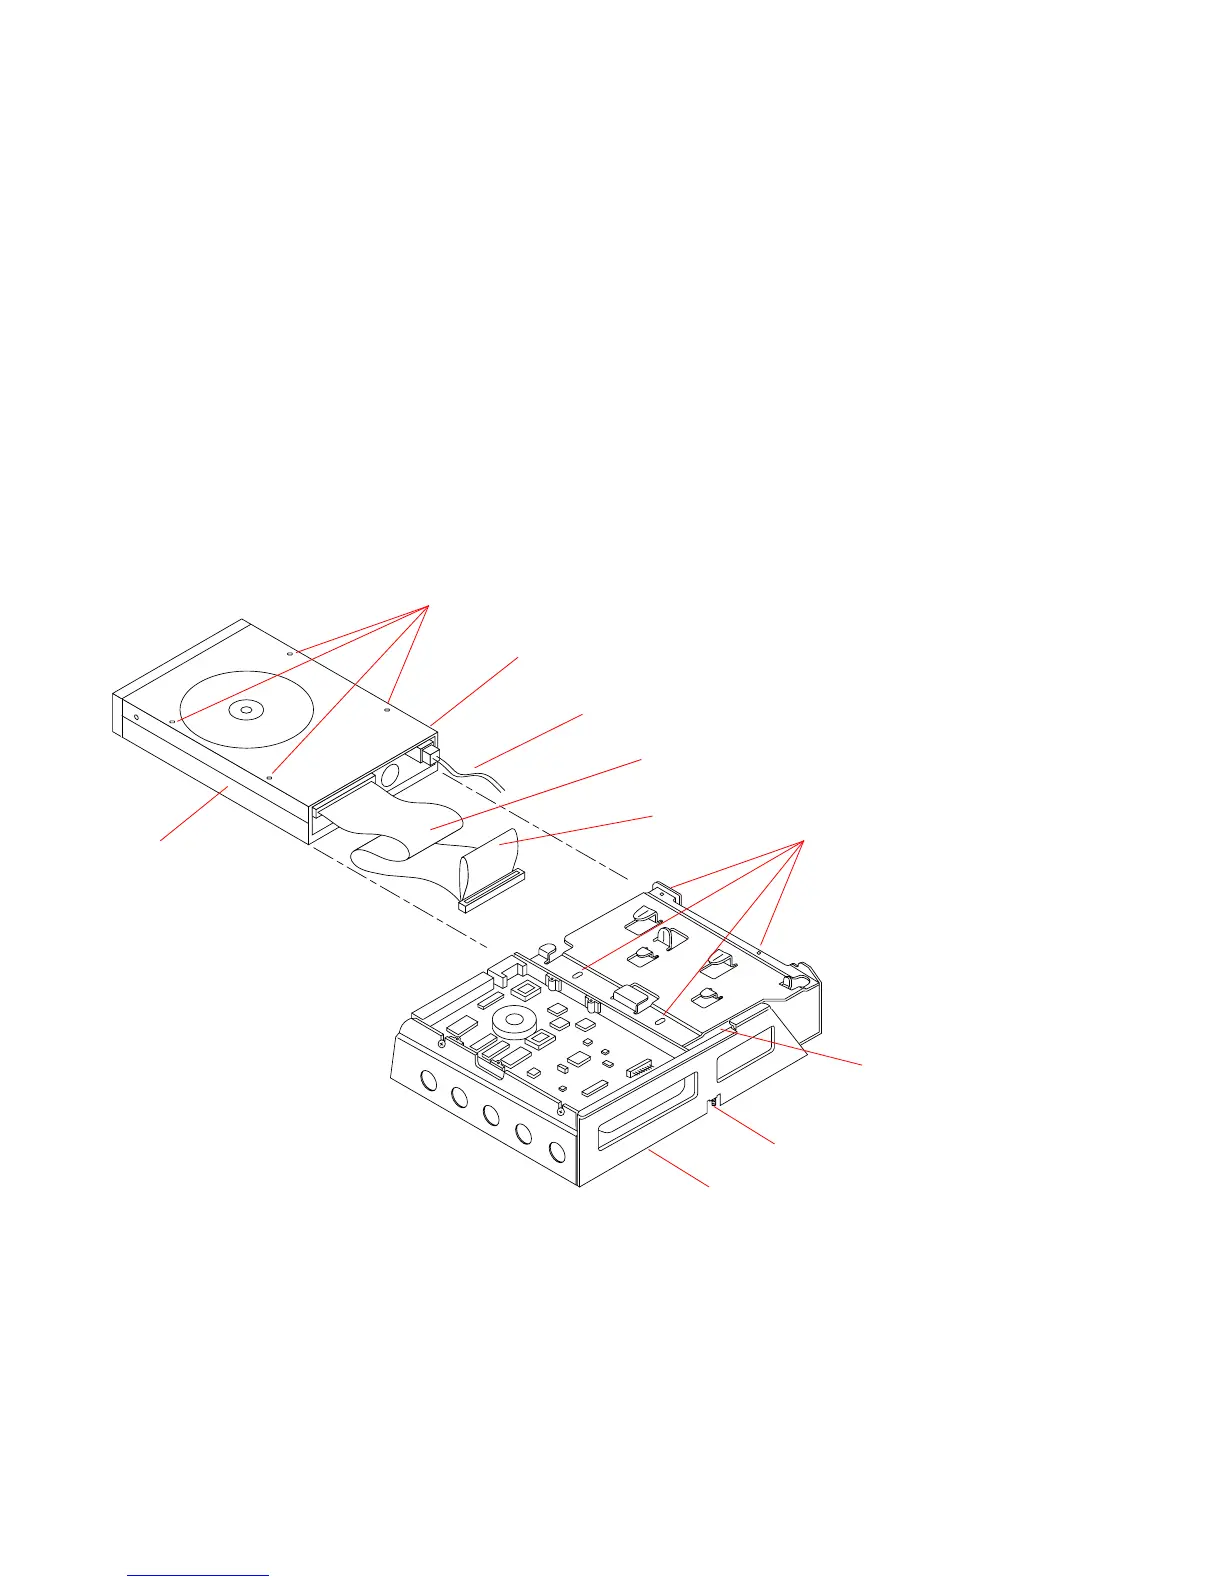
9.3.1 Removing the Diskette Drive
To remove the diskette drive:
1. Preparation.
Follow the instructions for removing the disk drive mounting bracket in Section 9.2.1
“Removing the Disk Drive Mounting Bracket.
2. Remove the four Phillips-head screws holding the diskette drive to the disk drive
mounting bracket (see
FIGURE 9-16).
3. Remove the diskette drive from the bracket.
Slide the diskette drive out of the bracket as shown in
FIGURE 9-16 and place it on an
antistatic mat.
FIGURE 9-16 Disk Drive Mounting Bracket
4. Detach the diskette drive data cable.
Detach the data cable from the diskette drive and set it aside for use with the
replacement drive.
Screw holes
Diskette drive
Diskette drive power cable
Diskette drive data cable
Pull tab
Screw holes
Captive screw
Drive mounting bracket
Drive select switch
(hidden from view)
Thread data cable
through this opening
in top of bracket.