Drive Chain / Drive Train / Drive Shaft: 3A-7
2) Install the bearing to the sprocket mounting drum
using the special tool.
Special tool
(A): 09913–70210 (Bearing installer set)
3) Install the dust seal using the special tool.
Special tool
(A): 09913–70210 (Bearing installer set)
4) Apply grease to the dust seal lip.
: Grease 99000–25010 (SUZUKI SUPER
GREASE A or equivalent)
5) Apply grease to the retainer before installing the rear
sprocket mounting drum.
6) Install the rear sprocket mounting drum assembly to
rear wheel. Refer to “Front Wheel Dust Seal /
Bearing Removal and Installation in Section 2D
(Page 2D-7)”.
7) Install the rear wheel assembly. Refer to “Rear
Wheel Assembly Removal and Installation (GSF650/
S/U/SUK7) in Section 2D (Page 2D-11)”.
Drive Chain Replacement
B817H23106006
Use the special tool in the following procedures, to cut
and rejoin the drive chain.
NOTE
When using the special tool, apply a small
quantity of grease to the threaded parts of
the special tool.
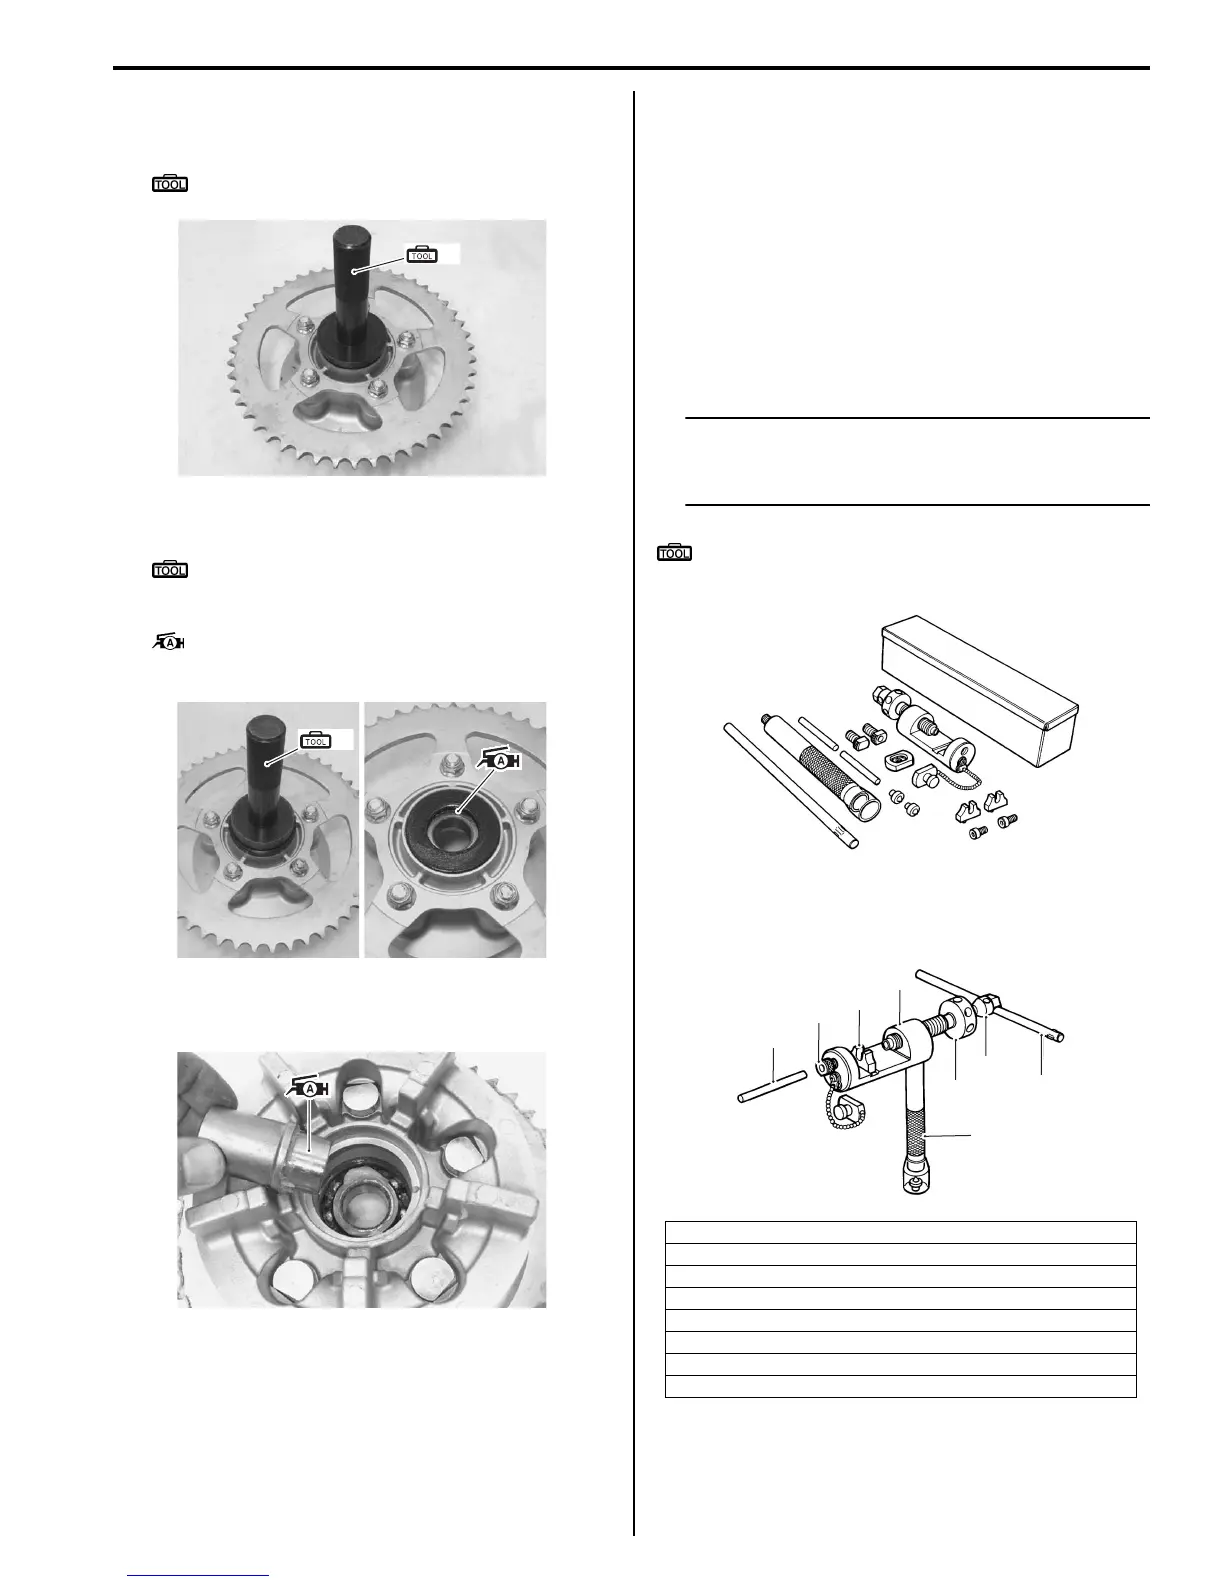
Special tool
: 09922–22711 (Drive chain cutting and joining
tool)
Drive Chain Cutting
1) Set up the special tool as shown in the illustration.
(A)
I717H1310027-01
(B)
I717H1310028-01
I717H1310029-01
1. Tool body
2. Grip handle
3. Pressure bolt [A]
4. Pressure bolt [B]
5. Bar
6. Adjuster bolt (With through hole)
7. Pin remover
8. Chain holder (Engraved mark 500) with reamer bolt M5 x 10
I649G1310023-02
1
2
3
4
5
6
7
8
I649G1310024-02