4.3 CALIBRATION WITH THE USE OF THE CONTROL PANEL
The calibration via the control panel (manual calibration) gives the user an option to decide whether the new
calibration factor should replace the current one.
Note: Before proceeding with the manual calibration you should be sure that the Automatic
calibration is Off (see Chapter 4.2).
To perform the manual calibration, follow next steps:
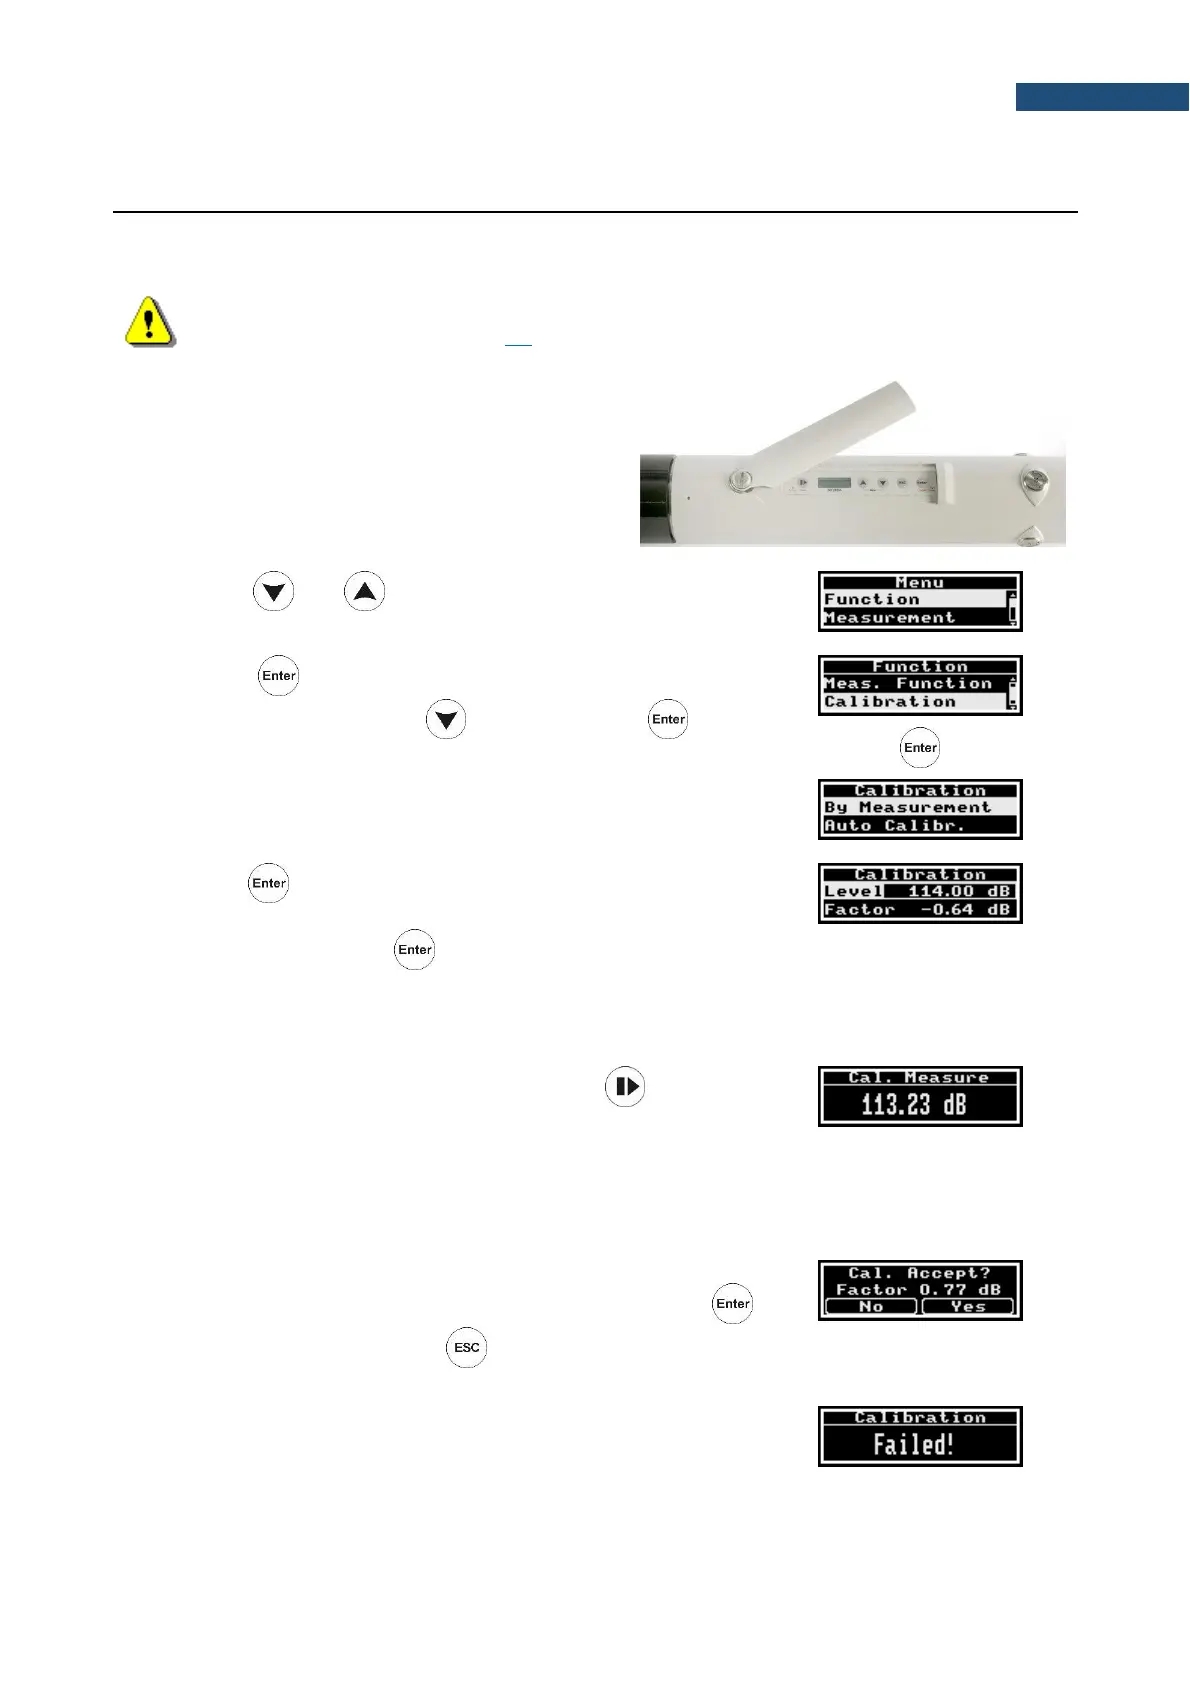
1. Uncover the control panel of SV 200A by unlocking
and shifting the control panel flap.
2. Press the and keys simultaneously to open the Menu
window of the panel display.
3. Press the key to open the Function position, select the
Calibration position with the key and press the key to
open it.
4. Press the key to open the By Measurement position and set
up the required calibration Level according to the calibration card of
your calibrator. Press the key to confirm the new calibration
level.
5. Attach the calibrator on the microphone and switch it on (if the used
calibrator doesn’t have switch-on automatic feature).
6. Start the calibration measurement by pressing the key. During
the calibration measurement, the level of the calibration signal will
be displayed. If three consecutive 1-second results are stable within
±0.1dB margin, the calibration measurement is stopped, and the
calibration factor is calculated. Otherwise the instrument will stop the
measurement and display the message “Failed!” after 10 seconds
from the calibration measurement start.
7. The successful calibration will result in calculation of the new
calibration Factor, which should be confirmed (Yes) with the
key or rejected (No) with the key. After confirmation, the
calculated calibration factor will be the current calibration factor.
8. If the calculated calibration factor is out of the range ±20dB, the
calibration will fail and the message “Failed!” will appear on the
display.
9. Detach the calibrator from the microphone.

 Loading...


