Tally Dascom 2600 2610
11
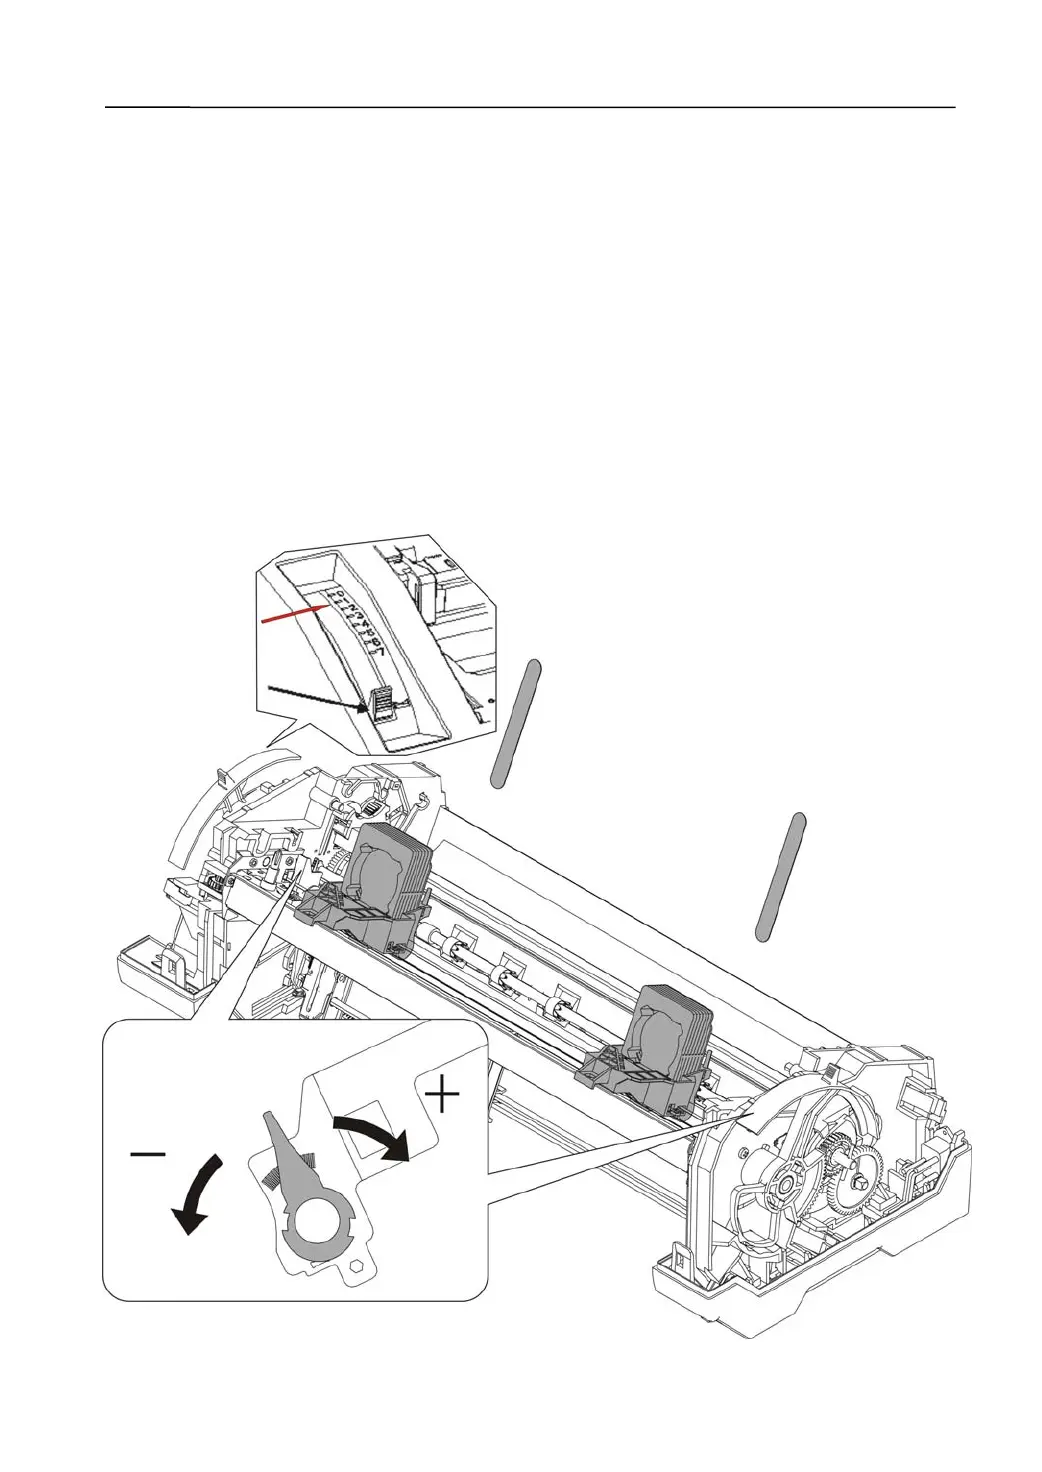
2.2.2 Head Gap Adjustment
Some parts are required temporary removal to get a bare head gap measurement with
feeler gauges:
Remove:Unload the Print Head Assembly. Extract the Paper Width Sensor Assembly.
Then remove the Paper Guide Carriage.
Restore: Restore the Print Head, fixed with screws.
Confirm the Head Gap value:
1. Adjust the Gap Lever to 1 position.
2. Straightly insert a filler gauge in between the Print Head and the Print Bar.
3. Adjust the Head Gap Sleeves on both ends so that 0.40mm feeler gauge can get
through the gap but not the 0.44mm one.
4. After setting both sides, double check again before proceeding.
5. After the correct adjustment, unload the Print Head and reverse the procedures in
Remove above.
6. Secure the levers with lacquer.