EasyManua.ls Logo

TECO JSDEP Series - User Manual

TECO JSDEP Series
210 pages
Print Icon
To Next Page IconTo Next Page
Loading...

Table of Contents

Other manuals for TECO JSDEP Series

Questions and Answers

  • W
    William CookAug 19, 2025
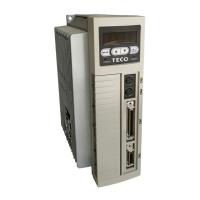
    What to do if TECO Servo Drives show over-voltage error?
    • J
      John SpencerAug 19, 2025
      If your TECO Servo Drive displays an over-voltage (regeneration error), it means the main circuit voltage has exceeded the maximum allowable value (410V). First, use a multimeter to check if the input voltage is within the specified limit. Next, verify that Parameter Cn012 is set correctly. If the alarm appears during operation, extend the acceleration/deceleration time or reduce the load ratio within the permitted range. If the problem persists, an external regeneration resistor might be needed.
  • M
    Melissa BrownAug 21, 2025
    What to do if TECO JSDEP Servo Drives show motor overload?
    • M
      Matthew SilvaAug 21, 2025
      If your TECO Servo Drive shows a Motor Over-load error, it indicates that the drive has exceeded its rated load during continuous operation. When the loading equals twice the rated loading, the alarm triggers within 10 seconds. Start by checking the connections for the motor terminals (U, V, W) and the encoder. Then, adjust the drive gain; incorrect gain settings can cause motor vibration and high current, leading to motor overload. Also, extend the acceleration/deceleration time or reduce the load ratio within the permitted range.
  • A
    Amy MayAug 23, 2025
    What to do if TECO JSDEP Servo Drives show drive over-current?
    • J
      Jared CummingsAug 25, 2025
      If your TECO Servo Drive shows a Drive Over-current error, it indicates an over-current in the drive's main circuit or a transistor error. First, check the connections of the motor cable (U, V, W) and the encoder, as well as the power cable connection. If the problem persists, turn off the power and turn it on again after 30 minutes. If the alarm continues, there may be a power module malfunction or noise issues, requiring the drive to be tested and repaired.
  • A
    Alex EvansAug 26, 2025
    How to fix position error in TECO JSDEP Servo Drives?
    • M
      Mariah WillisAug 26, 2025
      If your TECO Servo Drive displays a position error, it means the deviation between the pulse command and encoder feedback (position error) is greater than the setting of Pn308 or Pn309. To resolve this, first, increase the position loop gain (Pn310 and Pn311) setting value. Next, increase the position tolerance value using (Pn307) for improved motor response. Also, extend the acceleration/deceleration time or reduce load inertia within the permitted range. Finally, check if the motor wiring (U, V, W) is correct.
  • S
    Sabrina HallAug 28, 2025
    What causes motor over-current in TECO JSDEP Servo Drives?
    • J
      Justin MorseAug 28, 2025
      If your TECO Servo Drive shows a Motor over-current error, it indicates that the motor current is four times greater than the rated current. Check if the motor wiring (U, V, W) and encoder wiring are correct. Also, internal interference or malfunction could be the cause. Ensure that all connections are correct.
  • S
    Steven VaughanAug 30, 2025
    What to do if TECO Servo Drives show encoder ABZ phase signal error?
    • R
      Rebecca YoungAug 30, 2025
      If your TECO Servo Drive displays an Encoder ABZ phase signal error, it indicates a failure in the motor's encoder or a problem with the encoder connection. First, check the motor's encoder connections. Next, inspect the encoder for short circuits, poor solder joints, or breaks. Finally, check the encoder signal terminals CN2-1 and CN2-2 (power cable 5v).
  • C
    Christopher GardnerSep 1, 2025
    How to resolve motor over speed in TECO JSDEP Servo Drives?
    • M
      Mark RobersonSep 1, 2025
      If your TECO Servo Drive shows a Motor over speed error, it means the motor’s speed is 1.5 times more than the motor’s rated speed. First, reduce the speed command. Second, check if the electronic gear ratio is incorrect and set it correctly. Finally, adjust speed loop gains (Sn211 & Sn213) for a better motor response.
  • M
    mckenzielindaSep 3, 2025
    What causes under-voltage in TECO JSDEP Servo Drives?
    • J
      jeffrey19Sep 3, 2025
      If your TECO Servo Drive displays an Under-voltage error, it means the main circuit voltage is below its minimum specified value (190Vac). Use a multimeter to check whether the input voltage is within the specified limit. If the problem persists, there may be a failure inside the drive.
  • V
    Victoria BowenSep 5, 2025
    What causes memory error in TECO JSDEP Servo Drives?
    • A
      Alfred LindseySep 5, 2025
      If your TECO Servo Drive displays a Memory Error, it indicates a parameter write-in error. To solve this, disconnect all command cables and then recycle the power. If the alarm still occurs, it means the drive has failed.
  • S
    Stephanie PetersonSep 7, 2025
    Why does TECO Servo Drives show emergency stop error?
    • M
      Michelle WellsSep 7, 2025
      If your TECO Servo Drive displays an Emergency Stop error, it means the input contact point EMC is activated, triggering Alarm 09. To resolve this, first, disable the Emergency stop signal input. If the issue persists, there may be an internal malfunction. Ensure that all connections are correct.

Summary

Safety and Precautions

Warning and Caution Statements

Important warnings and cautions for safe operation of the servo drive and motor.

Safety Procedures and Guidelines

General safety procedures and guidelines for handling and operating the equipment.

Chapter 1: Checking and Installing

1-1 Product Verification

Verifying servo driver and motor models, checking for damage, and confirming components.

1-4 Drive Installation Conditions

Specifies environmental and physical requirements for installing servo drives.

1-5 Servomotor Installation Conditions

Specifies environmental and physical requirements for installing servo motors.

Chapter 2: Wiring

2-1 Basic Wiring for Servo System

Fundamental wiring principles and diagrams for connecting the servo system components.

2-2 I;O Terminal Connections

Details on the input/output terminals and their functions for signal communication.

2-3 Typical Circuit Wiring Examples

Illustrative wiring configurations for various control modes like position, speed, and torque.

Chapter 3: Panel Operator; Digital Operator

3-1 Panel Operator Overview

Description of the drive's operator panel, including display, buttons, and LEDs.

3-2 Signal Display and Diagnostics

How to interpret drive status signals and utilize diagnostic functions.

Chapter 5: Control Functions

5-1 Control Mode Selection

How to select and configure the servo drive's operational control modes.

Chapter 1: Checking and Installing

1-1 Product Verification Steps

Procedures for checking the servo pack and its components before initial use.

Chapter 2: Wiring

2-1 Basic Wiring for Servo System

Fundamental wiring principles and diagrams for connecting the servo system components.

Chapter 2: Wiring

2-2 I;O Terminal Overview

Overview of the I/O terminals, including control signal, encoder, and communication connectors.

Chapter 2: Wiring

Digital Input Function Details

Detailed explanation of digital input functions, modes, and I/O operations.

Chapter 2: Wiring

2-3 Typical Circuit Wiring Examples

Illustrative wiring configurations for various control modes like position, speed, and torque.

Chapter 3: Panel Operator; Digital Operator

3-1 Panel Operator Overview

Description of the drive's operator panel, including display, buttons, and LEDs.

Chapter 3: Panel Operator; Digital Operator

Alarm Reset Procedures

Procedures for resetting alarms using the keypad or by power cycling.

Chapter 3: Panel Operator; Digital Operator

3-2-1 Status Display Parameters

List and explanation of parameters for displaying drive and motor status.

Chapter 3: Panel Operator; Digital Operator

3-2-2 Diagnostic Functionality

Explanation of available diagnostic parameters, focusing on control mode display.

Chapter 3: Panel Operator; Digital Operator

dn-07 Auto Offset Adjustment

Procedure to auto-adjust the analog input zero offset for torque or speed commands.

Chapter 4: Trial Operation

Trial Run Scenarios

Procedures for trial runs with no-load motor, host controller, and connected load.

Chapter 4: Trial Operation

4-1 No-Load Motor Trial Run

Steps to ensure drive wiring is correct and perform a trial run of the servo motor without load.

Chapter 4: Trial Operation

Parameter Setting for Rotation Limits

Guide to setting parameter Cn002.1 for CCWL & CWL rotation limit selection.

Keypad Trial Run (JOG)

How to use the JOG function for checking motor speed and rotation direction.

Chapter 5: Control Functions

5-1 Control Mode Selection

How to select and configure the servo drive's operational control modes.

Chapter 5: Control Functions

5-2 Torque Mode Operation

Detailed explanation and parameters for controlling the servo motor using torque mode.

Chapter 5: Control Functions

5-3 Speed Mode Overview

Overview of speed mode, its system components, and control stages.

Chapter 5: Control Functions

5-3-1 Speed Command Selection

Methods for selecting speed commands using external analog or internal preset values.

Chapter 5: Control Functions

5-3-6 Speed Command Smoothing

Methods for eliminating speed overshoot and motor vibration using acceleration/deceleration.

Chapter 5: Control Functions

5-3-8 Speed Loop Gain Adjustment

Explanation of speed loop gain and integral functions for controlling response time.

Chapter 5: Control Functions

5-3-9 Notch Filter Function

Function and application of the Notch filter for suppressing mechanical system resonance.

Chapter 5: Control Functions

5-3-11 Gain Switching Features

Features for PI/P control mode selection and automatic gain switching.

Chapter 5: Control Functions

5-4 Position Mode Overview

Overview of position mode, its control methods, and preset commands.

Chapter 5: Control Functions

5-4-2 Internal Position Command Setup

How to set and activate 16 preset position commands using internal parameters and input contacts.

Chapter 5: Control Functions

5-4-3 Electronic Gear Ratio

How to use electronic gear ratio to scale command output pulses for mechanical requirements.

Chapter 5: Control Functions

5-4-5 Definition of Direction

How to define motor rotation direction in position mode using Pn314.

5-4-6 Gain Adjustment

Parameters for adjusting the position loop, including gain and feed-forward gain.

Chapter 5: Control Functions

5-4-7 Pulse Offset Clearing

Modes for clearing pulse errors and their corresponding functions when CLR input is activated.

Chapter 5: Control Functions

5-4-8 Home Routine Setup

Routine for finding and setting a reference point for correct positioning using various inputs.

Chapter 5: Control Functions

5-4-9 Other Position Functions

Functions related to position complete value and position error alarms.

Chapter 5: Control Functions

5-5 Gain Adjustment Overview

Explanation of control loops and gain adjustment parameters for speed and position.

Chapter 5: Control Functions

5-5-1 Automatic Tuning Process

Utilizing ON-LINE Auto tuning to measure load inertia and adjust gain automatically.

Chapter 5: Control Functions

5-5-2 Manual Gain Adjustment

Procedures for manual gain adjustment in speed and position control modes.

Chapter 5: Control Functions

5-6-1 Programmable I;O Functions

Overview of programmable digital inputs (DI) and their functions.

Chapter 5: Control Functions

DO-1 Functions and Active Level

List of functions and active level settings for digital output DO-1.

Chapter 5: Control Functions

5-6-2 Control Mode Switching

How to switch control modes using programmable input terminals like MDC.

Chapter 5: Control Functions

5-6-4 Brake Mode Configuration

Settings for brake functions (dynamic and mechanical) for servo off, emergency stop, and inhibit.

Chapter 5: Control Functions

5-6-7 External Regeneration Resistor Selection

Guidelines for selecting external regeneration resistors and their specifications.

Chapter 5: Control Functions

5-6-9 Low Voltage Protection Auto-Reset

Settings for the auto-reset behavior of low voltage protection alarms.

5-6-10 Factory Setting Parameter

How to reset all parameters to their default factory values.

Chapter 6: Parameter Overview

6-1 Explanation of Parameter Groups

Overview of the 10 parameter groups and their corresponding symbols.

Chapter 6: Parameter

System Parameters: Control Mode Selection

Detailed table of system parameters, including control mode selection.

Chapter 6: Parameter

PI;P Control Mode Switching

Parameters for switching between PI and P control modes based on various conditions.

Chapter 6: Parameter

Rigidity Setting

How to set rigidity level based on gain settings for different applications.

Servo Motor Model Code Parameters

Information on displaying and checking servo motor model compatibility.

Chapter 6: Parameter

Torque-Control Parameters

Parameters related to torque control, including acceleration, deceleration, and limits.

Chapter 6: Parameter

Speed-Control Parameters: Internal Speed Command

Selecting internal speed commands using input contacts SPD1 and SPD2.

Chapter 6: Parameter

Speed Loop Gain and Integral Time

Effect of speed loop gain and integral time on response and rigidity.

Chapter 6: Parameter

Position Pulse Command Selection

Selecting the type of external position pulse command signal.

Electronic Gear Ratio Numerator Settings

Selecting the electronic gear ratio numerator using input contacts GN1 and GN2.

Chapter 6: Parameter

Position Complete Value and Error Band

Setting position complete value and error band limits for position error alarms.

Chapter 6: Parameter

Position Command Smoothing and Direction

Setting time constant for smoothing position commands and defining rotation direction.

Chapter 6: Parameter

Encoder Feedback and Home Routine Settings

Selecting encoder feedback phase and setting home routine parameters.

Chapter 6: Parameter

Stopping Mode and S-Curve Time Constant

Setting stopping modes after home detection and S-curve time constants for position commands.

Quick Set-up Parameters

Speed Loop Gain and Integral Time Settings

Gain and integral time settings for speed control loops.

Chapter 6: Parameter

DI-1 Function and Active Level

List of functions and active level settings for digital input DI-1.

Display Parameter

Motor Status Displays

Parameters for displaying actual motor speed, torque, and regenerative load rate.

Diagnosis Parameter

Diagnosis Parameter Descriptions

List of diagnosis parameters including control mode, software version, and JOG operation.

Chapter 7: Communications function

7-1 RS-232 Communication Wiring

Wiring diagrams and pin assignments for RS-232 communication.

Chapter 7: Communications function

RS-232;RS-485 Communication Parameters

Table of communication parameters for RS-232 and RS-485, including baud rates and protocol selection.

Chapter 7: Communications function

7-1-2 RS-232 Protocol and Format

Explanation of the RS-232 communication protocol and data formats for reading and writing.

Chapter 7: Communications function

7-1-3 Modbus Communication Protocol for RS-485

Explanation of Modbus protocol for RS-485, including coding methods (ASCII/RTU).

Chapter 7: Communications function

03 H: Read Register Contents

Format and example for reading register contents via ASCII and RTU modes.

Chapter 7: Communications function

08 H: Diagnostic Function

How to use the diagnostic function to check communication signals between Master and Slave.

Chapter 7: Communications function

LRC and CRC Check Methods

Explanation of LRC and CRC check methods used in ASCII and RTU modes.

Chapter 8: Troubleshooting

8-1 Alarm Functions Overview

How alarm codes are displayed and how to identify causes and reset alarms.

Chapter 8: Troubleshooting

8-2 Alarm and Warning Troubleshooting

Table detailing alarm codes, corrective actions, reset methods, and digital output status.

Chapter 8: Troubleshooting

Alarm Reset Procedures

Suggestions for resetting alarms using input signals, keypad, or power cycling.

Chapter 9: Specifications

Servo Drive Specifications and Dimensions

Table of specifications and dimensional data for JSDEP servo drives.

9-2 Servomotor Specifications

Servo Motor Type Number Description

Explanation of the naming convention and components of the JSMA servo motor type number.

Appendix A: Peripheral for Servo motors

Power Connectors

Part numbers and descriptions for various power connectors used with servo motors.

Appendix A: Peripheral for Servo motors

Encoder and Battery Connectors

Part numbers and descriptions for encoder and battery module connectors.

Appendix A: Peripheral for Servo motors

I;O and Communication Cables

Part numbers and descriptions for I/O signal connectors and communication cables.

TECO JSDEP Series Specifications

General IconGeneral
CategoryServo Drives
FeedbackIncremental encoder, Absolute encoder
SeriesJSDEP Series
Control ModePosition, Speed, Torque
Communication InterfaceCANopen
Protection FeaturesOvervoltage, Undervoltage, Overcurrent, Overtemperature

Related product manuals