Routine Maintenance
3. Loosen the captive screw (#1, Figure 4.1) on the lamp door by rotating it counterclockwise about ¼
turn.
4. Raise the lamp door.
5. Unscrew the thumbscrew (#2, Figure 4.1) holding the lamp assembly (#3, Figure 4.1) in place.
6. Carefully pull the assembly out until you can reach the connector.
7. Release the tab (#4, Figure 4.1) and disconnect the cable.
WARNING
Do not touch the lamp with your fingers!
8. Unpack the new lamp assembly.
9. Use a soft, lint-free cloth to wipe off any fingerprints on the lamp.
10. Connect the cable to the connector.
11. Position the new assembly as shown in #5 of Figure 4.1, making sure to align the pins correctly.
12. Tighten the thumbscrew (#2, Figure 4.1).
13. Close the lamp door.
14. Plug the instrument into an appropriate wall outlet and turn on the power.
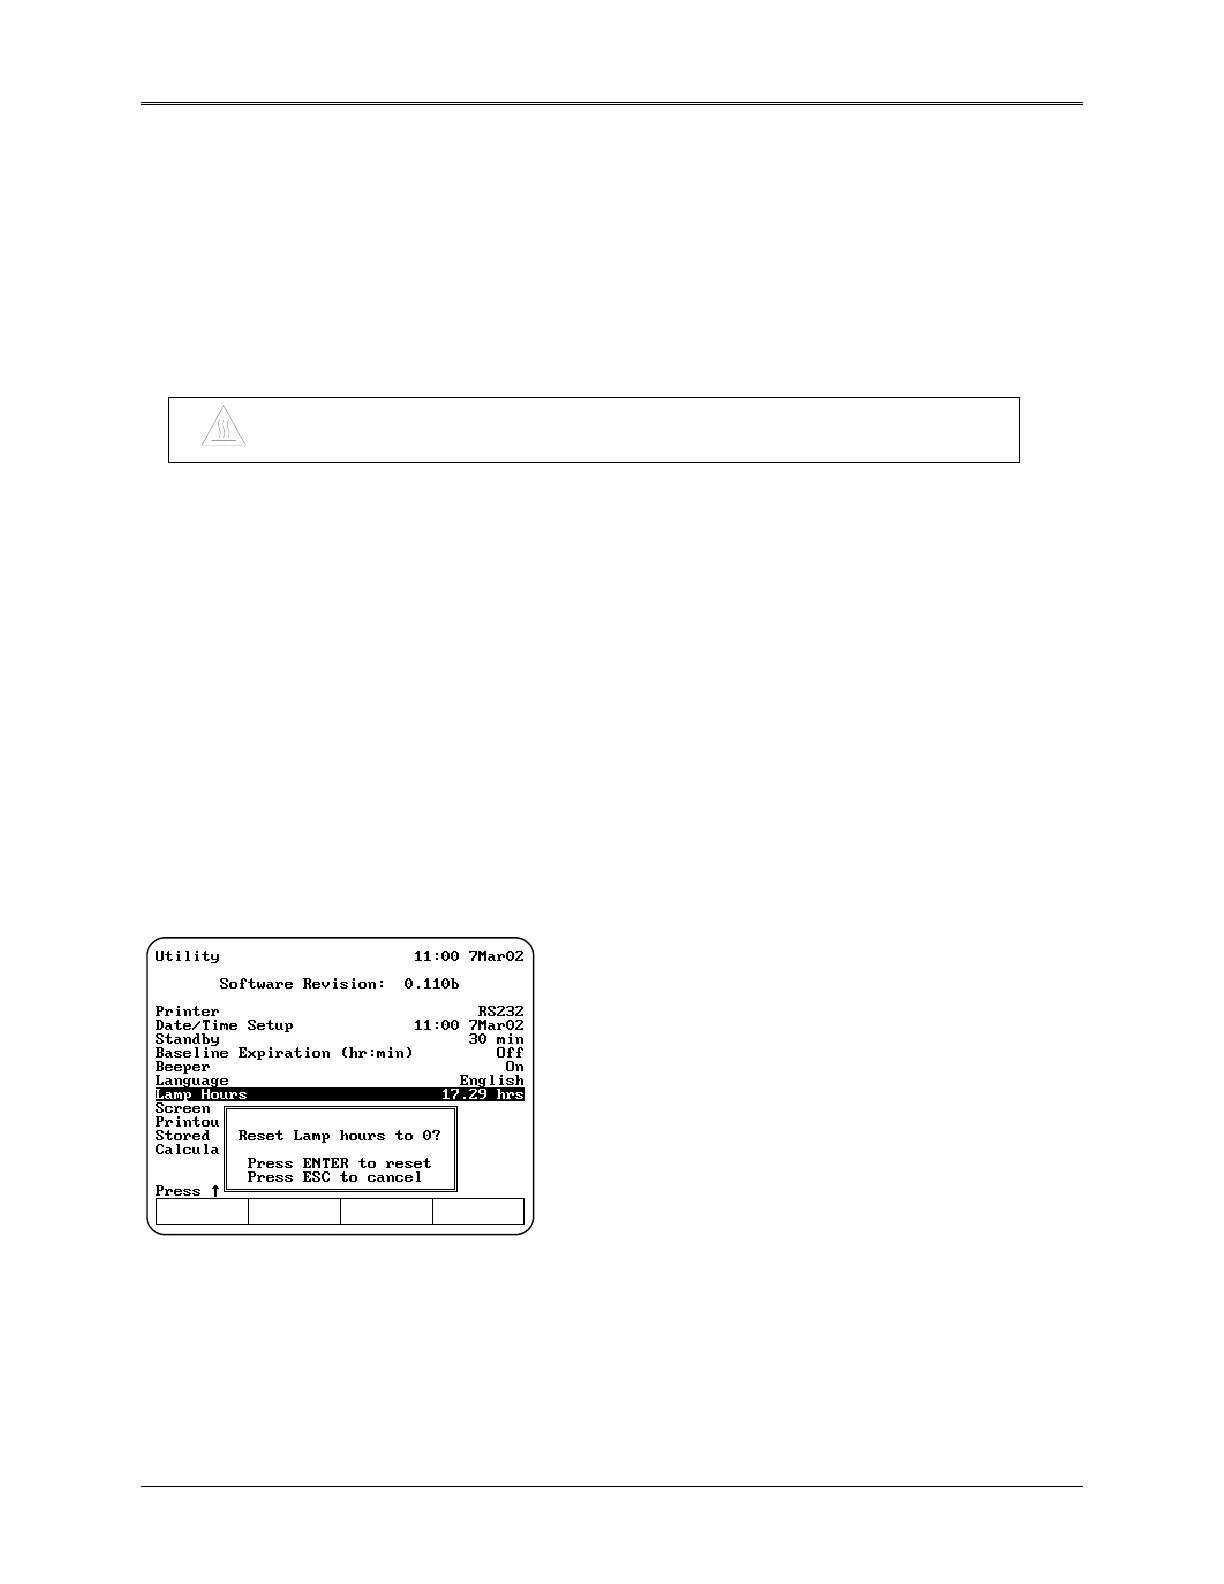
15. Press the UTILITY key. The Utility screen appears on the display.
16. Press the arrow keys to highlight Lamp Hours and press ENTER.
17. Press ENTER to reset the lamp hours to zero.
4-4
 Loading...


