Optical Alignment
To install and adjust any of the mirrors:
1. Make sure the proper mirror has been selected for the location and is oriented with the mirrored
surface facing in the correct direction as shown in Figure 6.2. (All mirrors face in toward the center
of the instrument.)
2. Insert the two mounting screws through the foot of the mirror into the base. Snug the mirrors
slightly but do not tighten. The mirror should be able to be rotated in the hole with a slight
resistance. The screws must be loose enough so that the mirror will slide under the screw. Never
force or twist the mount to align it.
3. Rotate the mirror as required until it is properly aligned horizontally.
4. Tighten the two mounting screws.
5. Tighten or loosen the tilt adjustment screw as necessary until the vertical alignment of the mirror is
proper.
Alignment Sequence
The various components of the optical path and their locations are shown in Figure 6.2. In addition to any
replacement components, which may be required, the following procedure requires the use of the
Spectronic GENESYS 10 Service Alignment Tool Kit [335901-400], which includes the following
components:
• 335901-401 Mirror B2 Target
• 335901-408 Dental Mirror
• 335901-403 zero order grating Tool
• 335901-406 Spectronic GENESYS 10 Sample Target
• 335901-407 Spectronic GENESYS 10 Mirror Adjust Tool
• H-152 728 Spacing Tool
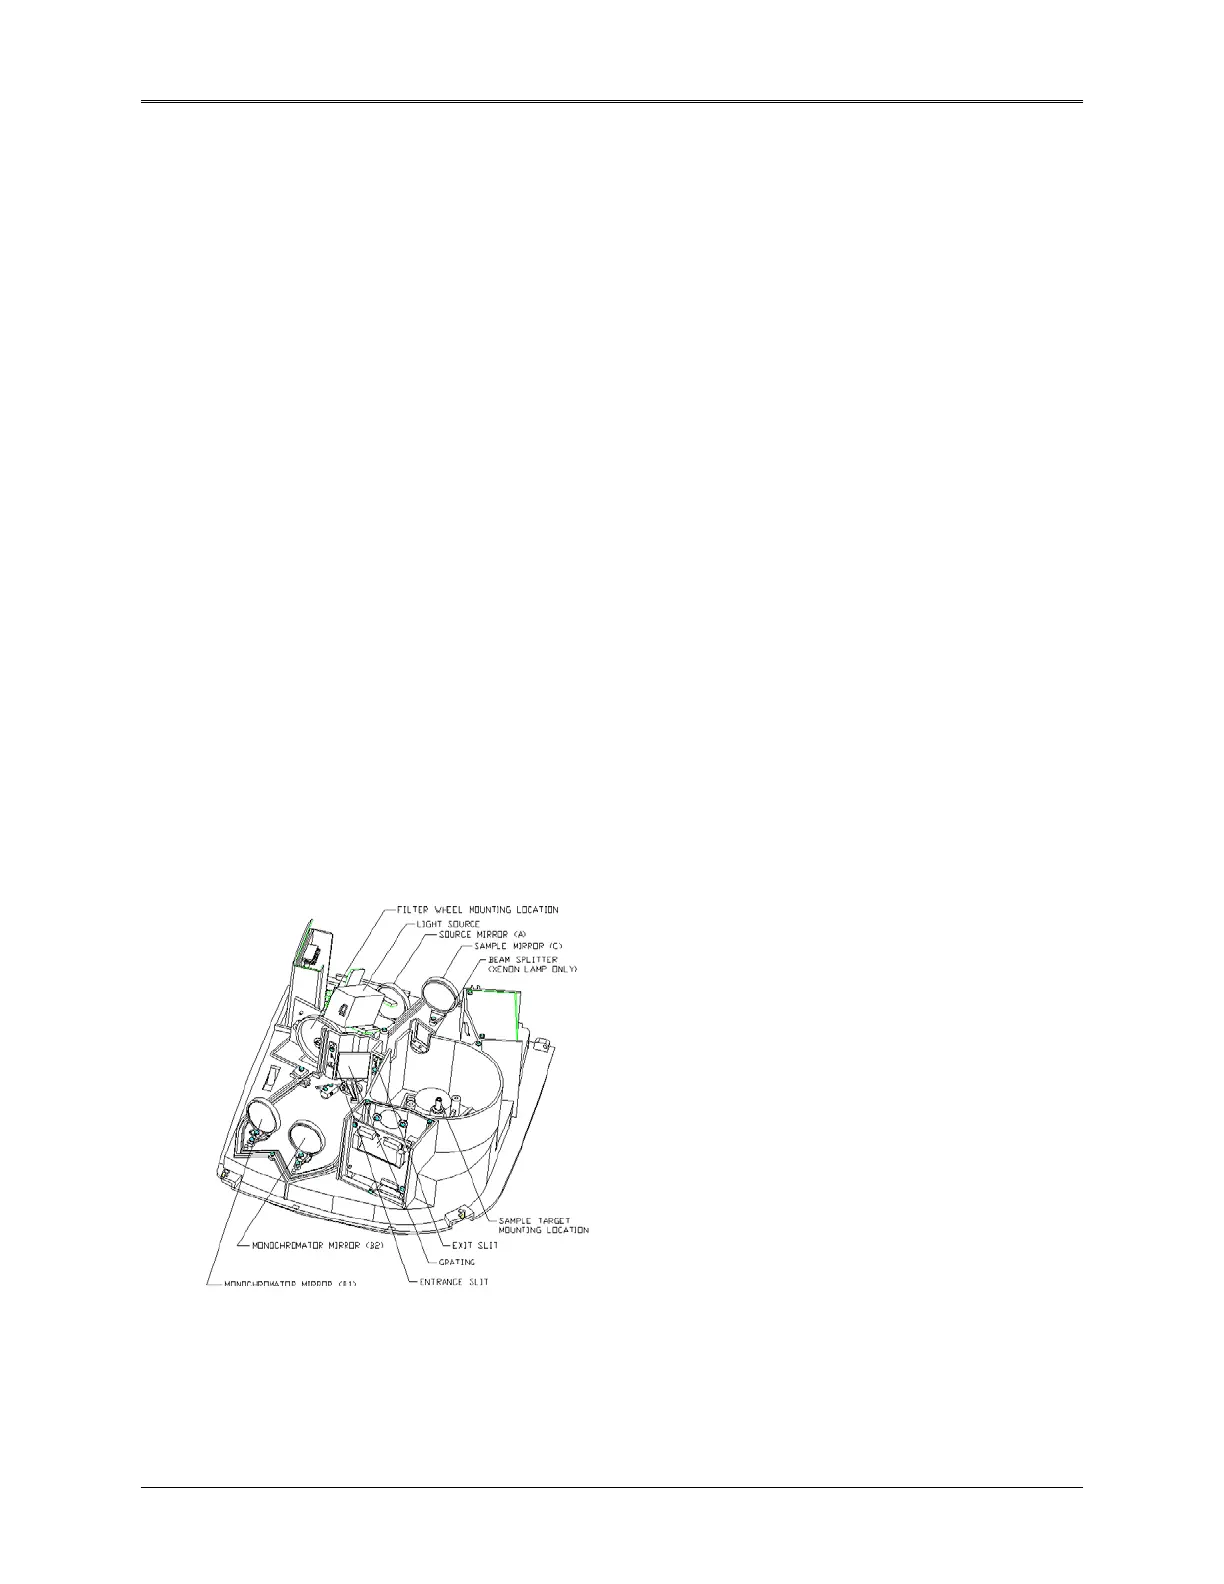
Figure 6.2 Optical Path Components
6-3
 Loading...


