Disassembly and Replacement
NOTE: Each mirror is secured to the base using the two outer screws. The center screw is used
for vertical alignment of the mirror.
3. Remove the two screws securing the mirror to the base and set the mirror aside.
Replacement
1. Insert the two screws, which secure the mirror to the base. They do not have to be tightened at this
step.
2. After all replacements are complete for mirrors, light source, grating, and lenses, follow the optical
alignment procedures in "Optical Alignment."
3. When all other work is complete, replace the Monochromator cover (refer to “Monochromator ").
4. When all other work is complete, replace the Beam Splitter and turret cover (refer to “Beam splitter
and turret cover ").
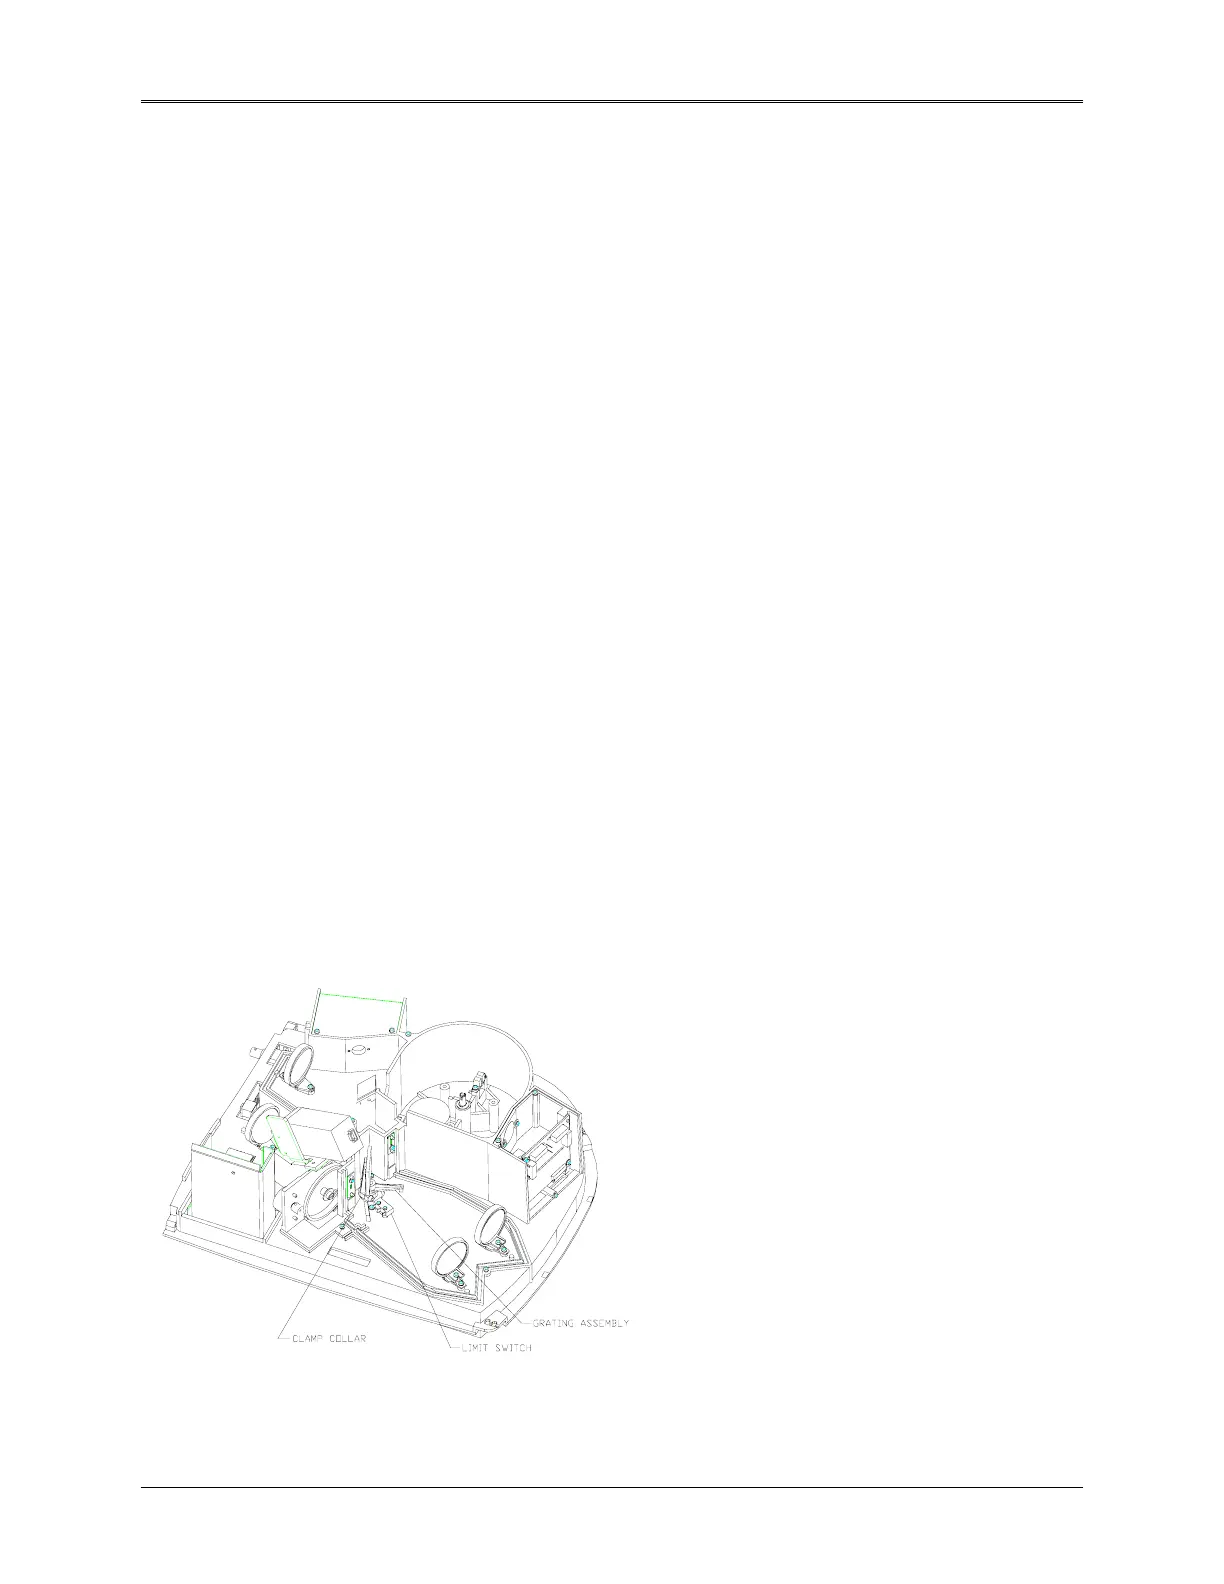
Grating assembly [335901-125]
CAUTION: DO NOT TOUCH THE GRATING SURFACE WITH ANYTHING.
Removal
1. Remove the Beam Splitter and turret cover (refer to “Beam splitter and turret cover ").
2. Remove the Monochromator cover (refer to “Monochromator ").
3. Loosen the locking screw on the clamp collar around the grating assembly.
Figure 5.18 Grating
5-19
 Loading...


