Disassembly and Replacement
Installing the Internal Printer
WARNING
Turn off the instrument and disconnect the power cord from the outlet before installing the
Internal Printer.
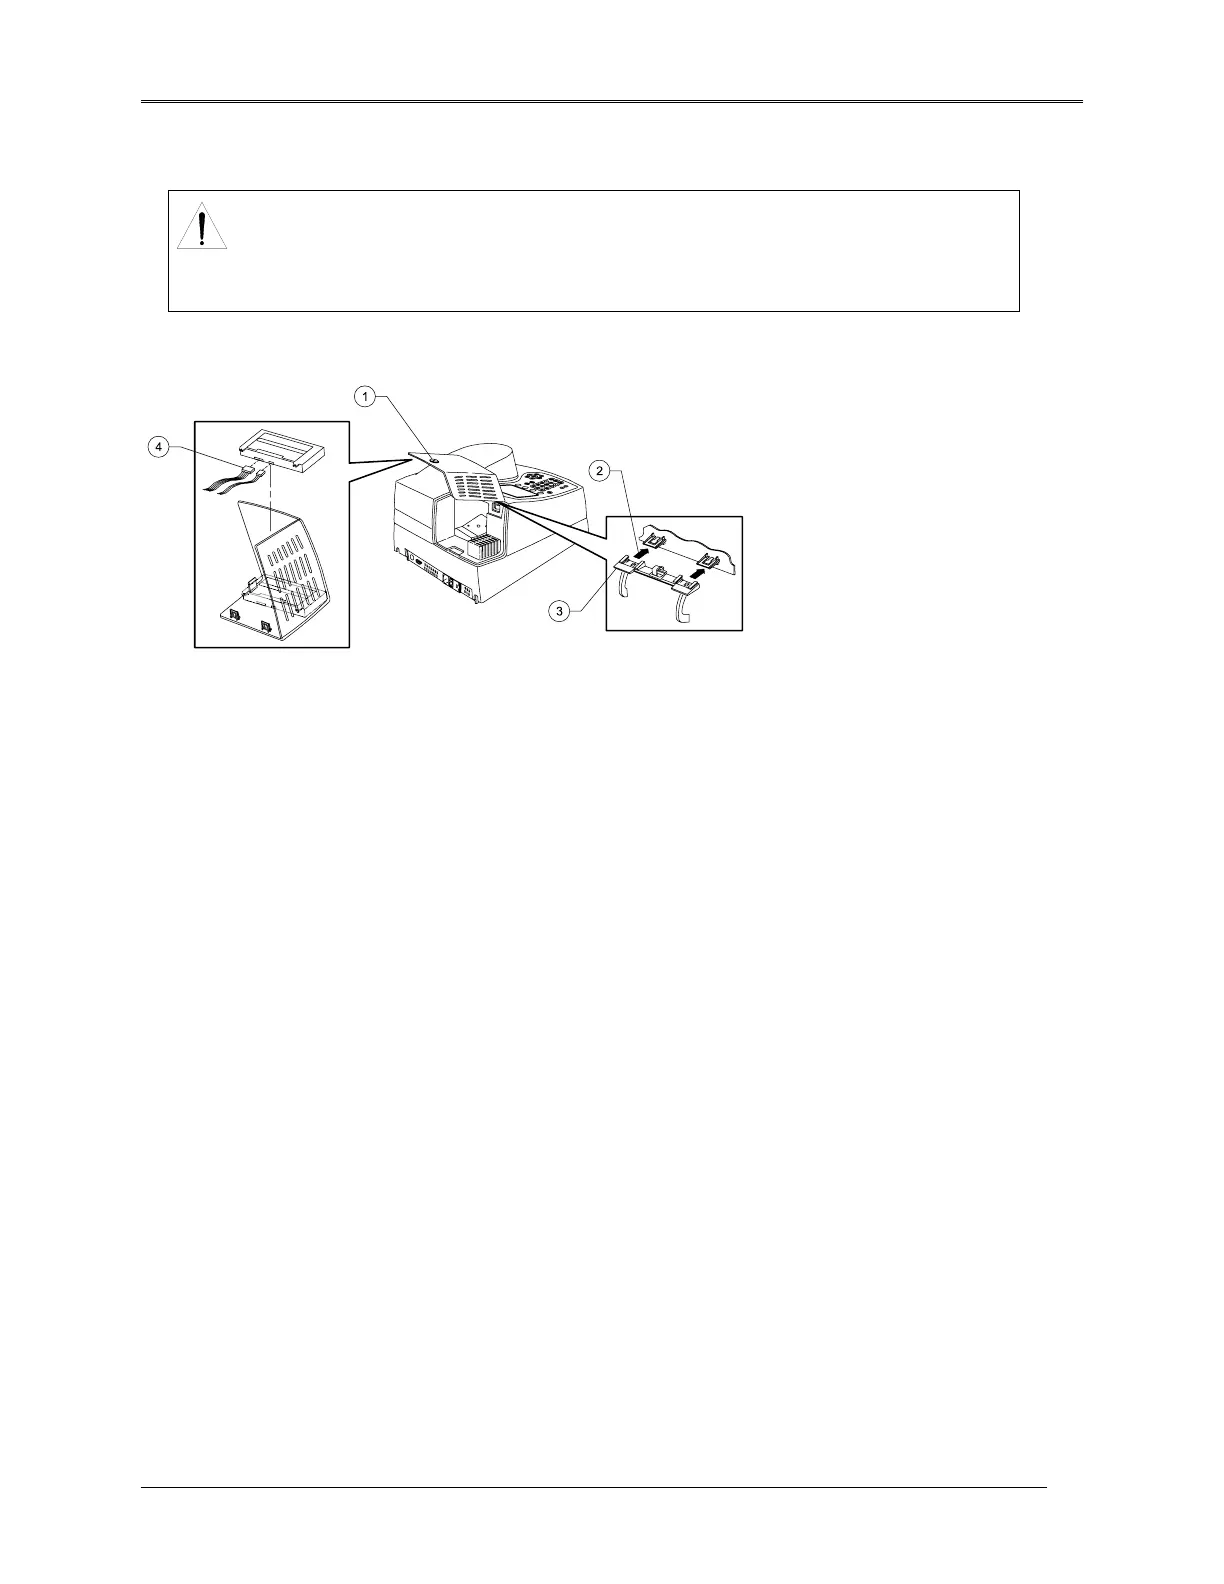
1. Loosen the captive screw (#1, Figure 5.25 Printer Installation) on the lamp door by rotating it
counterclockwise about ¼ turn.
Figure 5.25 Printer Installation
2. Open the lamp door.
3. Use a pen or screwdriver to lift the tabs holding the door to the hinge (#2 and #3, Figure 5.25
Printer Installation).
4. Slide the door off the hinge.
5. Remove the printer (already installed on the printer door) from its packing.
6. Unclip the connector wires on the door hinge.
7. Lower the hinge so it is out of the way.
8. Connect the wires (#4, Figure 5.25 Printer Installation) and press them into place with a small
screwdriver. There is only one way that the connector will fit. Look closely at the end of the
connector, it has a slight D shape, or make sure that the side of the connector with the shiny metal
contacts showing, faces away from the printer and towards the plastic door. In the figure above, the
side of the connector with the shiny metal contacts showing faces down.
9. Use the clip on the hinge to secure the wires.
10. Install the printer door by sliding it back onto the hinge (#3, Figure 5.25 Printer Installation).
11. Close the lamp door.
12. Tighten the captive screw (#1, Figure 5.25 Printer Installation) on the printer door to hold it securely
in place.
13. Load the paper into the printer (see instructions in Setting up the Instrument in the operator
manual).
5-28
 Loading...


