EasyManua.ls Logo

Toshiba B-EX6 Series - User Manual

Toshiba B-EX6 Series
279 pages
Print Icon
To Next Page IconTo Next Page
Loading...
PRINTED IN JAPAN
TOSHIBA Barcode Printer
B-EX6 SERIES
Document No. EO18-33031K
Original: Nov., 2016
(Revised: Mar., 2020)
Maintenance Manual

Table of Contents

Questions and Answers

  • K
    Karen NelsonAug 15, 2025
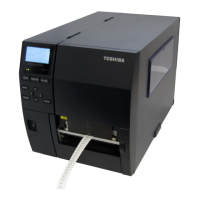
    Why is the ribbon wrinkling in my Toshiba Barcode Reader?
    • E
      Emily BrownAug 15, 2025
      If the ribbon is wrinkling in your Toshiba Barcode Reader, it may be due to poor ribbon quality or the ribbon not being rewound or fed smoothly. Ensure you are using only TOSHIBA TEC-approved ribbon. If the problem persists, replace the ribbon rewind motor or ribbon feed motor.
  • B
    Brianna RamseyAug 18, 2025
    What to do if my Toshiba Barcode Reader does not print?
    • L
      Lori BurtonAug 18, 2025
      If your Toshiba Barcode Reader isn't printing, possible causes include print head failure, incomplete connection of the print head connector, issues with ribbon rewinding/feeding, MAIN PC board failure, software problems, or a faulty printer cable. Suggested solutions involve replacing the print head or cable, ensuring the harness is correctly connected, addressing ribbon issues by replacing the ribbon take-up motor, checking the program, or replacing the MAIN PC board.
  • N
    nicholasboydAug 21, 2025
    Why does my Toshiba B-EX6 show a communication error?
    • M
      Maureen JohnsonAug 21, 2025
      If your Toshiba Barcode Reader shows a communication error, the issue might stem from a faulty communication cable, RS-232C connector, communication connector, PC or application software, or the MAIN PC board. Try replacing the cable or connector, modifying the program, or replacing the MAIN PC board.
  • B
    Brandon RussellAug 26, 2025
    What to do if my Toshiba B-EX6 has media feed failure?
    • F
      fernandezmaureenAug 26, 2025
      If your Toshiba Barcode Reader is experiencing media feed failure, it could be due to improper media setting, poor media quality, incorrect sensor adjustment, improper threshold settings, a faulty sensor, incorrect cutter mechanism installation, or a stepping motor failure. Ensure the media is set correctly and is of approved quality. Try re-adjusting the sensor, setting the correct threshold, properly installing the cutter module, or replacing the stepping motor or MAIN PC board.
  • M
    Matthew MorrowAug 28, 2025
    Why is the print blurred on my Toshiba B-EX6 Barcode Reader?
    • A
      anthony92Aug 28, 2025
      If the print from your Toshiba Barcode Reader is blurred, it may be due to poor media quality or dust on the media. Use only TOSHIBA TEC-approved media and clean the print head, removing any dust from the media.
  • D
    Dalton SimmonsSep 1, 2025
    How to fix a Toshiba B-EX6 Barcode Reader when the power does not turn on?
    • K
      Kristen LaraSep 1, 2025
      If your Toshiba Barcode Reader's power does not turn on, the issue could stem from the input voltage not being within the rated voltage, the output voltage not being within the rated voltage, no voltage to the MAIN PC board, or a failure of the MAIN PC board. Try replacing the power cable or power inlet, the PS unit, the power harness, or the MAIN PC board.
  • J
    Jenny HarrisSep 4, 2025
    How to resolve poor printing quality on a Toshiba Barcode Reader?
    • E
      Elizabeth EdwardsSep 4, 2025
      If your Toshiba Barcode Reader is producing poor prints, it could be due to poor media quality, a dirty print head, or the print head block not being set completely. Use the media approved by TOSHIBA TEC, clean the print head, and ensure the print head block is completely closed.
  • K
    Katherine DunnSep 7, 2025
    What causes missing dots when printing with a Toshiba B-EX6?
    • S
      Stephanie TaylorSep 7, 2025
      If the print from your Toshiba Barcode Reader has missing dots, this could be due to a broken print head element, broken print head cable wires, or a failure of the MAIN PC board. Consider replacing the print head, the print head harness, or the MAIN PC board.
  • A
    amandajonesSep 12, 2025
    What to do if the LED or LCD doesn't light on my Toshiba Barcode Reader?
    • L
      laurie63Sep 12, 2025
      If the LED or LCD on your Toshiba Barcode Reader does not light up, it could be due to a failure of the panel PC board or operation panel, the operation panel harness, or the MAIN PC board. You may need to replace the panel PC board or operation panel, the operation panel harness, or the MAIN PC board.

Summary

1. Unpacking Procedures

1.1 Printer Unpacking Procedure

Step-by-step instructions for unpacking the printer and its accessories from the carton.

1.2 Accessory Checks

Confirms that all included accessories are present and checks the printer for any damage.

2. Printer Installation

3. Notes for Optional Equipment Installation and Maintenance

3.1 Opening and Closing the Top Cover

Instructions on how to properly open and close the printer's top cover.

3.2 Removing the Side Panel (L)

Procedure for removing the left side panel of the printer.

3.3 Opening and Closing the Printer Block

Steps for opening and closing the printer's internal print head block.

3.4 Removing the Operation Panel

Detailed steps for safely removing the printer's operation panel assembly.

4. Installation Procedure for Optional Equipment

4.1 Disc Cutter Installation

Installation guide for the B-EX206-QM-R disc cutter optional equipment.

4.2 Fanfold Paper Guide Module Installation

Instructions for installing the B-EX906-FF-QM-R fanfold paper guide module.

4.3 Peel-Off Module Installation

Procedure for installing the B-EX906-H-QM-R peel-off module.

4.4 Expansion I;O Interface Board Installation

Guide for installing the B-EX700-IO-QM-R expansion I/O interface board.

4.5 Wireless LAN Board Installation

Instructions for installing the B-EX700-WLAN2-QM-R wireless LAN board.

4.6 Parallel Interface Board Installation

Procedure for installing the B-EX700-CEN-QM-R parallel interface board.

4.7 Serial Interface Board Installation

Guide for installing the B-EX700-RS-QM-R serial interface board.

4.8 UHF RFID Kit Installation

Installation steps for the B-EX706-RFID-U4 UHF RFID kit.

4.9 4” Rotary Cutter Installation

Instructions for installing the B-EX206-R-QM-S 4-inch rotary cutter option.

5. System Mode Operations

5.1 Outline of System Mode

Overview of the system mode functions and key operations for printer settings.

5.2 Reflecting System Mode Settings

Explains how system mode settings are saved and applied to the printer.

5.3 Reset Printer

Procedure for resetting the printer to its default or initial state.

5.4 Diagnostic Functions

Details on diagnostic tests including maintenance counters and auto diagnostics.

5.5 Setting Parameters

Configuration options for various printer functions and settings.

5.6 Test Print Options

Information on performing test prints for quality checks like slant lines and barcodes.

5.7 Sensor Adjustments

Procedures for adjusting media and ribbon sensors for optimal performance.

5.8 RAM Clear Functions

Options for clearing maintenance counters and printer parameters.

5.9 Interface Settings

Configuration of network and communication interfaces like LAN, WLAN, USB, and RS-232C.

5.10 RFID Module Settings

Parameters for configuring the RFID module, including tag types and calibration.

5.11 RTC (Real-Time Clock) Settings

Configuration options for the real-time clock, including battery check and renewal timing.

5.12 USB Memory Operations

Instructions for copying data to and from USB memory, including error handling.

5.13 Factory Test Procedures

Tests performed in the factory to verify hardware functionality like LCD and keys.

5.14 BASIC Program Settings

Configuration related to the BASIC programming language feature.

5.15 Emulation Mode Settings

Options for setting the printer's emulation mode (Z-Mode or D-Mode).

5.16 XML Function Settings

Configuration for enabling and setting up XML data printing features.

5.17 LCD Panel Settings

Adjustments for the LCD panel, including language, display content, and contrast.

5.18 Password Protection

Setup and management of passwords for system and user modes.

6. User System Mode Operations

6.1 Outline of User System Mode

Overview of the user system mode and its key operations.

6.3 Set Parameters

Access to printer parameters for user-defined settings.

6.4 Detection Level Settings

Configuration of sensor thresholds for media detection.

6.5 System Tools Functions

Access to system tools for data dump, logs, and other utility functions.

6.6 Show Issue Condition Details

Displays current printer status and settings for various parameters.

6.7 Reset Printer

Resets the printer from the user system mode to the online mode.

7. Download Procedure

8. Auto Configuration Mode

8.1 Outline of Auto Configuration Mode

Introduction to the auto configuration mode for firmware download.

8.3 Auto Configuration File Structure

Details on the format and content of the auto configuration file.

9. Power Save Function

10. On Line Mode Operations

10.1 Key Functionality

Description of key functions available in the printer's online mode.

10.2 LED Indicators

Explanation of the meaning of the printer's ONLINE and ERROR LEDs.

10.3 LCD Display Information

Details about the LCD panel specifications and display structure.

10.4 Online Mode LCD Display Examples

Illustrations of LCD displays for various printer states like online, pause, and head open.

10.5 Help Screen Navigation

How to access and navigate help messages displayed on the LCD.

10.6 Manual Threshold Setting

Procedure for manually adjusting sensor thresholds for media detection.

10.7 RFID Calibration Process

Steps for calibrating the RFID module to ensure optimal read/write performance.

10.8 Information Mode Overview

Details on the information mode for viewing feed amounts and printer statistics.

10.9 Job Cancellation

Procedure for canceling print jobs and performing a quick reset.

10.10 LCD Messages and LED Indications

Comprehensive guide to LCD messages and LED status indicators for troubleshooting.

11. Display Patterns and Key Operations

11.1 List Box with Scrollbar

Explanation of list box display and key functions for navigation.

11.2 Value Setting Screen

How to adjust parameter values using the value setting screen.

11.3 Information Screen Display

Details on the information screen and its key functions.

11.4 Sensor Adjustment Screen

Procedure for adjusting media sensor levels.

11.5 Temperature Display Screen

Displays print head and ambient temperatures.

11.6 File Selection Screen

Screen for selecting files when copying data from USB memory.

12. Initial Setting Wizard

13. Periodic Maintenance Procedure

14. Troubleshooting Guide

15. Major Unit Replacement

15.1 Power Supply Unit Replacement

Instructions for replacing the printer's power supply unit.

15.2 Main PC Board Replacement

Procedure for replacing the main PC board.

15.3 Operation Panel Assembly Replacement

Steps for replacing the printer's operation panel assembly.

15.4 Stepping Motor Assembly Replacement

Guide for replacing the stepping motor assembly.

15.5 Ribbon Motors (Take-Up, Feed) Replacement

Procedure for replacing the ribbon take-up and feed motors.

15.6 Ribbon Motor Sensors Replacement

Instructions for replacing ribbon motor sensors (take-up and feed).

15.7 Print Head Replacement

Detailed steps for safely replacing the printer's print head.

15.8 Platen Replacement

Procedure for removing and replacing the printer's platen assembly.

15.9 Pinch Roller Lower Assembly Replacement

Instructions for replacing the lower pinch roller assembly.

15.10 Pinch Roller Upper Assembly Replacement

Guide for replacing the upper pinch roller assembly.

15.11 Media Sensors Assembly Replacement

Procedure for replacing the media sensor assembly.

15.12 Head Up Sensor Replacement

Instructions for replacing the head up sensor.

15.13 Ribbon End Sensor Replacement

Procedure for replacing the ribbon end sensor.

15.14 Paper Guide Assembly Replacement

Steps for replacing the paper guide assembly.

15.15 Interface Cards Replacement

Instructions for replacing interface cards like serial, parallel, and WLAN.

15.16 Head Up Solenoid Replacement

Procedure for replacing the head up solenoid assembly.

17. How to Adjust the Print Head Position

17.1 Outline of Print Head Position Adjustment

Overview of print head position adjustment for optimal print quality.

17.2 Print Head Position Adjustment Procedure

Step-by-step guide for adjusting print head position using jigs.

18. Print Head Pressure Adjustment Lever

Toshiba B-EX6 Series Specifications

General IconGeneral
TypeIndustrial Barcode Printer
Print MethodThermal transfer and direct thermal
Resolution203 dpi, 300 dpi
InterfacesUSB, Serial, Ethernet, Bluetooth, Wireless
Weight10 kg
Operating Temperature41°F to 95°F (5°C to 35°C)
Storage Temperature-20 - 60 °C (-4 - 140 °F)
Supported Barcodes1D and 2D barcodes
Humidity25 - 85% RH (non-condensing)

Related product manuals