TYPICAL APPLICATIONS FOR THE FMS-1650
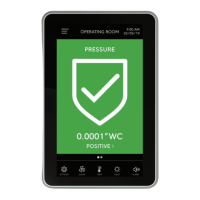
FMS-1650
TRIATEK reserves the right to change product specifications without notice.
- 62 -
begin configuring the output as follows:
• Operating Mode: Normally-Open
• Delay Time: 0 seconds
Configuring Alarm Relay
This section describes the configuration of the digital (relay) output for
the FMS-1650 room pressure controller targeting the application shown
in Figure 104. This room controller triggers a remote annunciator
panel which consists of an audible buzzer and an LED indicator. The
primary relay output (RL-1) is used to trigger the remote annunciator,
and should be configured using the Relay Setup option on the first
page of the Controller Setup menus.
Enter the user menus and navigate to the Relay Setup option on the
Controller Setup menus and select it to begin configuring the output as
follows:
• Trigger Mode: Setpoints
• High Setpoint: 0.0125 “WC
• Low Setpoint: 0.0010 “WC
• Action Mode: Direct
• Delay Time: 30 seconds
This section describes the configuration of the display settings for the
FMS-1650 room pressure controller targeting the application shown in
Figure 104. Since this room controller is monitoring and controlling the
differential pressure in two individual rooms, the display mode should
be selected to support a dual sensor room controller. Enter the user
menus and navigate to the Display Modes configuration screen on the
first page of the Display Setup menus. Select the Dual Sensor Mode
option and click OK to save the setting to non-volatile memory.
To specify the sources for the temperature, humidity, and air change
rate to be displayed on the main screen, the Display Options menu
option should be selected. Enter the user menus and navigate to the
Display Options configuration screen on the first page of the Display
Setup menus. At the Set Display Options configuration screen, be
sure to select all six (6) of the display options and click the Next button
to begin specifying the sources for the individual sensors.
Configure the sources as follows:
• Temperature Display Source: Thermistor Input 1
• Humidity Display Source: Analog Input 3
• Air Changes Display Source: Analog Input 4
• Room Pressure Display Source: Analog Input 1
Click Finish to save the setting to non-volatile memory. This completes
the procedure for configuring the display settings for the targeted
application shown in Figure 104.
Wiring & Confi guring External Devices