Cleaning
VTK-TR-BA-072e-1 - User Manual MDS 358X Series
9.4.5 Assembling of the Fluid Box and the Tappet
Re-assemble the valve and its components as follows.
Unusual (connector BY)
In the exceptional case that you removed the
connector BY as well, you have to mount it first.
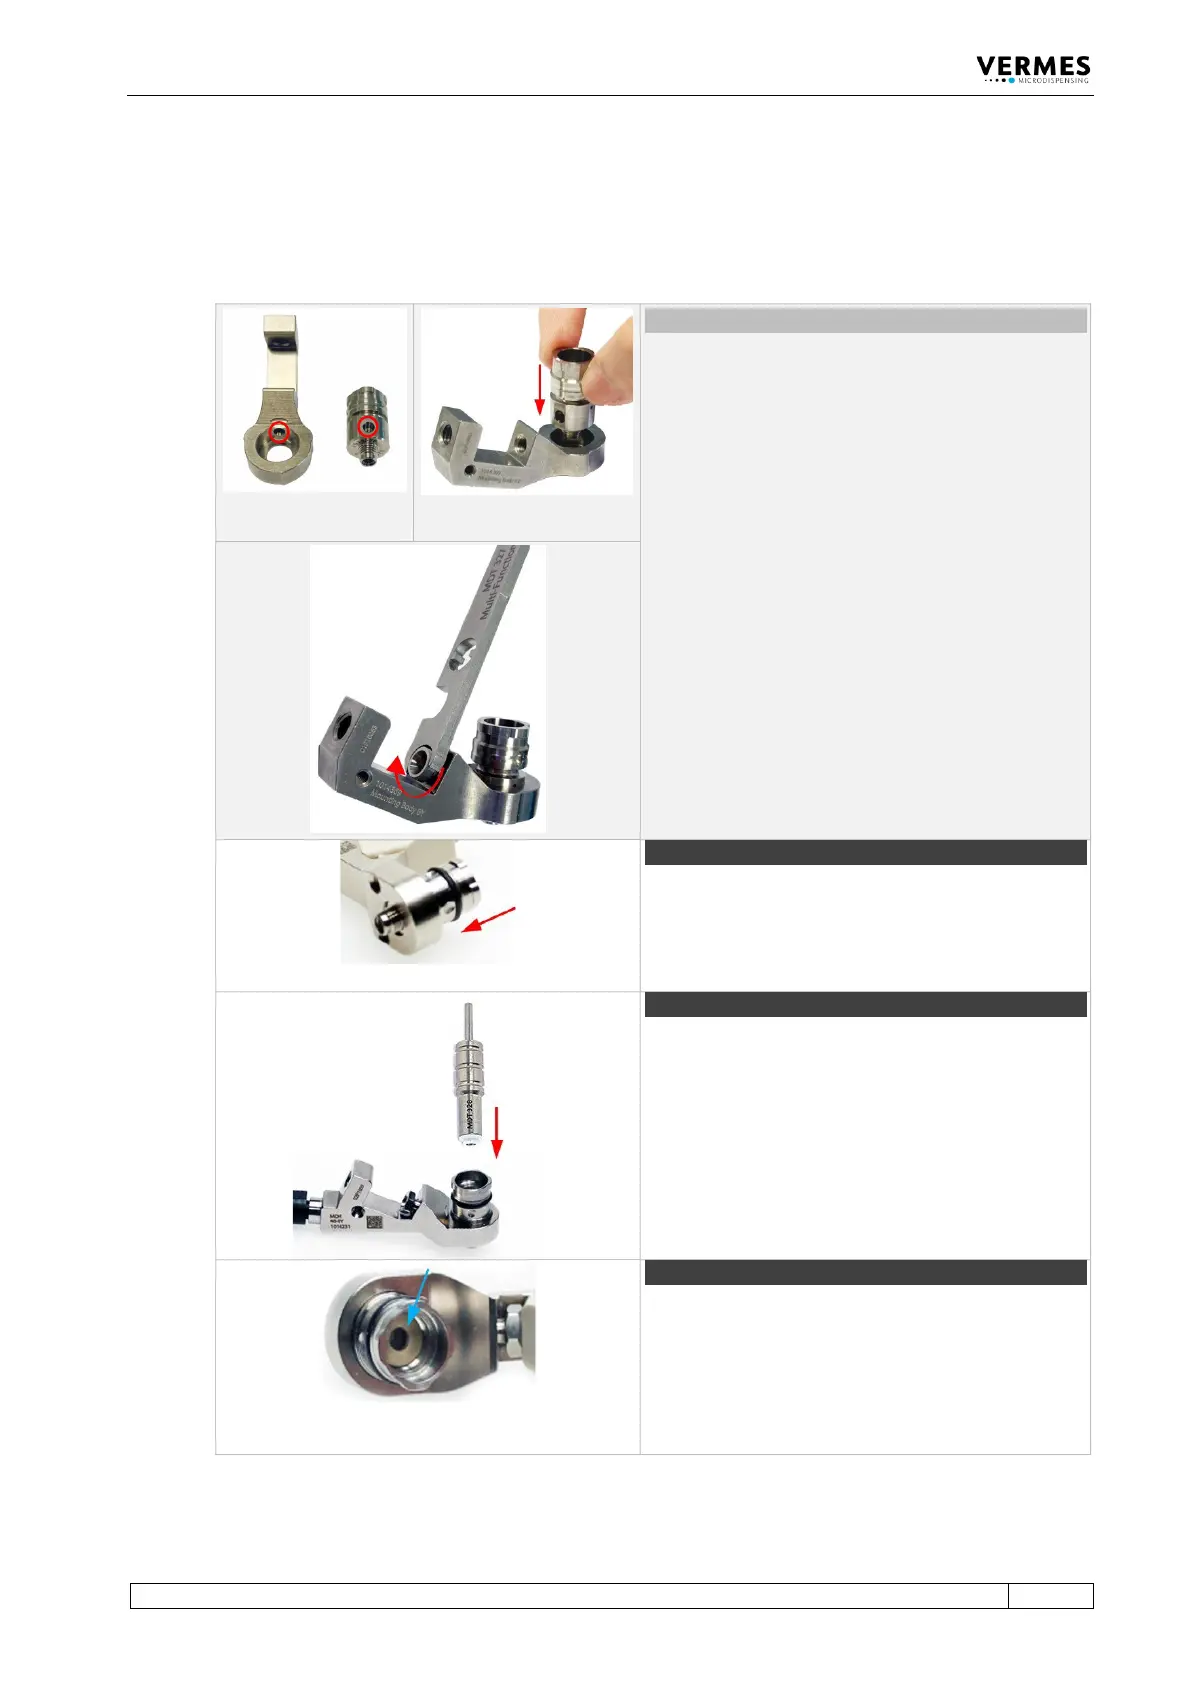
Place the fluid box body on the receptacle of the
mounting body. Align the bore on the fluid box
body with the bore on the mounting body (see
circles). The fluid box body will fit into the mounting
body, if the mounting direction is correct.
Push the Connector BY through the mounting body
into the bore of the fluid box body. Screw the
Connector BY tight (clockwise) by using an MDT 327
(for newer revisions of the Connector BY you can
also use a hexagon key 2.5 or the Torque Wrench
Tool VM with the Bit Hexagon Key 2.5). Torques are
depending on the material of the mounting body
(stainless steel 90 – 100 cN.m, PEEK 70 – 80 cN.m).
Important Note!
Do not press the fluid box body while fastening the
Connector BY, otherwise, it cannot correctly grip
into the fluid box body.
In case that you removed the O-ring, you have to
mount it onto the fluid box body.
Pull the O-ring over the fluid box body with a pair of
tweezers. Be careful not to damage the O-ring.
Use the MDT 328 - Tappet Sealing Changing Tool to
press the Tappet Sealing PE/PTFE/HT into the fluid
box body until it sits tight. When the tappet sealing
sits tight, you will hear a light noise.
Step 3 (tappet centering piece)
Press the tappet centering piece into the fluid box.
Use the MDT 328 to make sure the tappet centering
piece rests flat on the tappet sealing.
Important note!
When using a 2G tappet rod, do not use a tappet


 To Next Page