Initial Operation
VTK-TR-BA-072e-1 - User Manual MDS 358X Series
Options Recommended options
Different models of fluid boxes
Different fluid box connectors
Nozzle heating
MDT 301 - Universal Tool
MDT 306 - Torque Wrench Tool
MDT 324 - Nozzle Insert Cleaning Holder
If the intended application needs particular accessories (e.g. seals made of special material),
consult our Technical Support at once (see Page 7). Do not start the system in incomplete state.
6.2 First Assembling of the Valve
This chapter describes how to ready your microdispensing system for the first dispensing session.
Always make sure all screw couplings sit tight (torque values in paragraph 3.3.11, page 19).
INFORMATION
Some parts preassembled
Some elements of the equipment are usually delivered in preassembled state. In those cases you
can omit the respective steps.
Proceed as follows:
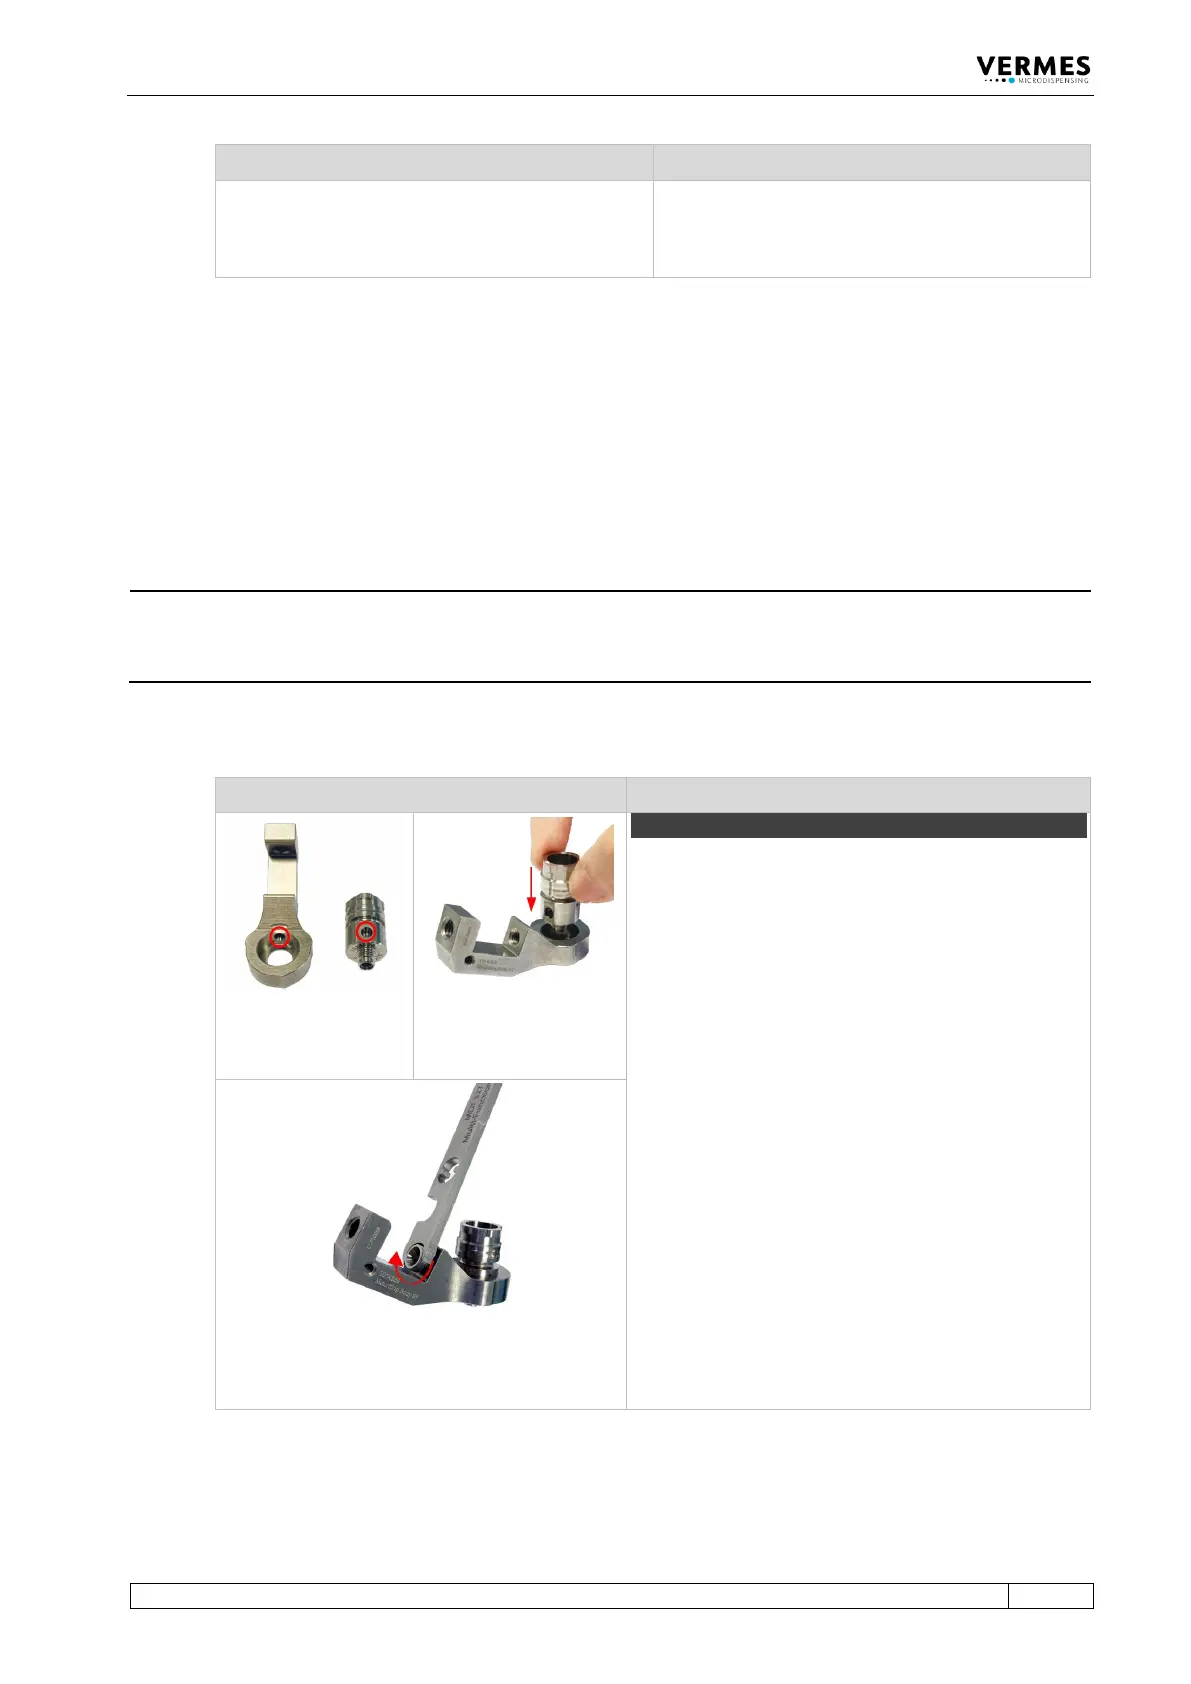
Picture Explanation
Information!
This step will be optional, if you re-assemble the valve
later, since usually you would not remove the
Connector BY from the mounting body.
Place the fluid box body on the receptacle of the
mounting body. Align the bore on the fluid box body
with the bore on the mounting body (see circles in
the first picture). The fluid box body will sit in the
mounting body.
Push the Connector BY through the mounting body
into the bore of the fluid box body. Screw the
Connector BY tight (clockwise) by using an MDT 327
(for newer revisions of the Connector BY you can also
use a hexagon key 2.5 or the MDT 306 - Torque
Wrench Tool VM with the Bit Hexagon Key 2.5).
Torques are depending on the material of the
mounting body (stainless steel 90 – 100 cN.m, PEEK 70
– 80 cN.m).
Important Note!
Do not press the fluid box body while fastening the
Connector BY. Otherwise, the Connector BY cannot
correctly grip into the fluid box body.