Initial Operation
VTK-TR-BA-072e-1 - User Manual MDS 358X Series
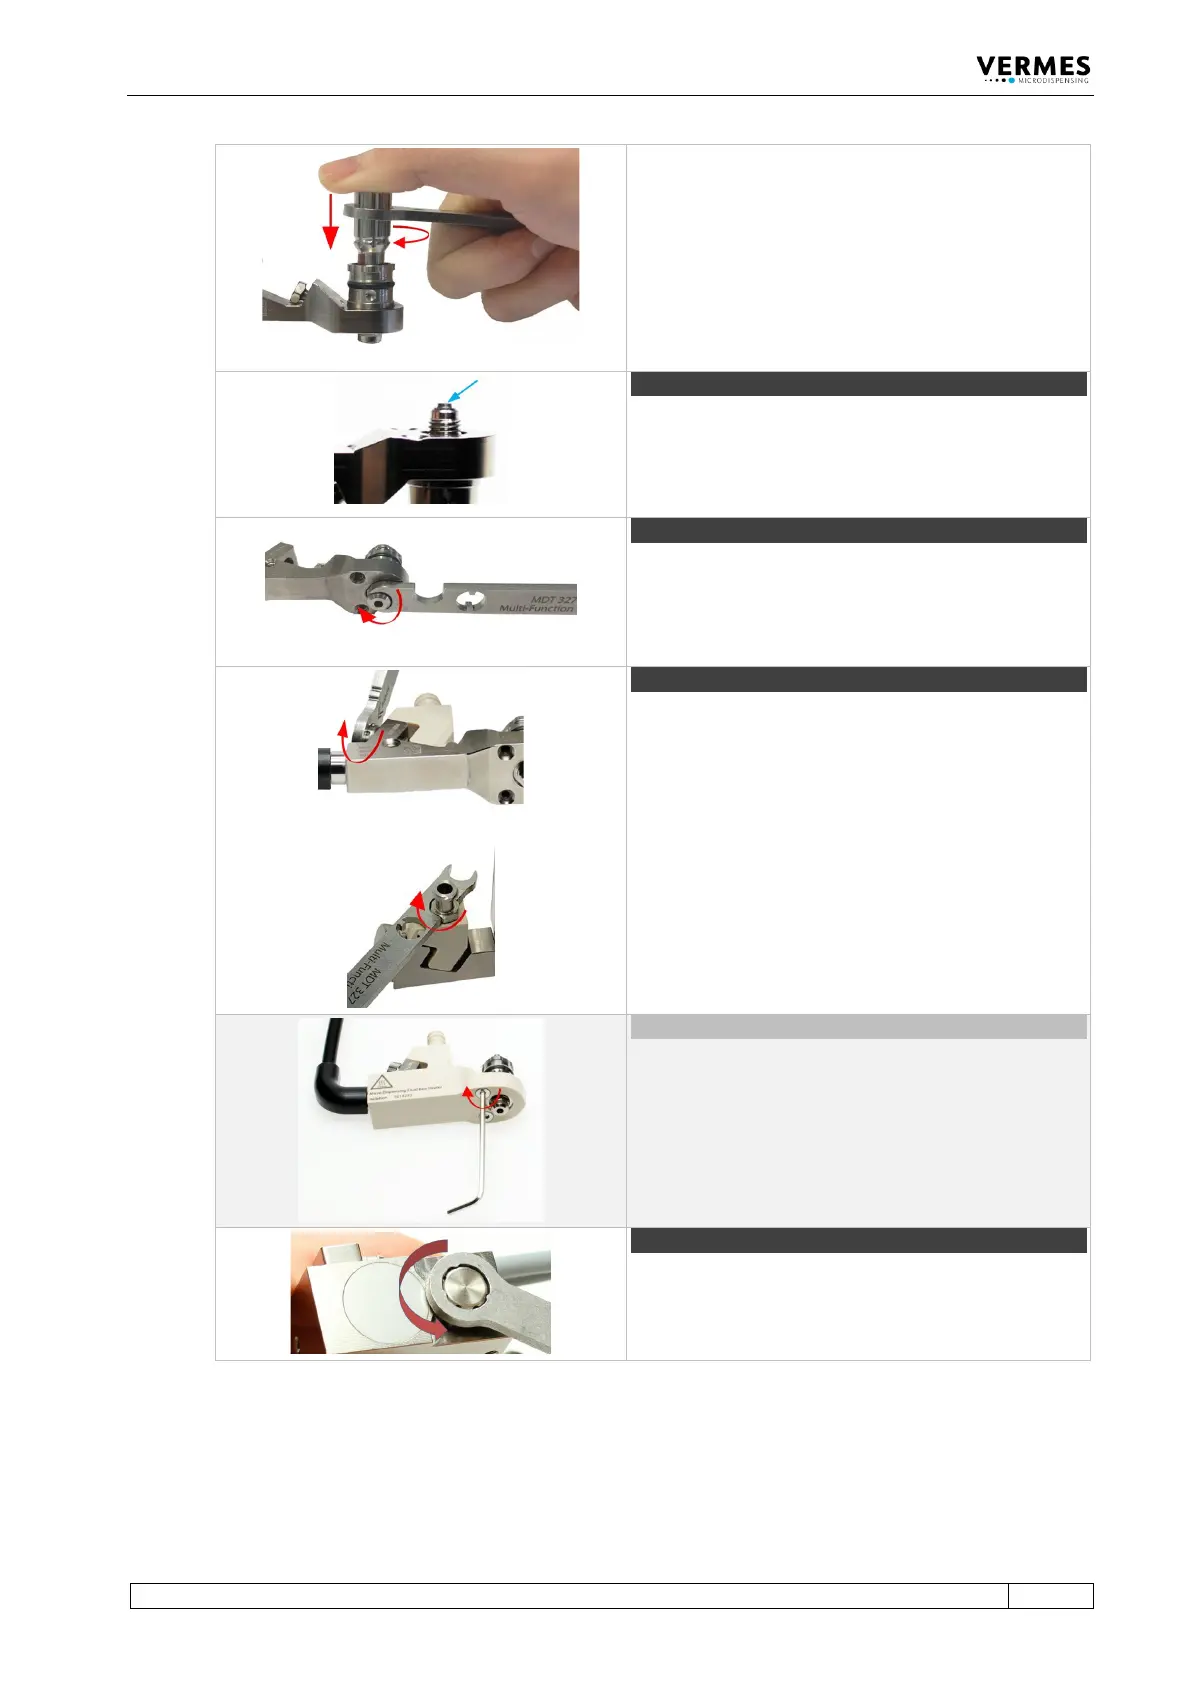
Screw the Tappet Centering Screw BY completely into
the fluid box (torque 100 – 140 cN.m) with MDT 303 -
Nozzle Insert Changing Tool.
Make sure the three pins of the MDT 303 fit exactly
into the three holes of the Tappet Centering Screw
BY. Turn the MDT 303 clockwise while pressing it
down slightly to the fluid box.
Combine the MDT 303 with MDT 327 for a better
leverage.
Clip the nozzle insert into the fluid box. Use the small
hole of MDT 327 - Multi-Function Tool to pick up the
nozzle insert and to place it. Make sure the nozzle
Step 7 (nozzle fixation nut)
Screw the nozzle fixation nut clockwise onto the fluid
box. Use MDT 327 Multi-Function Tool.
Place the cartridge base onto the fluid box and fix it
with the tightening screw. Screw the tightening screw
clockwise with MDT 327 Multi-Function Tool (torque
120 – 140 cN.m).
Important note!
In case you use a Cartridge Base without integrated
luer lock, you need to screw the Fluid Box Connector
Luer Lock into the top bore of the cartridge base CH.
Use the open-ended wrench of the MDT 327
(hexagon screw size M8, torque stainless steel 100 –
120 cN.m, PEEK 40 – 60 cN.m).
Optional (isolation body)
For thermally sensitive applications, you might use an
isolation body. Pull it onto the fluid box, until it clips
in. Screw it tight with the two screws for the isolation
body (torque 40 – 50 cN.m). Use the MDT 329 - L-
Shape hexagon Key 2 mm.
Open the adjust screw completely. Screw counter-
clockwise. Use MDT 327 Multi-Function Tool.