11.
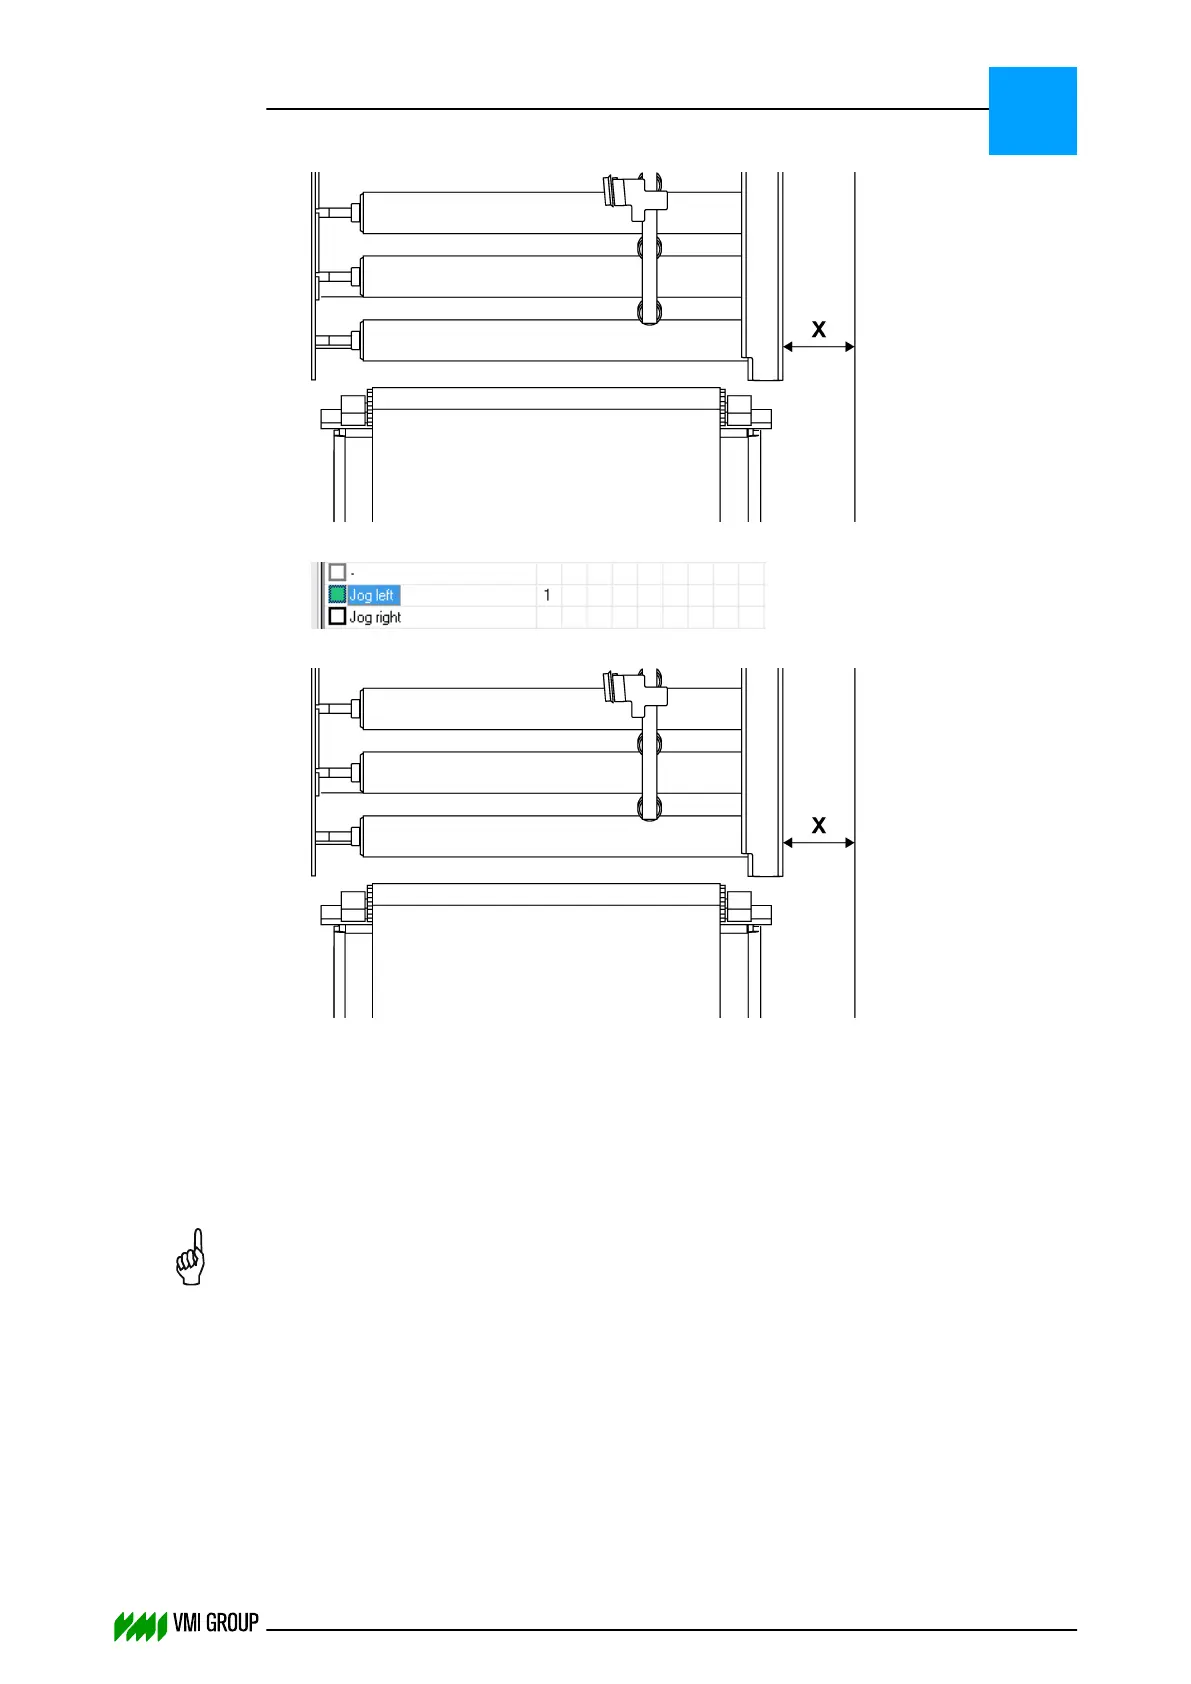
Measure the distance [X] between conveyor and right-hand side of the frame.
12.
Select Jog left.
13.
Measure the distance [X] between conveyor and right-hand side of the frame again.
14. In VVSU, go to tab ACTUATOR.
15. Change the value of Pos Range to half the difference ((left-right)/2) in [mm] and
press ENTER.
16. Change the value of Motion Range to half the difference ((left-right)/2) in [mm] and
press ENTER.
NOTICE
Note this value, you will need it in a later stadium.
17. Click TRANSMIT to send the values to VVSX.
18. Click FILE > REFRESH PARAMETERS and check the values in the ACTUATOR tab
screen.
19. In VVSU, go to tab CALIBRATION.
20. In the SELECT ITEM TO CALIBRATE drop‑down menu, select ACTUATOR.
21. Click START CALIBRATION to start the actuator calibration (determine the motor
type).
Wait for the Calibration OK message.
ALIGNMENTS, ADJUSTMENTS AND CALIBRATIONS
VVS Breaker
5
THINKING FORWARD
VMI Vision System VVS (OL82) VVSX 13.0.12.0, VVSU 3.0.6 / 4 / 2016-07-11 / pd#175592
5-18