5.4.2 Adjust and focus the camera
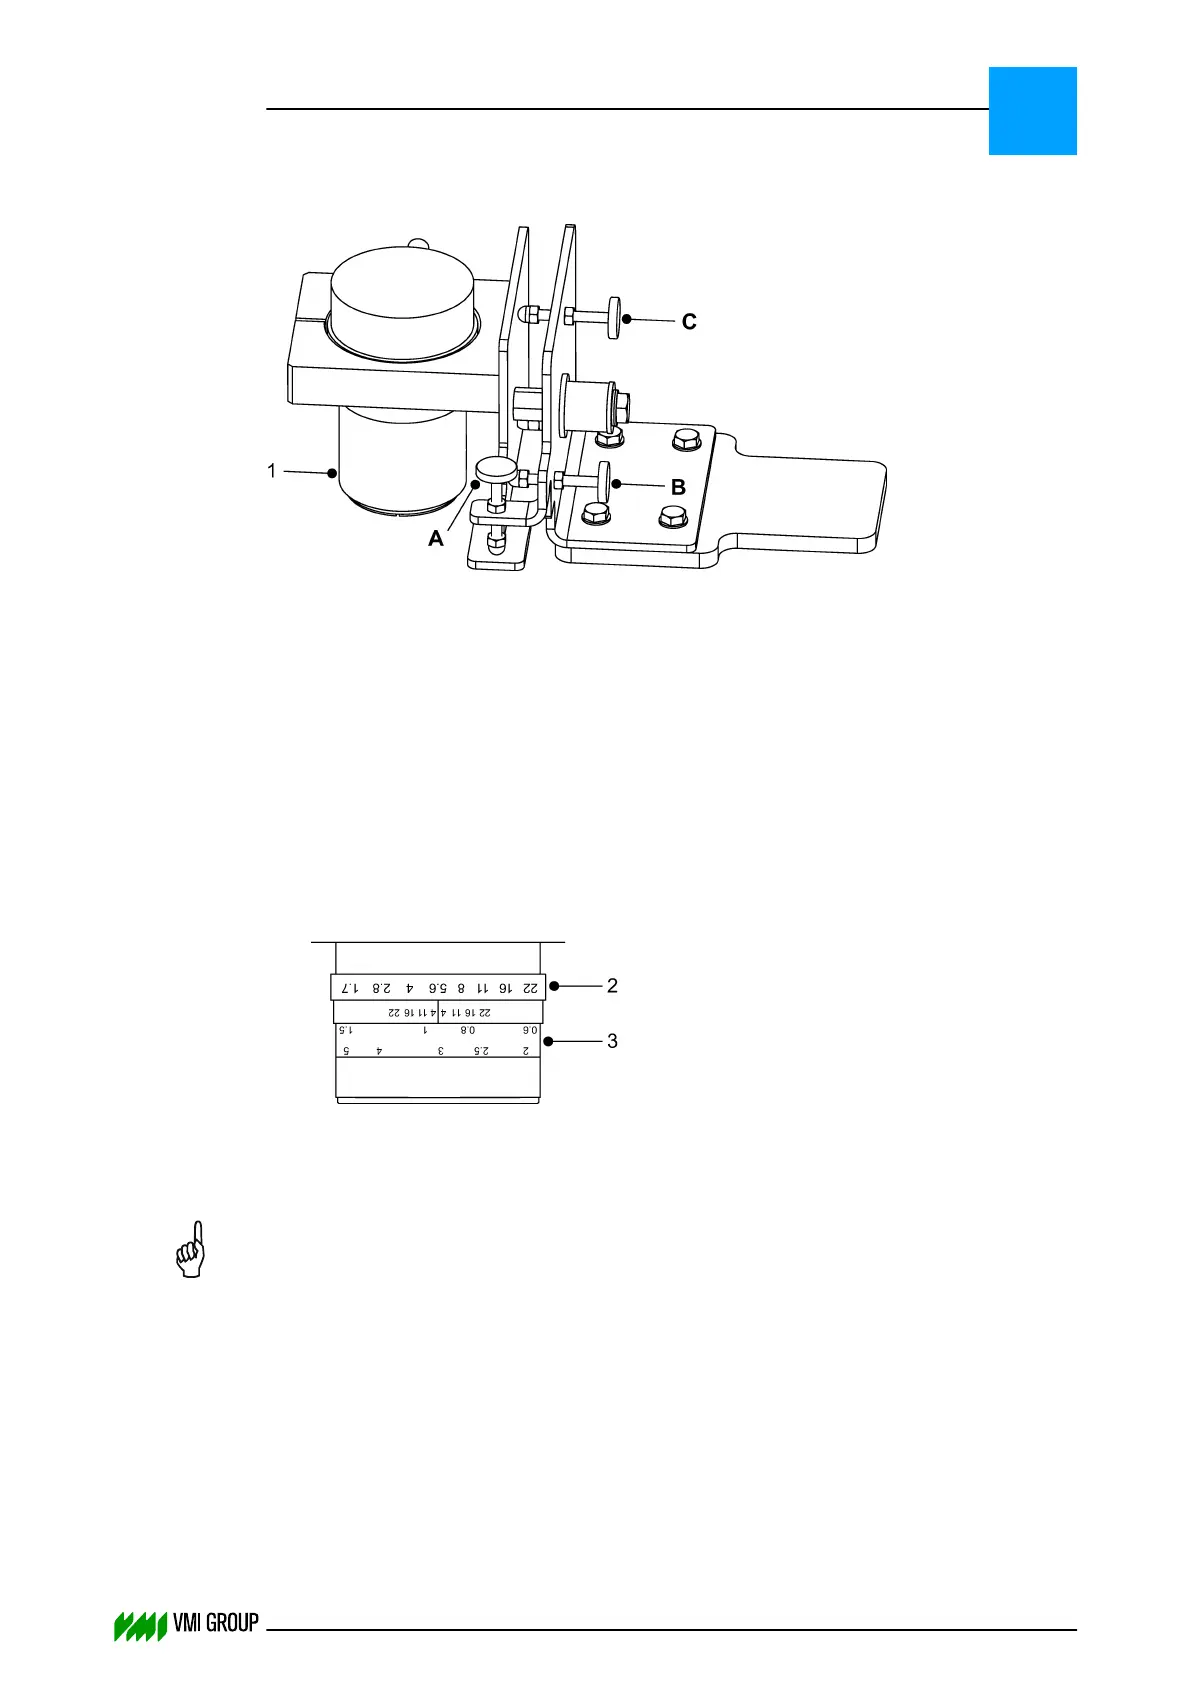
1 Cover A Adjustment screw
B Adjustment screw
C Adjustment screw
1. Remove the lens protection cover [1] from the camera.
2. Clear the white balance:
● In VVSU, go to tab SENSOR.
● Change the value of Start Service to 9 and press ENTER.
● Click TRANSMIT to send the values to VVSX.
After a few seconds the value returns to 0.
3. Check if the Ascending Threshold = 120 and the Descending Threshold = 100.
Adjust if necessary.
4. In VVSU, go to tab DISPLAY SENSOR.
5.
Turn the aperture ring [2] until the maximum intensity of the camera image is between
150 - 230.
Use the mouse pointer in DISPLAY SENSOR to determine the intensity.
NOTICE
When the gray lens filter (B&W type 103) is mounted on the lens cover, you must
place or hold the cover on lens to check the camera image.
Example - simplified image:
ALIGNMENTS, ADJUSTMENTS AND CALIBRATIONS
VVS Tread
5
THINKING FORWARD
VMI Vision System VVS (OL82) VVSX 13.0.12.0, VVSU 3.0.6 / 4 / 2016-07-11 / pd#175592
5-26