Page: 1-24
WALKER MANUFACTURING COMPANY
July 2006
SERVICE INSTRUCTIONS
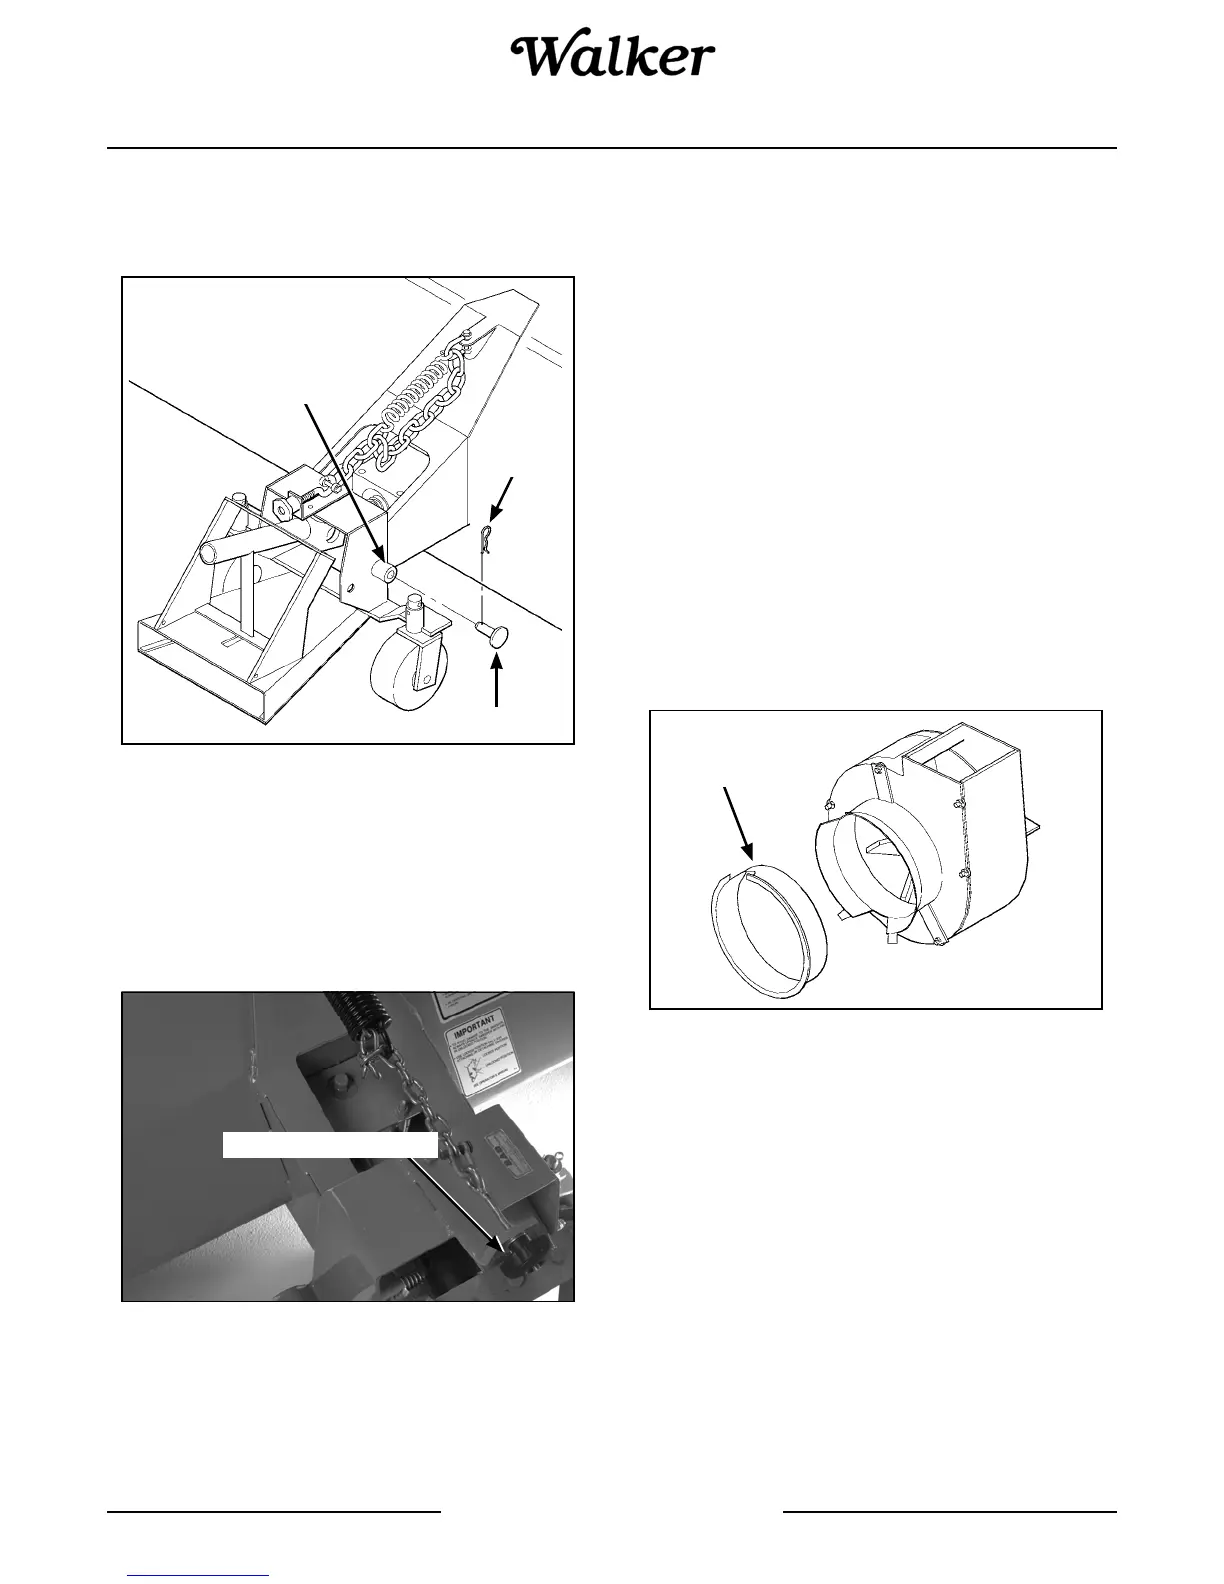
6. Remove the hairpin from the welded sleeve on the
right hand side of the broom mounting bracket.
Carefully pull out the stopper pin to its most ex-
tended position and lock in place with the hairpin.
Lock Stopper Pin in Place
NOTE: The pin in the innermost position is used to
prevent the female hitch on the broom from being
pulled up by the brush ground contact adjustment
spring, thus facilitating mounting and dismounting
of the broom.
7. Adjust brush ground contact by threading knob.
Adjust Brush to Ground Contact
8. Retract the parking stands and secure with the
hairpins prior to operation.
9. To install the optional tire chains:
a. Remove the tractor wheels.
b. Attach the tire chains to the wheels.
c. Place the wheel spacer plates on the lug
bolts. The wheel spacer plates provide clear-
ance for the chains between the tires and the
tractor body.
d. Place the wheels back on the tractor.
e. Reinstall and tighten the lug bolts.
10. For GHS (Grass Handling System) equipped
Walker tractors, install a blower intake cover in the
blower intake tube. The cover “unloads” the blower
and seals the intake to effectively eliminate power
loss and noise when the blower is not being used.
GHS Blower Intake Cover
11. For stability of the tractor when transporting with
the rotary broom in raised position, approximately
80 lb (36 kg) of counterweight should be installed
on the tail of the tractor. Optional tail weights for
the various tractor models are available from your
Walker dealer or a sandbag or similar weight may
be used.
Welded Sleeve
Hairpin
Stopper Pin
Ground Contact Knob
Blower Intake
Cover