36 Preparing Your 600E System for Operation
3. Install a union in place of the column during system flush.
4. Place the rest of the system back in the flow path by closing the reference valve.
5. Flush the complete system, including detectors (see Section 3.4.1, Flushing the
System Fluid Lines).
3.4.1 Flushing the System Fluid Lines
1. Press the Direct function key to display the Direct Control screen (see Figure 3-2).
2. Move the cursor to the Flow field and type 2.0. Press Enter. Eluent now flows
through the system at 2.0 mL/min.
3. Flush the system for 2 to 5 minutes.
3.4.2 Flushing the Rheodyne Manual Injector
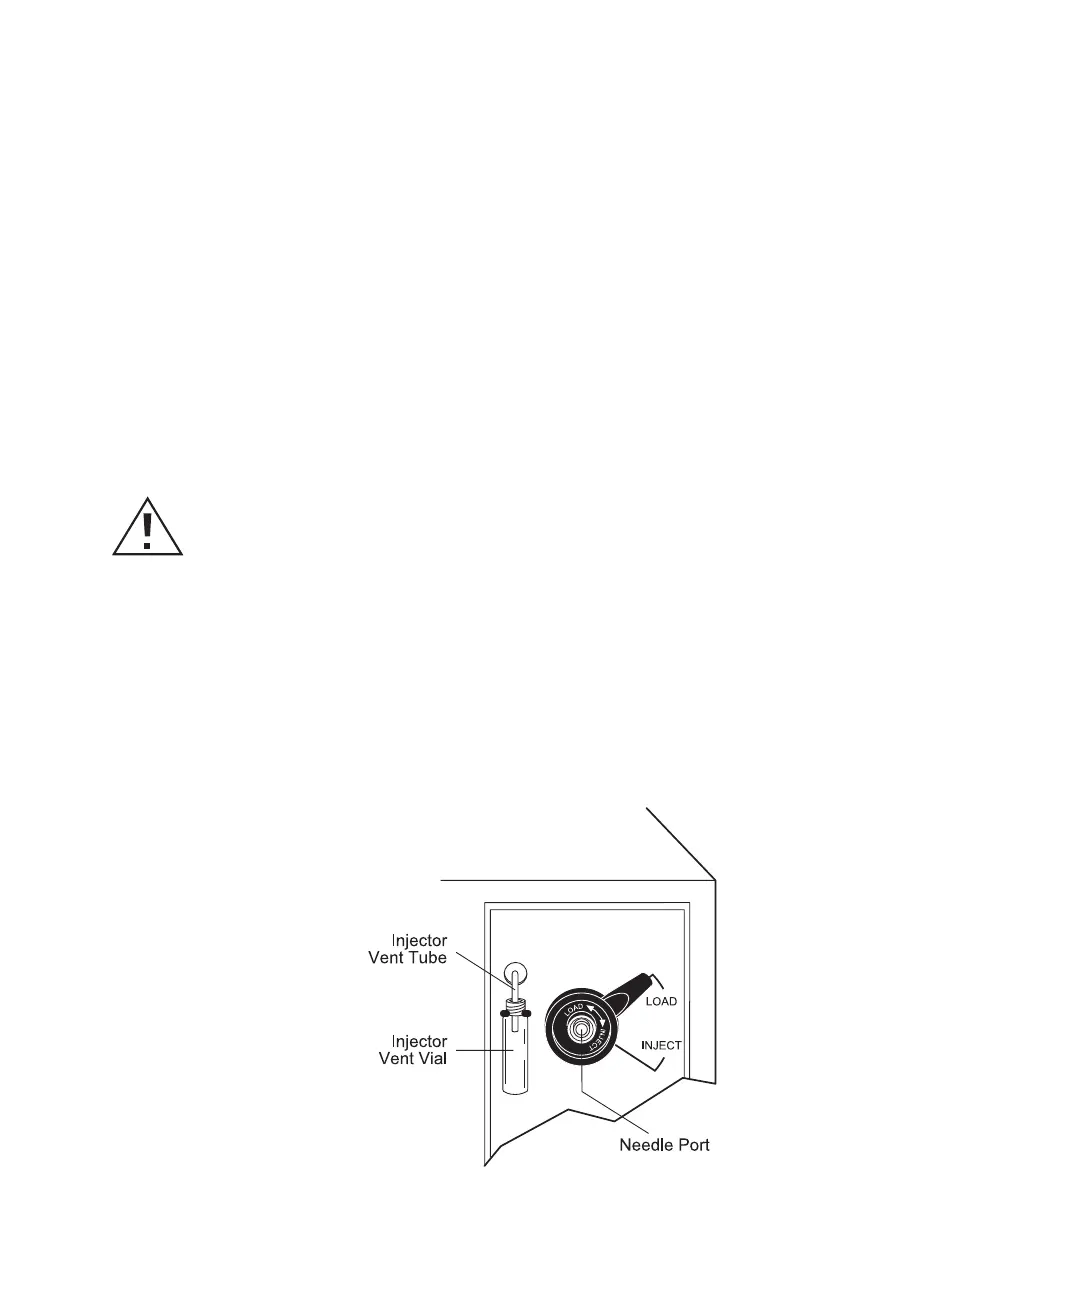
1. Set the injector handle to the Inject position. Setting the handle in the Inject position
inserts the sample loop in the flow path.
2. Start flow of the flushing eluent at 1.0 mL/min. Flow for 2 to 3 minutes.
3. Fill a syringe (fitted with a 22-gauge, 90° point needle) with the new or intermediate
eluent.
4. Set the injector handle to the Load position (Figure 3-5).
Figure 3-5 Injector Handle in the Load Position
Caution: Always observe safe laboratory practices when handling eluents. Know the
chemical and physical properties of eluents. See the Materials Safety Data Sheets for the
eluents in use.