6F65G11
6-18
9
8
7
6
5
4
3
2
1
Drive shaft and lower case
Checking the lower case and lower
case cap
1. Check the skeg and torpedo for cracks or
damage. Replace the lower case and
lower case cap if necessary.
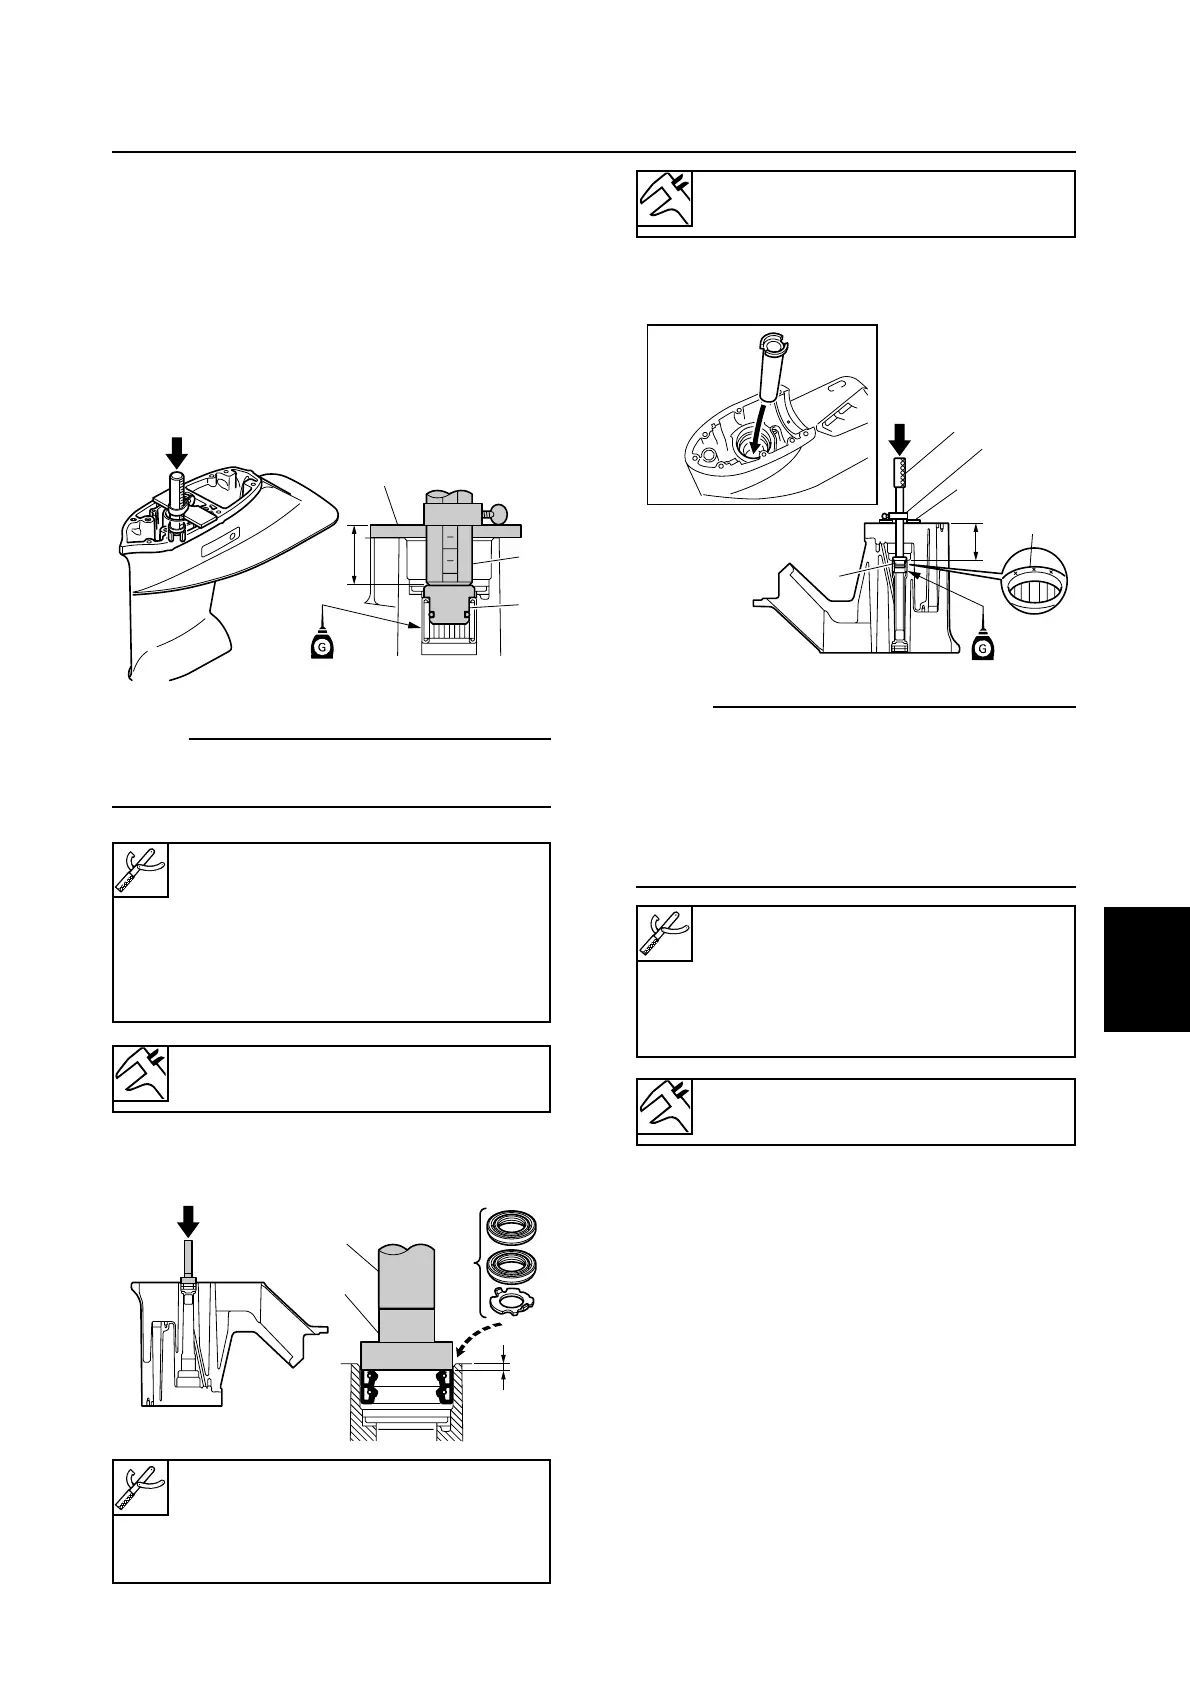
Assembling the lower case
1. Install the drive shaft needle bearing into
the lower case to the specified depth.
NOTE:
Be careful not to the let the stopper get out of
position when using the driver rod SS.
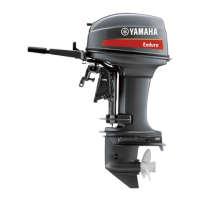
2. Install the washer and new oil seals into
the lower case to the specified depth.
3. Install the sleeve and needle bearing into
the lower case to the specified depth.
NOTE:
9 Install the needle bearing with the manufac-
ture identification mark c facing up.
9 Be careful not to the let the stopper e get
out of position when using the driver rod SL.
9 Apply gear oil to the inside and outside of
the sleeve before installation.
Ball bearing attachment 1:
90890-06616
Driver rod SS 2:
90890-06604
Bearing depth plate 3:
90890-06603
Driver rod SL 6 : 90890-06602
Needle bearing attachment 7:
90890-06613
Bearing depth plate 8:
90890-06603
Depth a:
24.7—25.3 mm (0.97—1.00 in)
Depth b:
2.2—2.8 mm (0.09—0.11 in)
Depth d:
75.2—75.8 mm (2.96—2.98 in)
Ball bearing attachment 4:
90890-06637
Driver rod SS 5:
90890-06604