BRKT
7-19
6F65G11
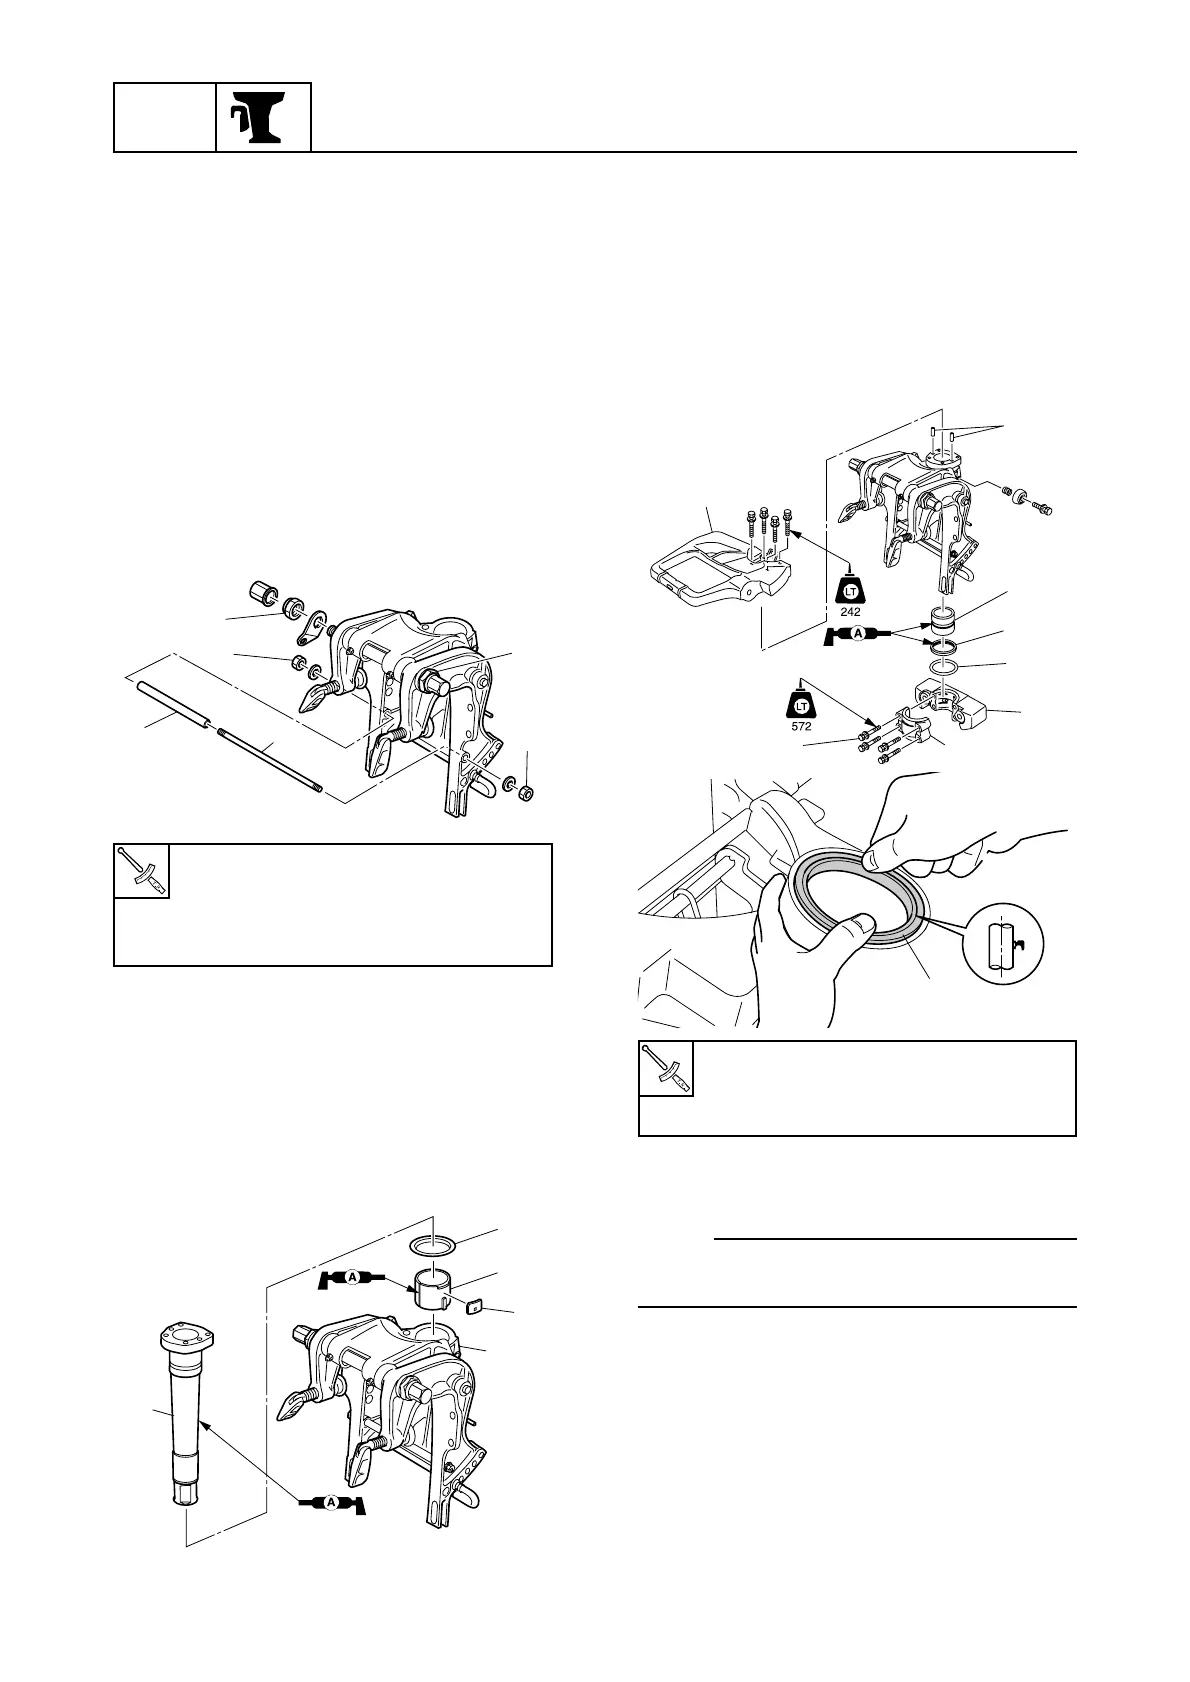
Bracket unit
2. Assemble the clamp brackets, washers,
and swivel bracket, and then install the
clamp bracket bolt.
3. Install the plate, tighten the self-locking
nuts 1 to the specified torque, and then
tighten the cap nuts.
4. Install the tilt stopper plate bolts and cir-
clips.
5. Install the collar 2, and clamp bracket
bolt 3, and then tighten the clamp brack-
et nuts 4 to the specified torque.
Installing the pivot shaft
1. Install the straight key 1, bushing 2,
and washer 3 onto the swivel bracket 4.
2. Place the swivel bracket 4 in an upright
position, and then install the pivot shaft
5 onto the swivel bracket.
3. Install the bushing 6, a new oil seal 7,
and the washer 8 onto the swivel brack-
et.
4. Install the dowels 9, steering bracket 0,
lower mount clamp q and lower mount
case w onto the swivel bracket. Then
tighten the bolt e to specified torque.
5. Apply water resistant grease to the
grease nipples.
NOTE:
Apply the grease until it comes out of the
bushings.