6F65G11
6-44
9
8
7
6
5
4
3
2
1
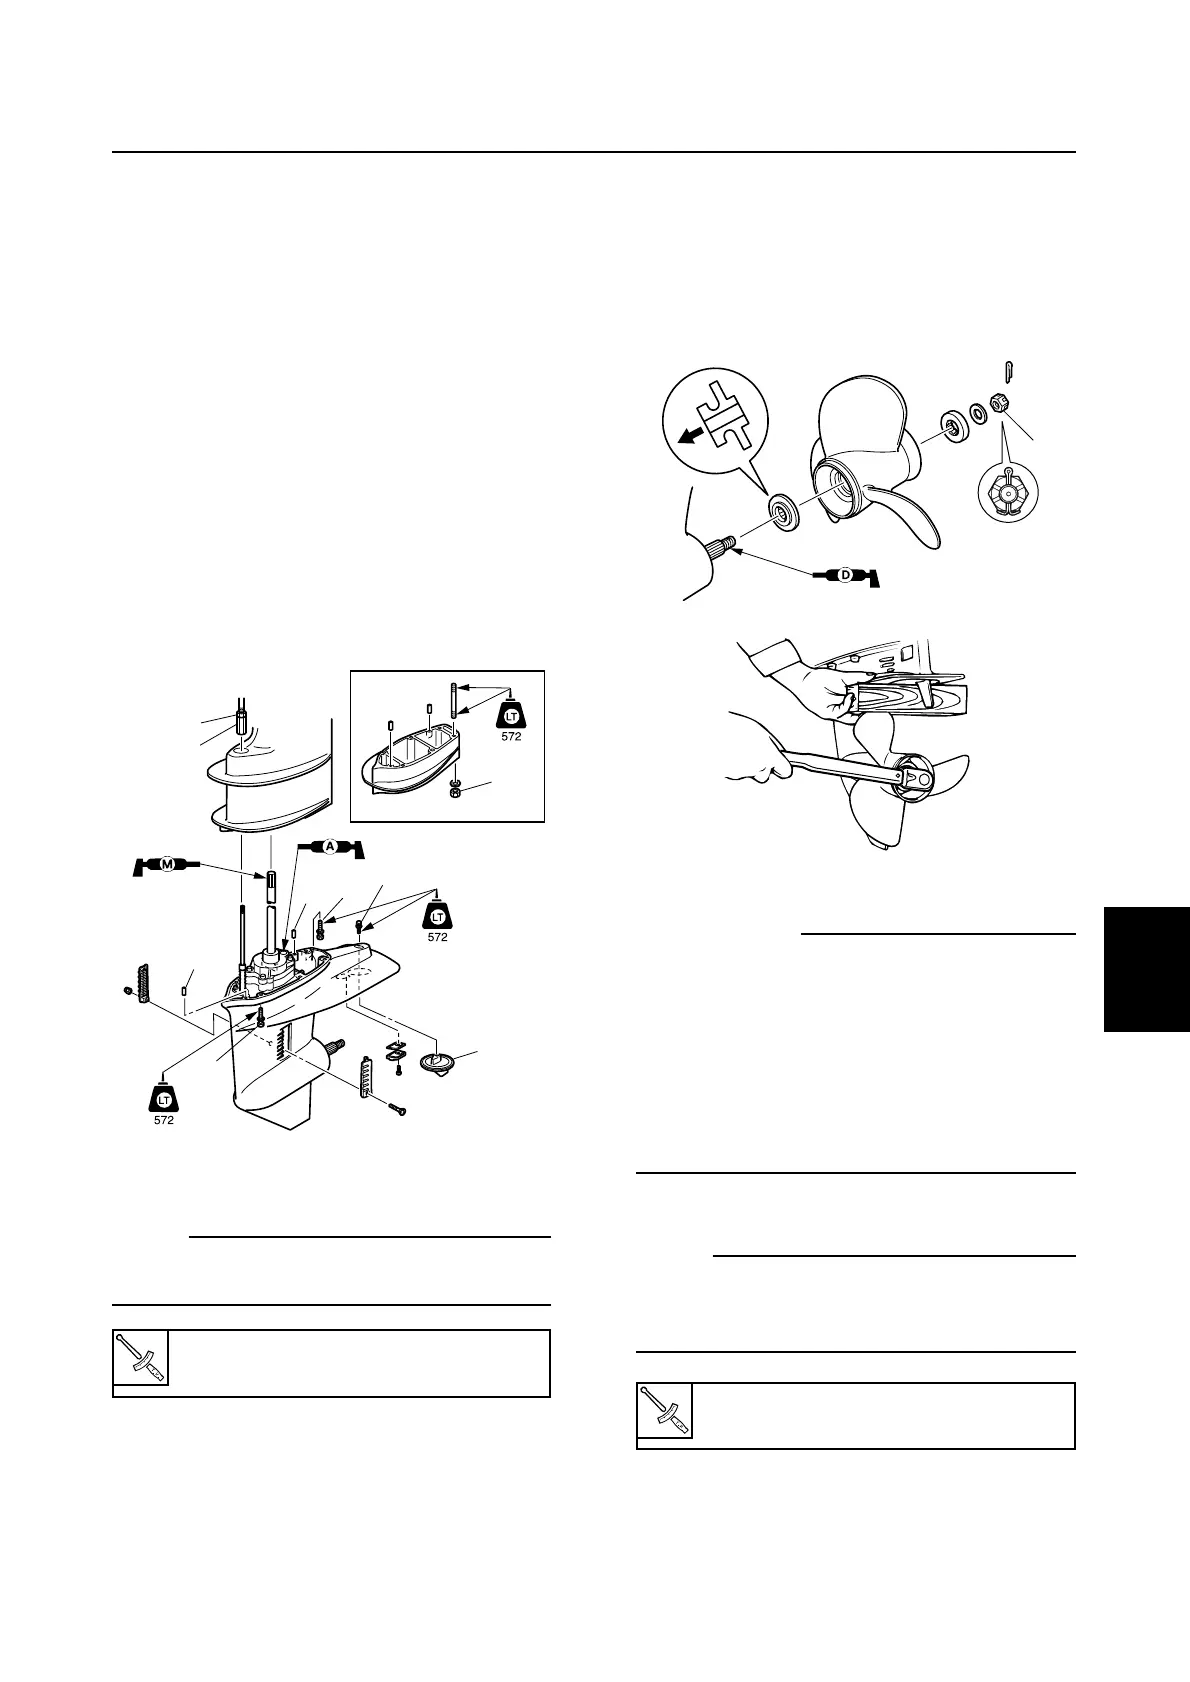
Drive shaft and lower case
Installing the lower unit
1. Set the gear shift to the reverse position
at the lower unit. Make sure that the shift
rod is in the reverse position.
2. Screw in the locknut 1 completely.
3. Install the two dowels 2 into the lower
unit.
4. Install the lower unit into the upper case,
and then tighten the lower case mounting
bolts (nuts) 3 to the specified torque.
5. Connect the shift rod.
6. Install the trim tab 4 to its original posi-
tion, and then tighten the trim tab bolt 5.
åY-transom model
NOTE:
Screw the adjusting nut 6 down until it light-
ly seated, and then tighten the locknut.
7. Install the propeller and propeller nut,
and then tighten the nut finger tight.
Place a block of wood between the anti-
cavitation plate and propeller to keep the
propeller from turning, and then tighten
the nut to the specified torque.
w
9 Do not hold the propeller with your
hands when loosening or tightening it.
9 Be sure to disconnect the battery leads
from the battery and the clip from the
engine stop lanyard switch.
9 Put a block of wood between the anti-
cavitation plate and propeller to keep the
propeller from turning.
NOTE:
If the grooves in the propeller nut 7 do not
align with the cotter pin hole, tighten the nut
until they are aligned.