6F65G11
5-36
9
8
7
6
5
4
3
2
1
Crankcase
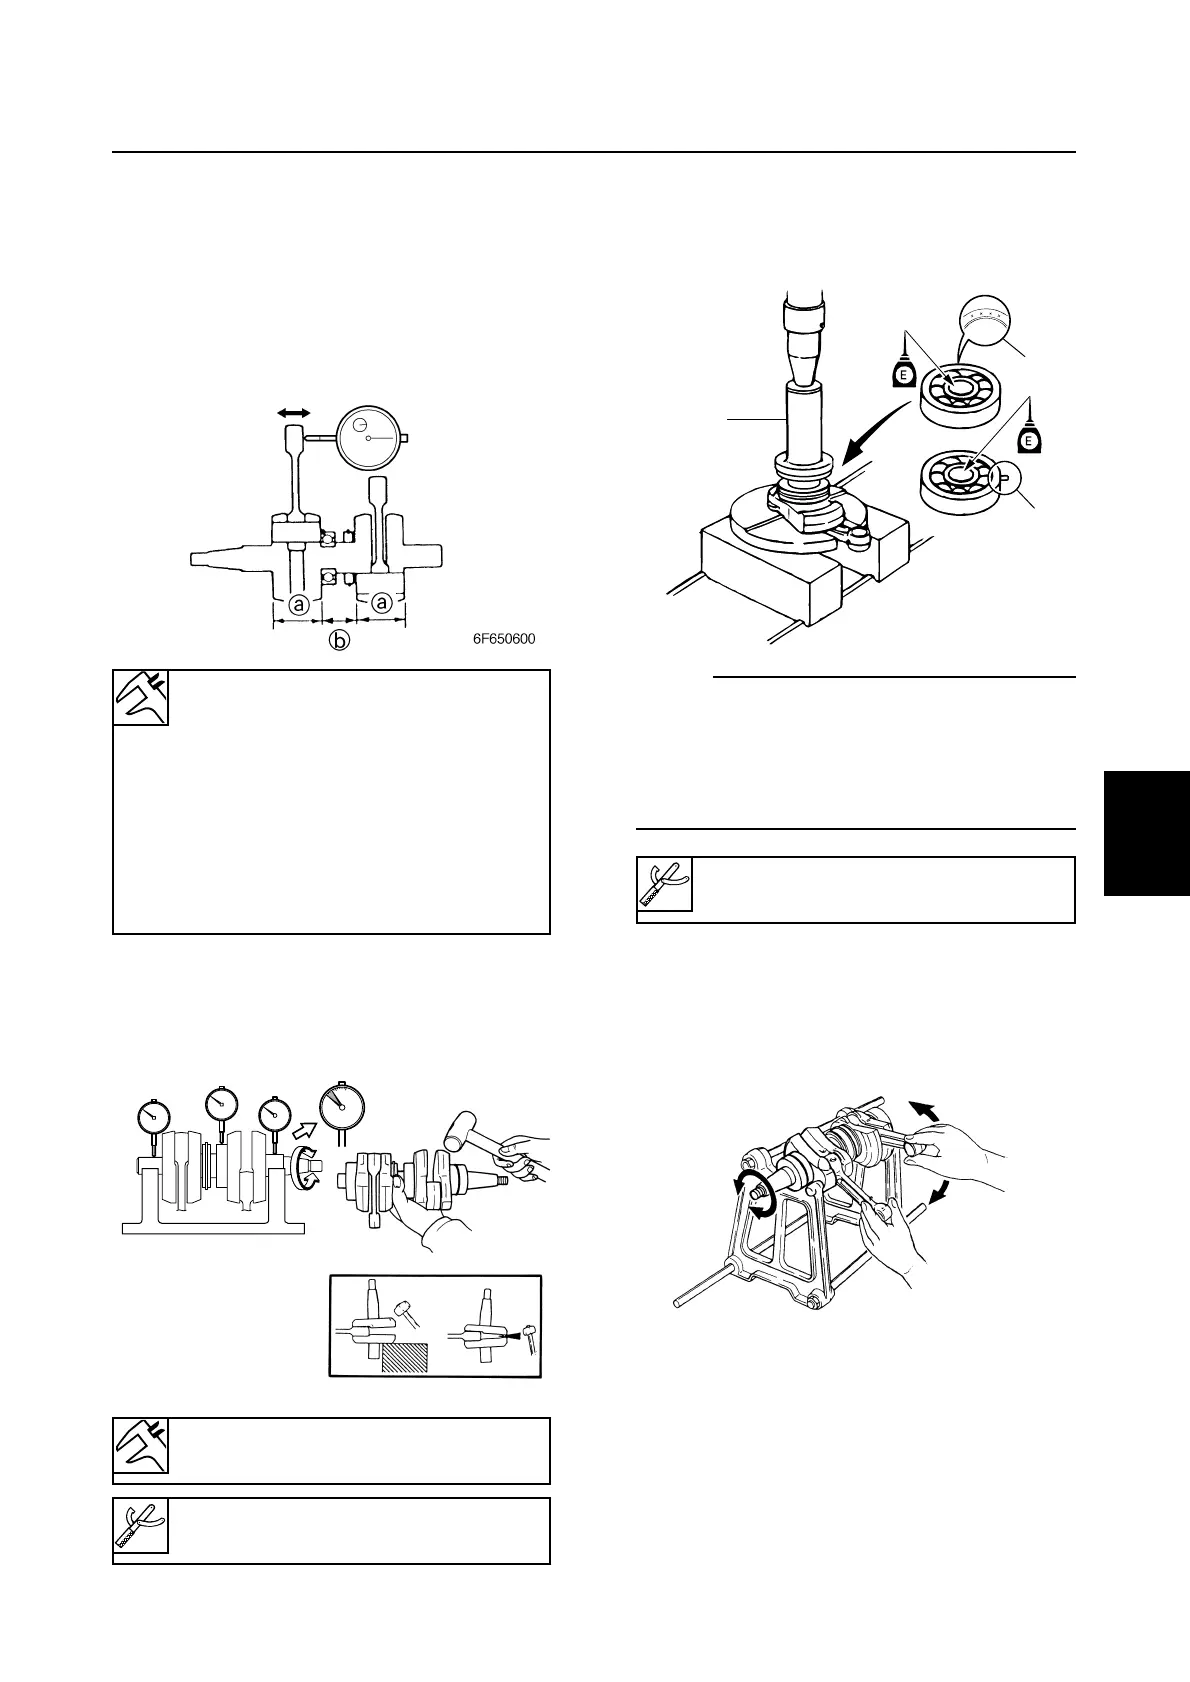
Checking the crankshaft
1. Measure the crankshaft widths a and b.
Repair or disassemble the crankshaft if
out of specification.
2. Measure the connecting rod small end
axial play. Replace the bearing and con-
necting rod if above specification.
3. Measure the crankshaft runout. Repair or
disassemble the crankshaft if above
specification.
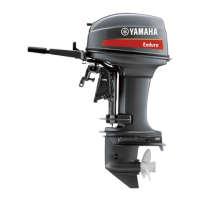
Installing the crankshaft bearings
1. Install the upper and lower bearings
using the bearing pressure C 1 and a
press.
NOTE:
9 Install the upper bearing so that the manu-
facture identification mark a faces the fly-
wheel magnet side.
9 Install the lower bearing so that the dowel
b faces the flywheel magnet side.
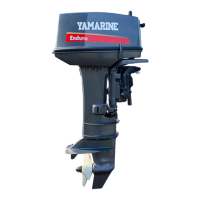
2. Slowly turn the crankshaft and connect-
ing rods. If it does not turn smoothly, dis-
assemble the crankshaft and adjust or
replace any parts as necessary.