FUEL
4-11
6F65G11
Fuel system
Checking the fuel pump
1. Place a drain pan under the fuel hose
connections, and then disconnect the
fuel hoses from the fuel pump.
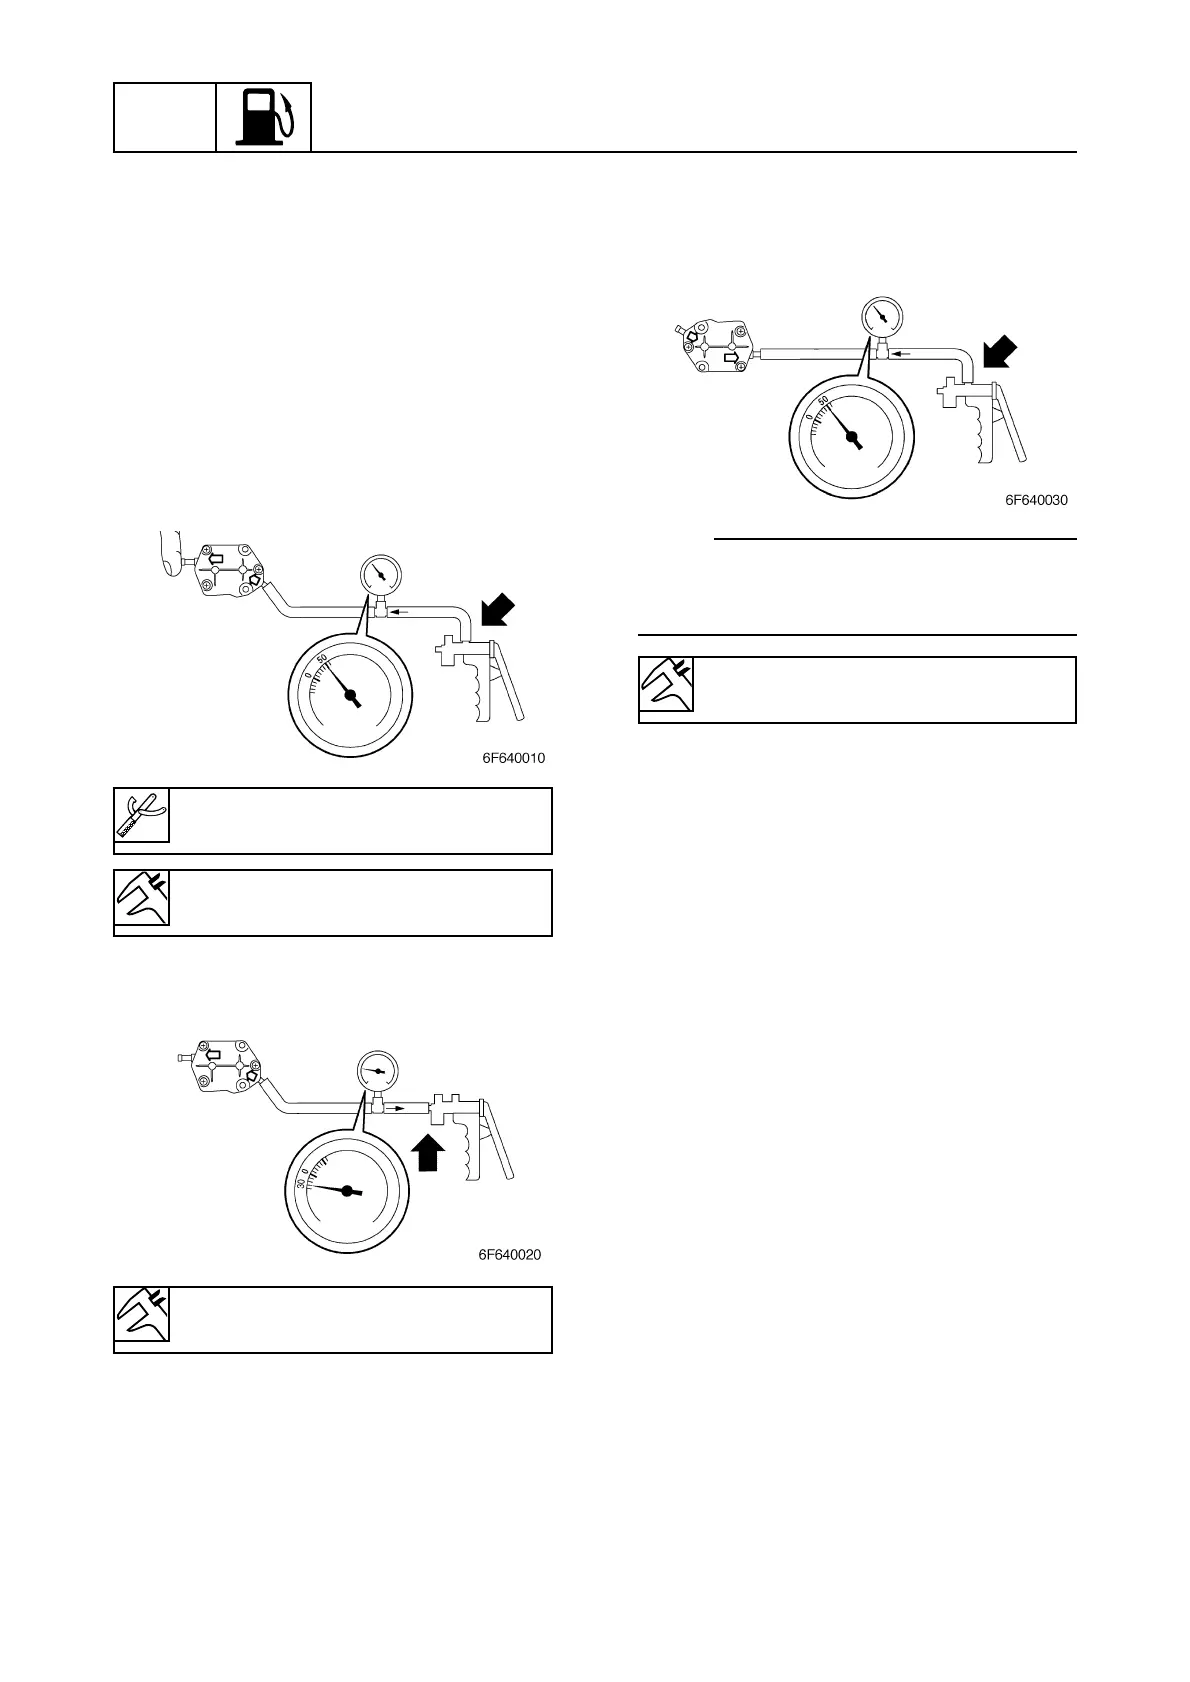
2. Connect the special service tool to the
fuel pump inlet.
3. Cover the fuel pump outlet with a finger,
and then apply the specified positive
pressure. Check that there is not air leak-
age.
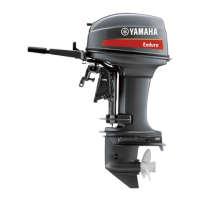
4. Apply the specified negative pressure
and check that there is no air leakage.
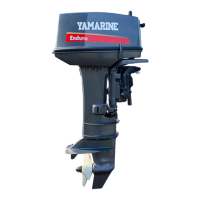
5. Connect the special service tool to the
fuel pump outlet.
6. Apply the specified positive pressure and
check that there is no air leakage.
Disassemble the fuel pump if necessary.
NOTE:
Assemble the fuel pump valve to the fuel
pump body, and moisten the inside of fuel
pump with gasoline to ensure a better seal.
Disassembling the fuel pump
1. Disassemble the fuel pump.
2. Check the diaphragms for tears or dam-
age. Replace if necessary.
3. Check the valves for bends or damage.
Replace if necessary. Also, check the fuel
pump body for damage. Replace if nec-
essary.
4. Clean the fuel pump body.
Vacuum/pressure pump gauge set:
90890-06756
Specified pressure:
50 kPa (0.5 kgf/cm
2
, 7.3 psi)
Specified pressure:
30 kPa (0.3 kgf/cm
2
, 4.4 psi)
Specified pressure:
50 kPa (0.5 kgf/cm
2
, 7.3 psi)