3-31
PERIODIC MAINTENANCE
EAS30811
CHECKING THE COOLANT LEVEL
1. Stand the vehicle on a level surface.
• Place the vehicle on a maintenance stand.
• Make sure the vehicle is upright.
2. Check:
• Coolant level
The coolant level should be between the
maximum level mark “a” and minimum level
mark “b”.
Below the minimum level mark → Add the
recommended coolant to the proper level.
ECA21281
• Adding water instead of coolant dilutes the
antifreeze concentration of the coolant. If
water is used instead of coolant; check,
and if necessary, correct the antifreeze
concentration of the coolant.
• Use only distilled water. However, if dis-
tilled water is not available, soft water may
be used.
3. Start the engine, warm it up for several min-
utes, and then turn it off.
4. Check:
• Coolant level
Before checking the coolant level, wait a few
minutes until it settles.
EAS30812
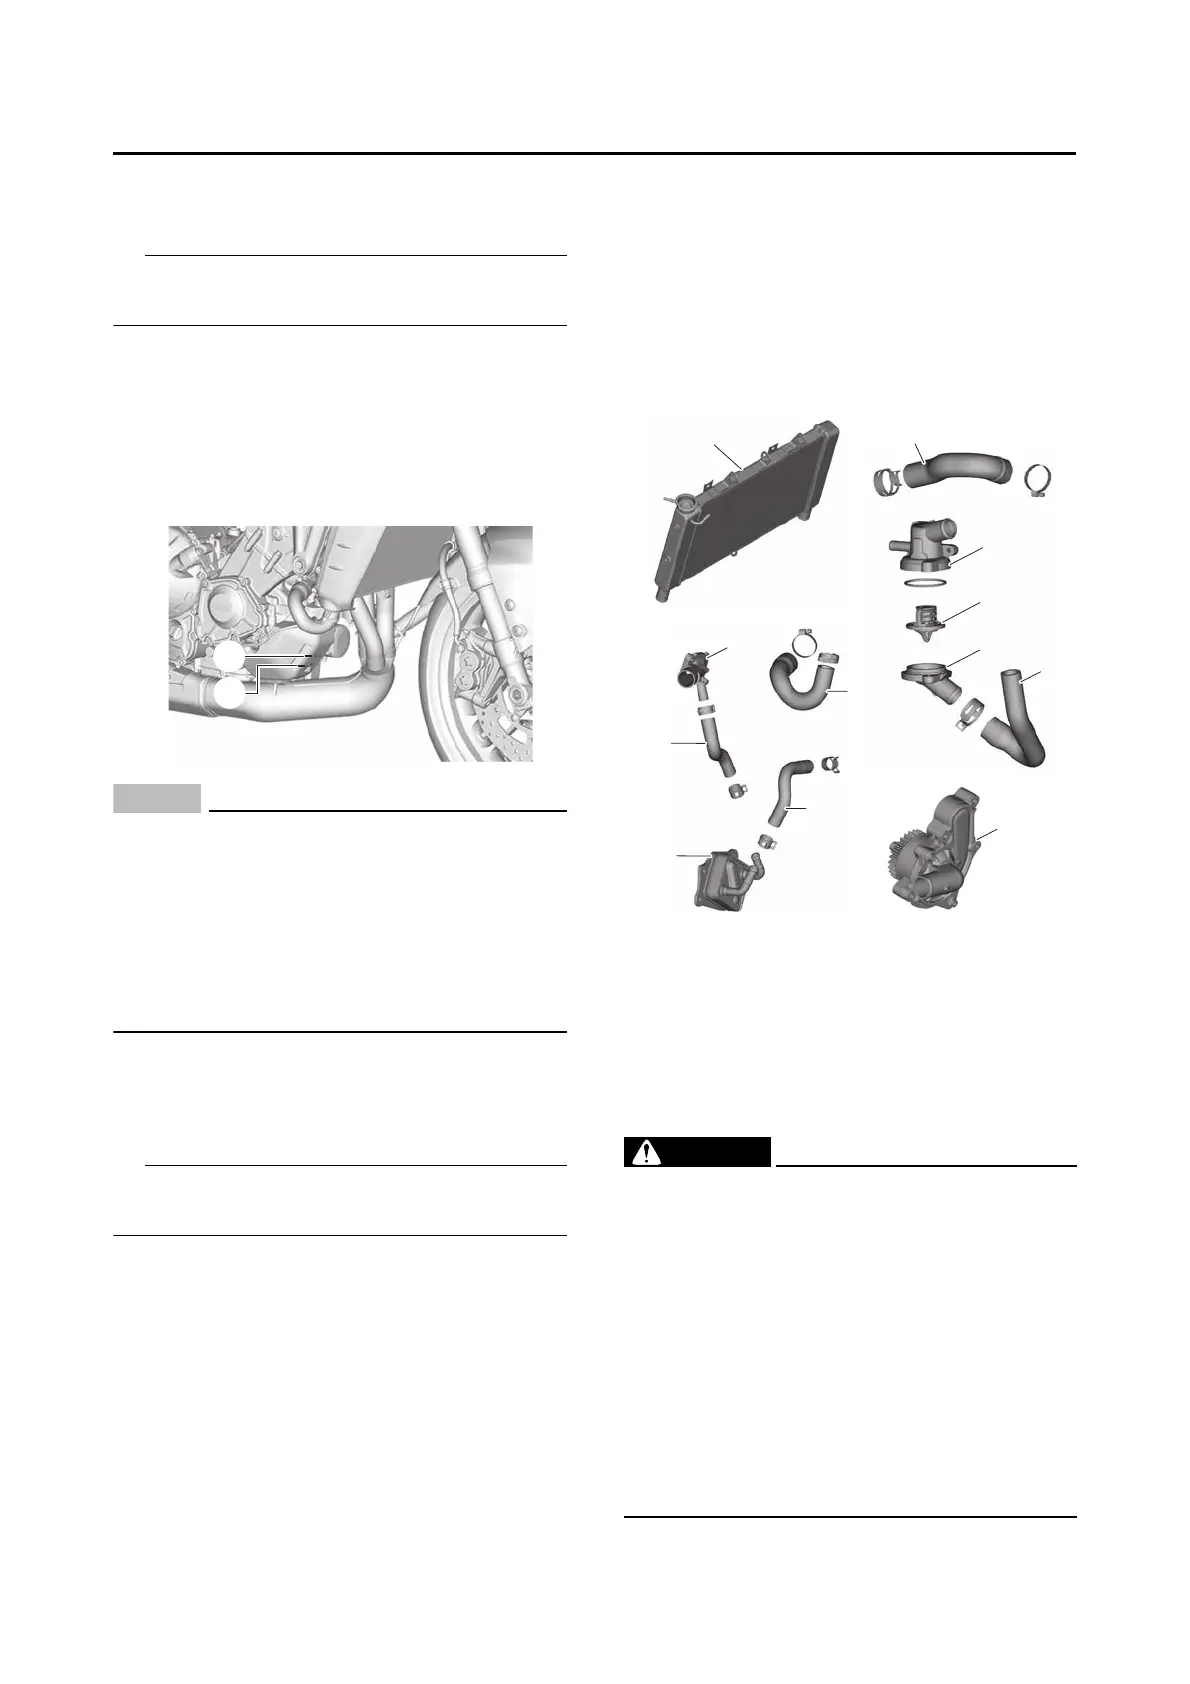
CHECKING THE COOLING SYSTEM
1. Check:
• Radiator “1”
• Water pump inlet hose “2”
• Thermostat housing “3”
• Thermostat “4”
• Thermostat cover “5”
• Radiator outlet hose “6”
• Water pump “7”
• Radiator inlet hose “8”
• Oil cooler outlet hose “9”
• Water jacket joint “10”
• Oil cooler inlet hose “11”
• Oil cooler “12”
Cracks/damage → Replace.
Refer to “RADIATOR” on page 6-3, “OIL
COOLER” on page 6-7, “THERMOSTAT” on
page 6-9, and “WATER PUMP” on page 6-
11.
EAS30813
CHANGING THE COOLANT
1. Remove:
• Front side panel (right side)
Refer to “GENERAL CHASSIS (1)” on
page 4-1.
• Radiator cap “1”
WARNING
EWA13030
A hot radiator is under pressure. Therefore,
do not remove the radiator cap when the en-
gine is hot. Scalding hot fluid and steam may
be blown out, which could cause serious in-
jury. When the engine has cooled, open the
radiator cap as follows:
Place a thick rag or a towel over the radiator
cap and slowly turn the radiator cap counter-
clockwise toward the detent to allow any re-
sidual pressure to escape. When the hissing
sound has stopped, press down on the radi-
ator cap and turn it counterclockwise to re-
move.