5-75
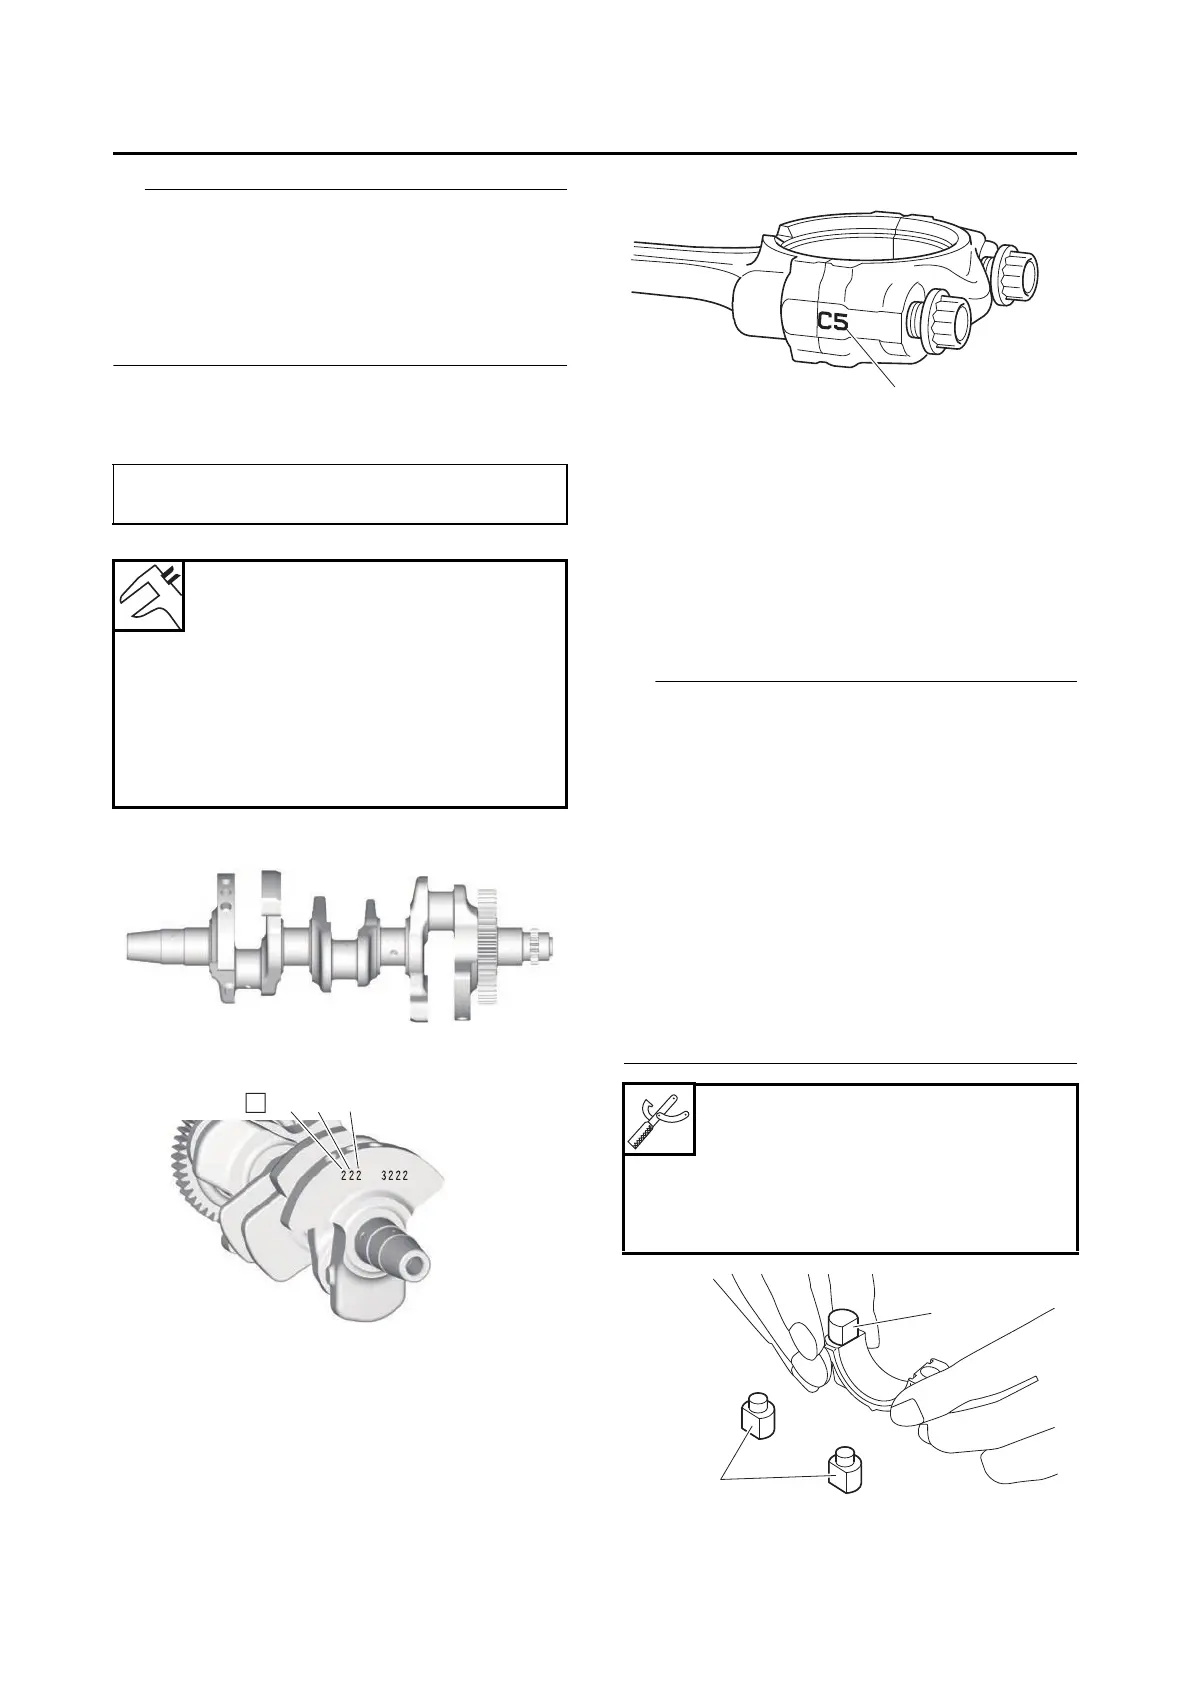
CONNECTING RODS AND PISTONS
• The numbers “A” stamped into the crankshaft
web and the numbers “1” on the connecting
rods are used to determine the replacement
big end bearings sizes.
•“P
1
”–“P
3
” refer to the bearings shown in the
crankshaft illustration.
For example, if the connecting rod “P
1
” and
the crankshaft web “P
1
” numbers are 5 and 2
respectively, then the bearing size for “P
1
” is:
EAS30751
INSTALLING THE CONNECTING ROD AND
PISTON
The following procedure applies to all of the con-
necting rods and pistons.
1. Install:
• Big end bearing
• Connecting rod cap
(onto the connecting rod)
• Be sure to reinstall each big end bearing in its
original place.
• From the 3 types, choose the connecting rod
big end metal installer “1” that fits exactly, and
install it to the connecting rod and connecting
rod cap as shown in the illustration.
• Align the projections “a” on the big end bear-
ings with the notches “b” in the connecting rods
and connecting rod caps.
• Push the big end bearing “2” down and install it
to the connecting rod and connecting rod cap.
• Make sure that the projection “c” on the con-
necting rod cap faces the same direction as the
“Y” mark “d” on the connecting rod.
“P
1
” (connecting rod) - “P
1
” (crankshaft) = 5 - 2
= 3 (brown)
Bearing color code
Code 1
Blue
Code 2
Black
Code 3
Brown
Code 4
Green
Connecting rod big end bearing
installer
90890-04193
Connecting rod big end bearing
installer
YM-04193