33www.zcorp-users.com
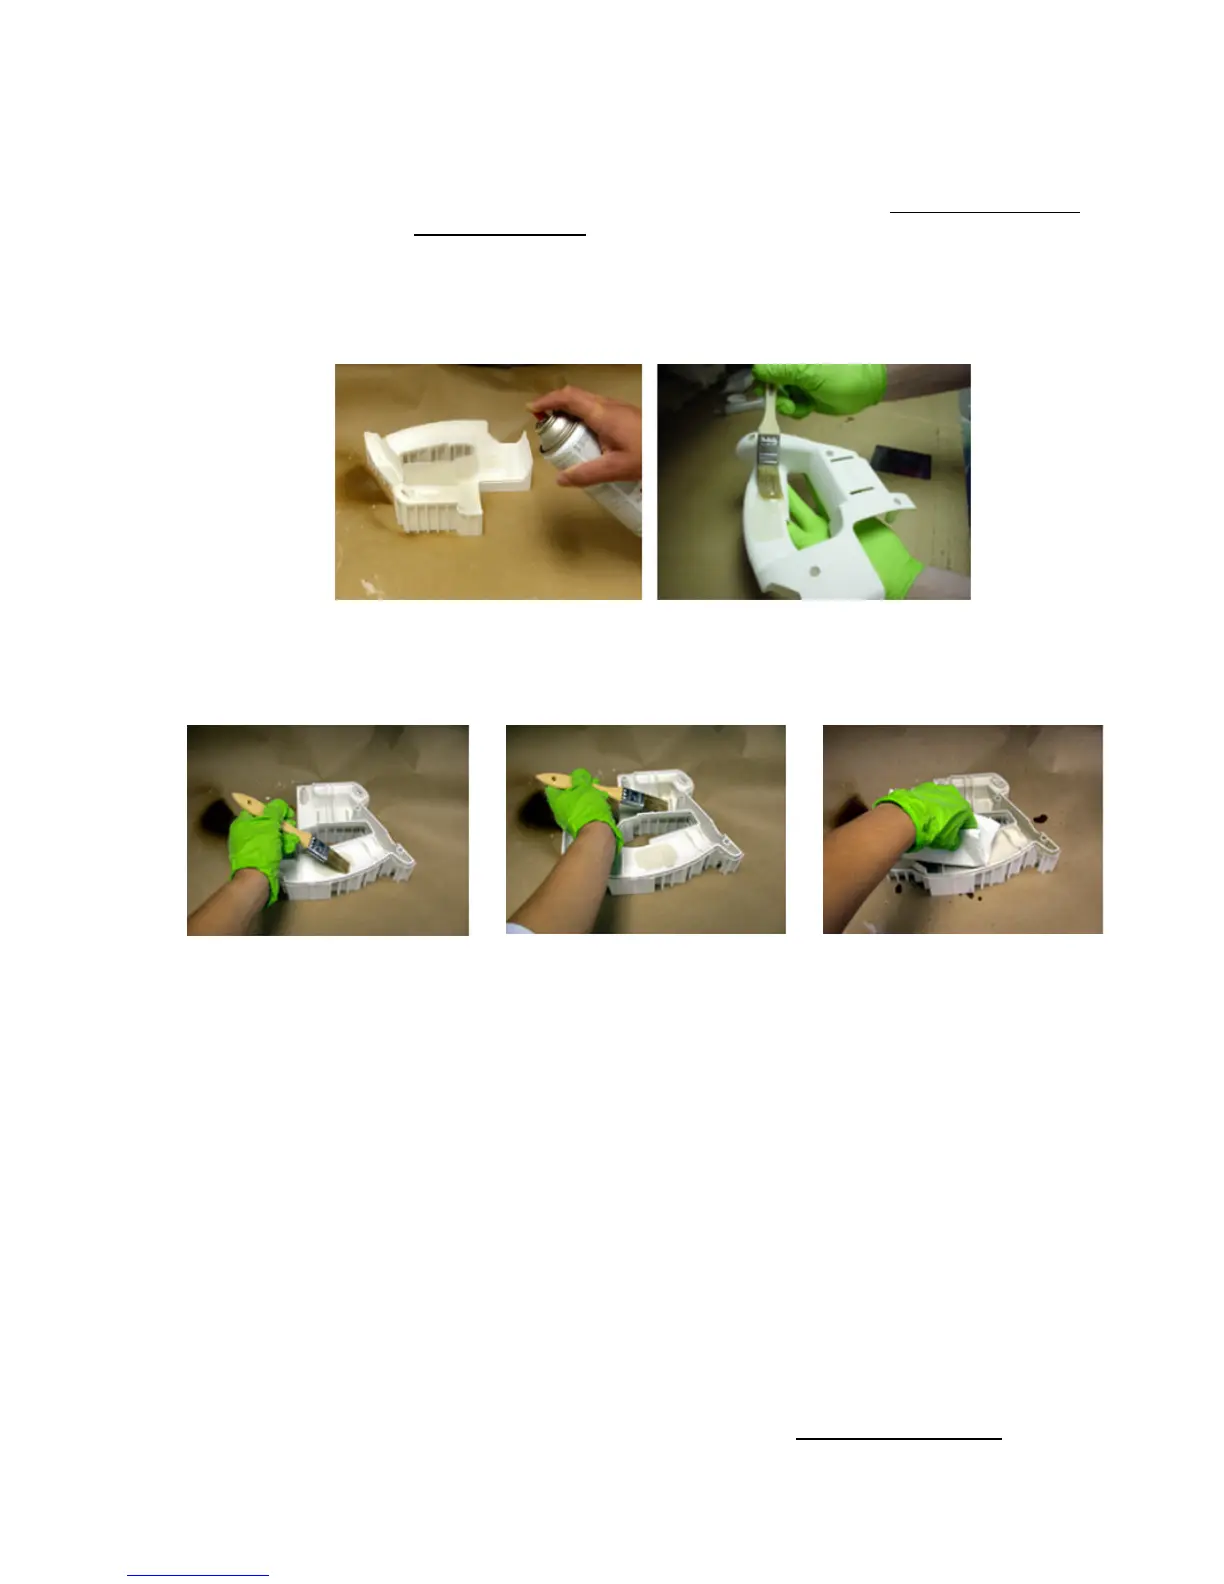
4. Apply a silicone mold release (such as IMS Paintable Neutral Oil Mold Release – www.imscompany.com or
Hapco GREASE-IT FDG - www.hapcoweb.com) liberally onto the top surface of the fixture where the part will
make contact with the fixture. This is done to prevent the infiltrated part from adhering to the fixture during the
infiltration process.
5. Gently apply Z-Snap or Z-Max epoxy to the bottom surface of the part and carefully place the part back onto the
fixture.
6. Apply Z-Snap or Z-Max epoxy to the rest of the part. Do not apply excess epoxy as pooling will occur. Several
thin coats are better than one thick coat. Use a paper towel or tissue paper to remove excess epoxy that may
have pooled on the surface of the part.
7. Let the part sit for 30 minutes at room temperature to allow excess Z-Snap epoxy to drain or wick into the
fixture. Z-Max parts should sit at ambient for 1 hour prior to the oven cure.
8. If using Z-Snap epoxy place the part with fixture into an oven for 30 minutes at 120°F (49°C). This step reduces
the occurrence of unsightly bubbling or pooling of the resin. If using Z-Max, parts should be oven cured for an
additional 2 hours at 160°F (71°C).
9. Parts infiltrated with Z-Snap should then be cured for an additional 2 hours in the oven at 165°F (74°C). Do not
place on the build plate.
10. Let the part sit for 30 minutes at room temperature to cool before handling.
INFILTRATION ADDENDUM
Parts with large unsupported overhangs that are difficult to manually handle without breaking should be left on the
fixture. Remove as much powder as possible from the top and side surfaces while the part is on the fixture.
Lightly infiltrate the exposed top surfaces of the part with Z-Snap or Z-Max epoxy. DO NOT apply too much
infiltrant to prevent the infiltrant from wicking through to the bottom side of the part. Cure the part for one hour at
165°F (74°C). Do not place on the build plate.
For more information, please contact one of our applications engineers at applications@zcorp.com.