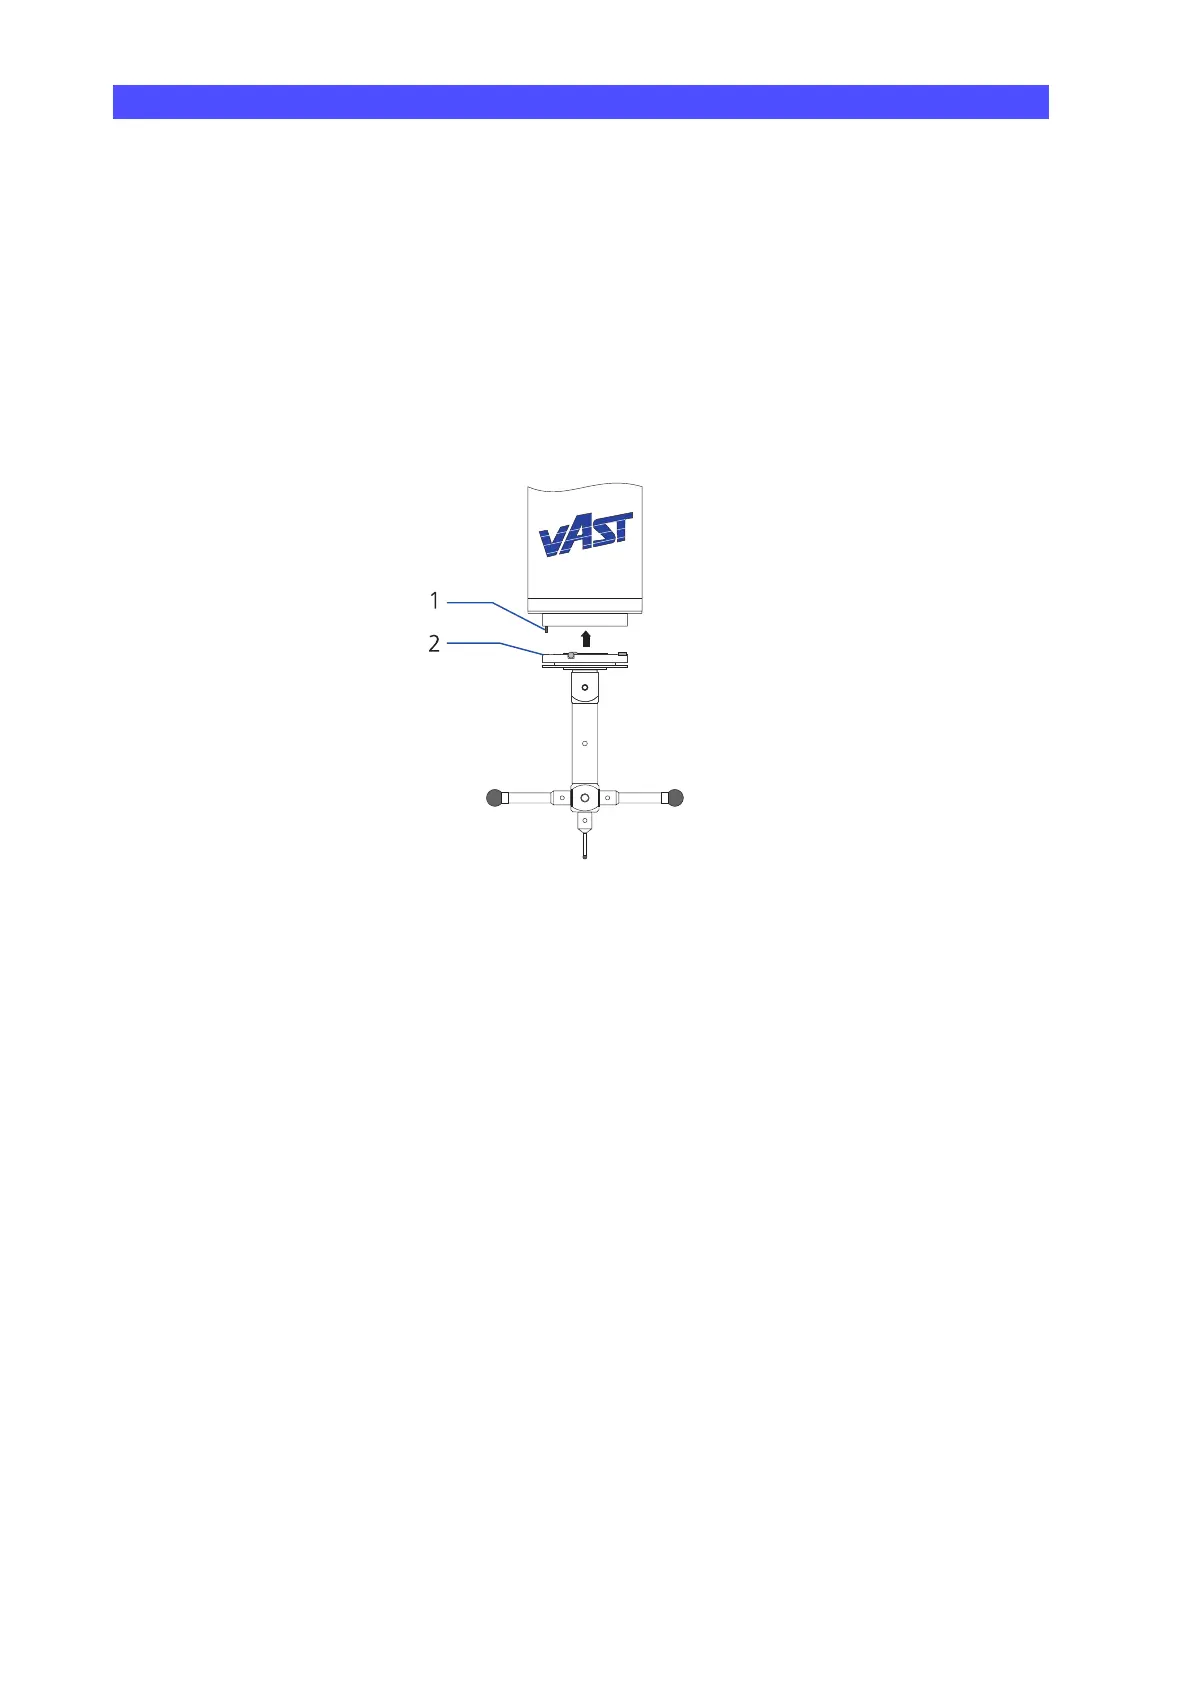
Inserting / removing the probe
6-17CenterMax Operating Instructions61211-1020202
2 Insert the probe in the adapter plate receptacle.
The pin must engage in the groove ➤ drawing. The probe is
attracted by the magnet. The completion of probe insertion is sig-
naled by an audible click.
Position of the pin The pin position in the adapter plate receptacle depends on the
probe system.
VAST: pin on the left side.
1 Pin in the probe head adapter plate receptacle
2 Groove in the adapter plate.
Removing the probe (manually)
The procedure for removing a probe is basically the same for all probe
systems. However, several special points must be observed. First, the
procedure must be initiated by the measuring software.
• Please read the corresponding chapters in the operating instruc-
tions for the measuring software.
1 Initiate the procedure via the measuring software.
With the VAST probe system, the delay required until the probe is
released from the adapter plate receptacle must be specified in the
measuring software.
Set the delay so that enough time always remains to grasp the
probe after initiating probe removal. This is essential to prevent
damage to probes, workpieces, or the measuring table caused by
falling probes.
2 Remove the probe.