Installation and Maintenance Manual - Aastra 5000 AMT/PTD/PBX/0058/4/6/EN
Maintenance 01/2011 Page 411
PROCEDURE
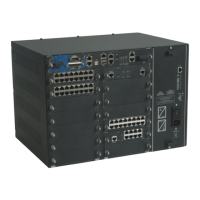
See Figure 4.3 for an overview of the power supply module.
Table 1:
OPERATION DETAILS OF THE OPERATION / COMMENTS
• Alert the operator. • In the case of remote operation, contact the remote operator
before starting any operation.
• Check the functional
technical state of the new
power supply module.
• Check that the functional technical state of the new power supply
module is compatible with the old one.
• Power off the power
supply module to be
removed.
• Refer to Section 6.4, Stopping the system (AXD, AXL, AXS,
AXS12 and AXS6)Error! No bookmark name given.
Avertissement : For a duplex configuration,
when a power supply module is out of service, the operator
has approximately 90 seconds to replace and power on
again the power supply module. After 90 seconds, the
second power supply module is automatically powered off.
• In a simplex configuration, if it is an iPBX with multiple cabinets,
power off the power supply module of the main cabinet then
those of the expansion cabinets.
• Disconnect the mains
cable.
• Disconnect the mains cable on the front panel of the power
supply module.
• Pull out the power supply
module.
• Unscrew the two securing screws on the front panel of the power
supply module.
• Pull out the power supply module using its handles, and remove
it.
• Fit the new power supply
module.
• Check that the new power supply module is powered off (“I/O”
switch set to “O”).
• Insert the power supply module in its slot and push it fully home.
• Secure the power supply module onto the iPBX structure using
its two captive screws.
• Connect the mains cable. • Connect the mains cable on the front panel of the power supply
module.
• Power on the power
supply module.
• "I/O" switch on "I".
• For a simplex configuration, if it is an iPBX with several cabinets:
- First power on the power supply module in the expansion
cabinets.
- then power on the power supply module in the main cabinet.
• Check the status of the
indicators on the front
panel.
Refer to Section 4, Description des sous-ensemblesError! No
bookmark name given.