Installation and Maintenance Manual - Aastra 5000 AMT/PTD/PBX/0058/4/6/EN
Installation and activation 01/2011 Page 317
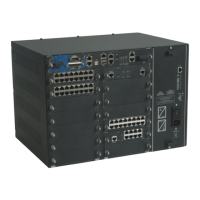
6.2.3 Installing a cabinet (AXL, AXS, AXS12 and AXS6)
The various installation options of an Aastra XS/XL cabinet are given in the following
table:
TABLEAU 6.2 OPTIONS FOR INSTALLING A CABINET
1) If laid on a piece of furniture, a CPU and a PC console may be superimposed in the
AXS, AXS12 or AXS6 cabinet.
2) The cabinets in an A2XS, A2XL or A3XL version can be placed on a piece of furniture,
on top of one another.
3) When mounting a cabinet on a wall (AXS, AXS12 or AXS6), the front panel of the
cabinet can face upwards or downwards. However, we recommend turning it upwards.
A minimum clearance is required for air circulation:
• 55 mm on the left and right side for AXS, AXS12 and AXS6 cabinets.
Read the environmental constraints described in section 6.2.1.3.
Hardware required
• 1 mounting kit (2 brackets + 4 screws)
• 4 pins and 4 securing screws for wall mounting
• Screws and captive nuts for fitting in a rack
CABINET STACKED INSIDE A CABINET ON A WALL
AXS/AXS12/
AXS6
(1) (2)
With 2-position mounting kit:
•Flush position
Vertically 3)
AXL (2) With 2-position mounting kit
(flush and recessed)
Not