Chapter 8. Point of Sale (POS)
1 From the
Sales Variable Maintenance Menu, select 2 for Addons.
2 The computer displays another menu:
DSVM0102 Sales Add-Ons DIM11 DATA Date mm/dd/yy
Rev11.0.1 Port 37
Store 01
Store Number 1
Choose Selection:
+---------------------------------------+
| 1. Sales Add-ons |
| 2. Functional Add-ons |
| |
| 98. Change Store |
+---------------------------------------+
<Esc>=End
Check the displayed store number. Change if necessary (select 98 and enter the
appropriate store number). Select 1 for
Sales Addon-ons.
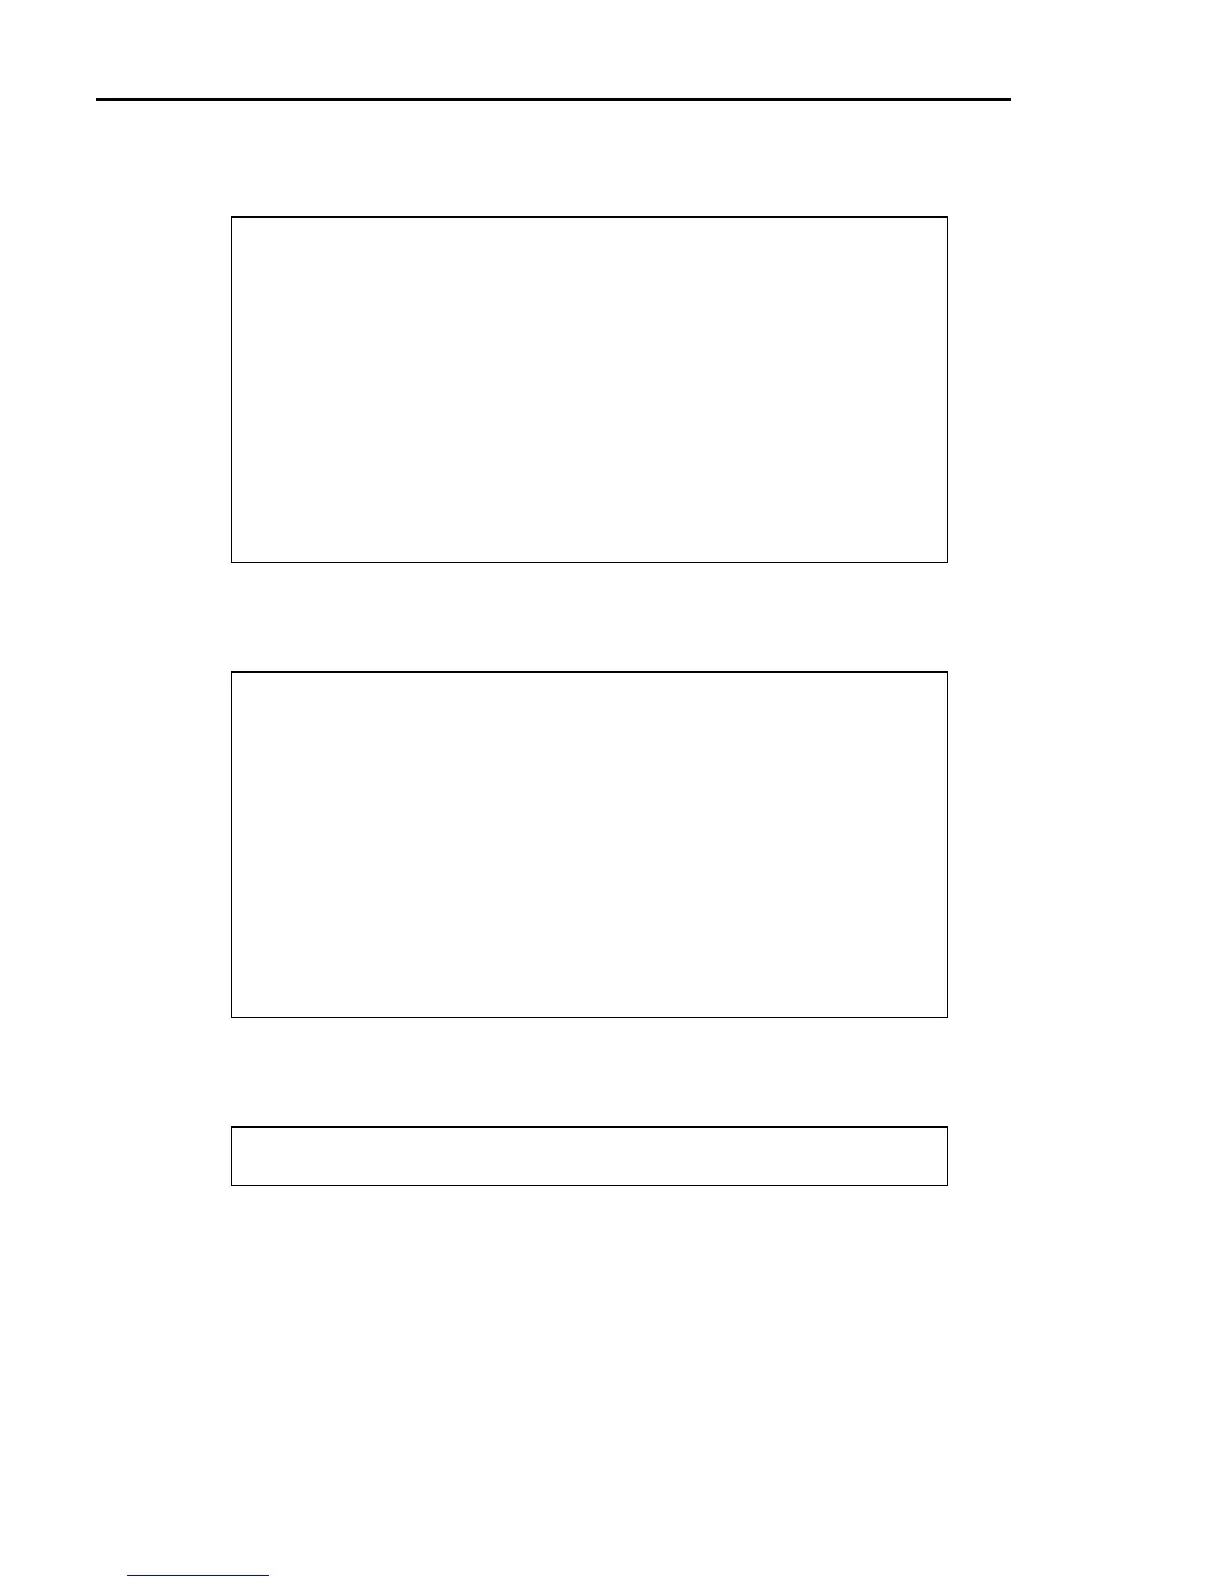
3 The computer displays the Sales Add-ons screen:
DSVM0102 Sales Add-Ons DIM11 DATA Date mm/dd/yy
Rev11.0.1 Port 37
Store 01
1. Add-on Code (1-99) 0
2. Description
3. Add-on G/L Account
4. Tax Status
5. Discountable
6. Add-on Type
7. Add-on Entry Type
<Esc>=End <Tab>=Go Forward One Field <F1>=Help
The cursor is positioned at 1. Add-on Code (1-99). You can add new addons or change
existing addons. Enter the addon code you wish to add or change.
4 If adding a new addon code, the computer displays:
Record Doesn’t Exist – (A)dd Record (V)iew Next Record (E)nd
Enter A to add this record and continue by entering the fields. If viewing an
existing addon code, the entries are filled in for the selected store and addon code.
Use C for
Change or F for Change by Field.
5 Fill in the fields as determined on the worksheet above for each addon code.
6 If needed, check the entries for other stores. Repeat Steps 4-5, entering the
appropriate store number.
7 After verifying these fields, return to the
Sales Variable File Maintenance Menu.
330 Dimensions 14