ELECTRONIC FUEL INJECTION
5-114
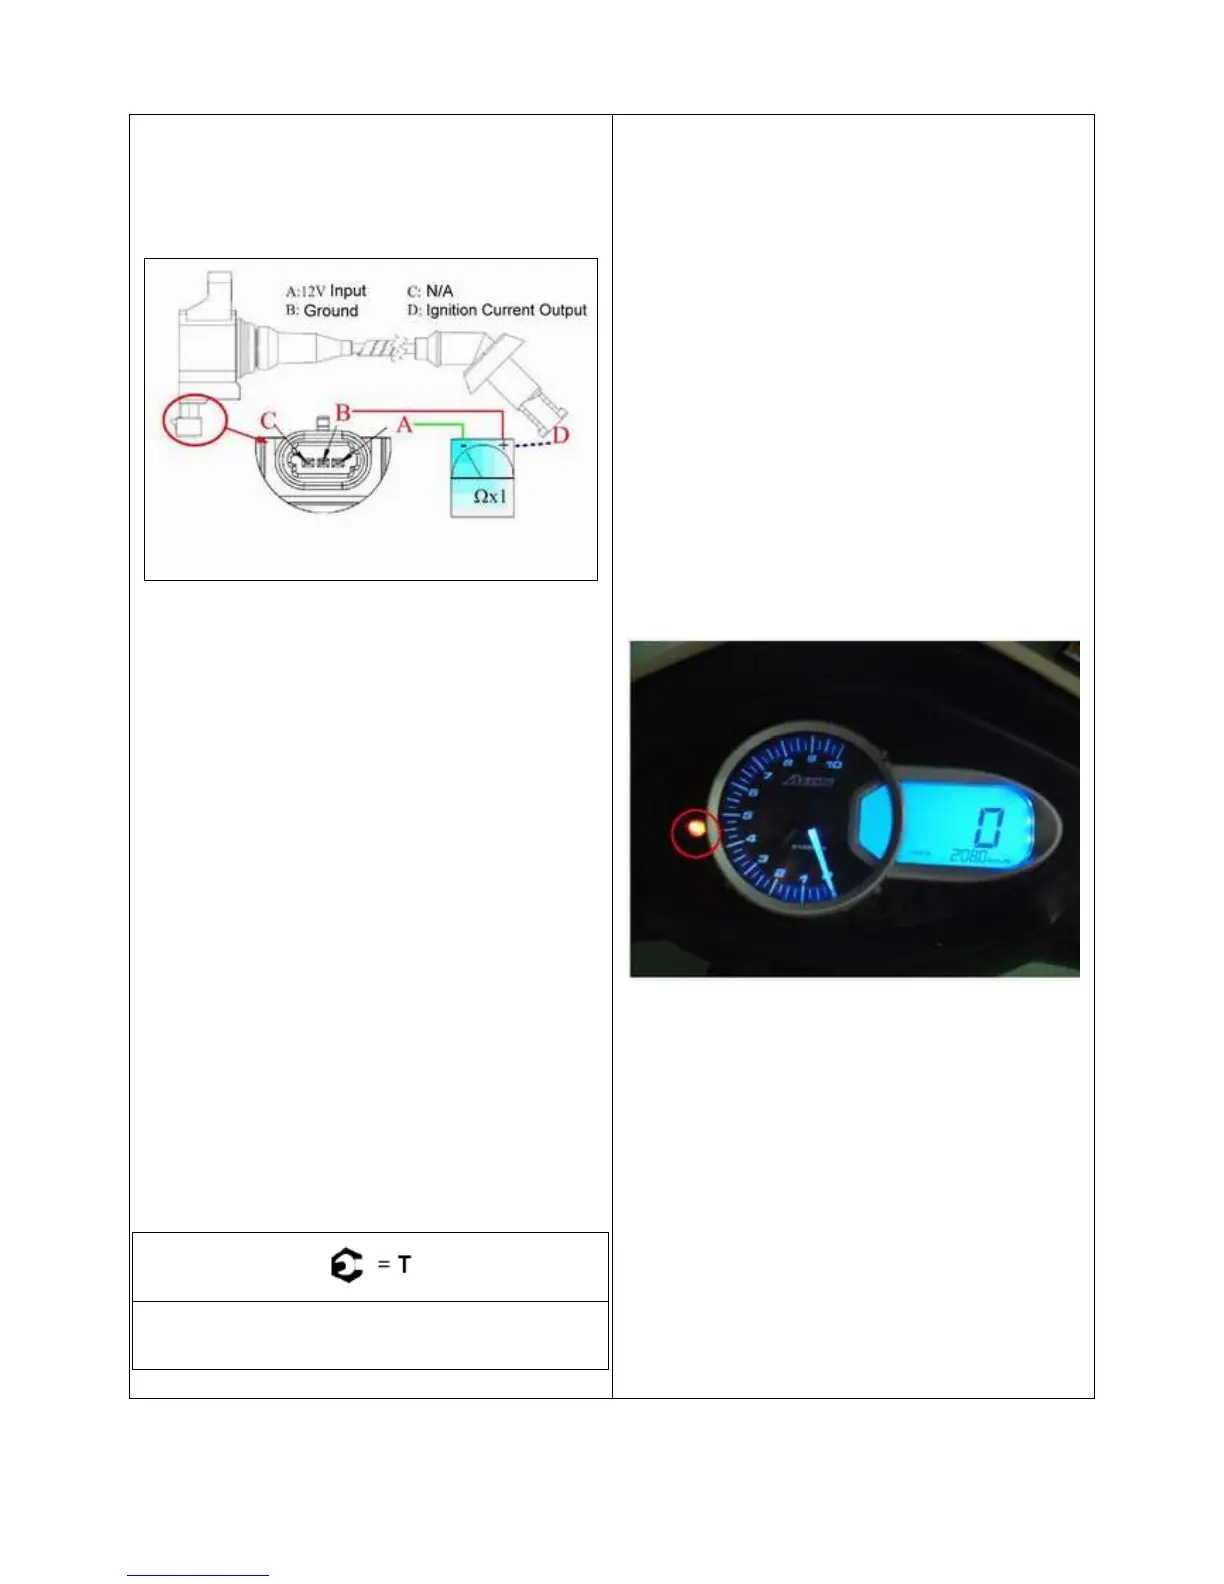
IGNITION COIL TEST
Using an ohmmeter can test the ignition coil. Use the
following illustration and specification table to test the ignition
coil.
1. Disconnect ignition coil from engine spark plug.
2. Connect the red voltmeter test probe in “B” port and black
voltmeter test probe in the “D” and set the meter to read VDC.
3. Start the engine and the volt value should be around 2.5KV.
4. Disconnect ignition coil from engine and main harness.
5. Connect an ohmmeter between the “A” and “B” terminals.
A resistance value of 0.7~1.3Ω at room temperature (25℃
/ 77℉) should be obtained.
6. Connect an ohmmeter between the “A” and “B” terminals.
A resistance value of 7KΩ~1.3KΩ at room temperature (25
℃ / 77℉) should be obtained.
IGNITION COIL REPLACEMENT
1. Remove the seat.
2. Remove the storage box.
3. Disconnect ignition coil from engine spark plug and main
harness.
4. Remove the fastener bolt and ignition coil.
5. Install the new ignition coil.
Ignition Coil Retaining Bolt Torque:
8 Nm (71 in. lbs.)
DIAGNOSTIC “BLINK CODES”
NOTE: The EFI diagnostic mode is intended to
quickly view the cause of the “Check Engine” light.
To recall blink codes (fail codes) from the ECU:
1. Verify the key switch is off and the transmission is in
neutral with the parking brake applied.
2. Turn the key switch ON and OFF 3 times within 5 seconds
and leave the key switch in the ON position on the third turn.
The word “Wait” will appear as the ECU searches for blink
codes.
3. Any “blink codes” stored in the ECU will display a
numerical “blink code”, one at a time, in numerical order, on
the instrument cluster display.
4. The word “End” and/or the number “61” will display after
all of the codes have been displayed or if no codes are present.