LIGHT SYSTEM
IF THE HEADLIGHT AND TAILLIGHT FAIL TO COME
ON, FOLLOWING PROCEDURE TO CHECKING.
◎
◎◎
◎ Fuse
Check the fuse (main, light system) continuity. If broken,
replace the fuse.
◎
◎◎
◎ Battery
Check the battery condition. The open-circuit voltage should
be 12.8 V or more at 20 °C (68 °F).
◎
◎◎
◎ Main Switch
Refer to “KEY/MAIN SWITCH” at above. If main switch
isn’t continuity, replace the main switch.
◎
◎◎
◎ Wire connection
Refer to “CIRCUIT DIAGRAM” to check properly connect
the light system. If light wires are poor continuity, repair the
wires.
◎
◎◎
◎ Light Switch
Refer to “ SWITCH SERVICE” to check properly connect the
light switch. If light switch is poor continuity, replace the
switch.
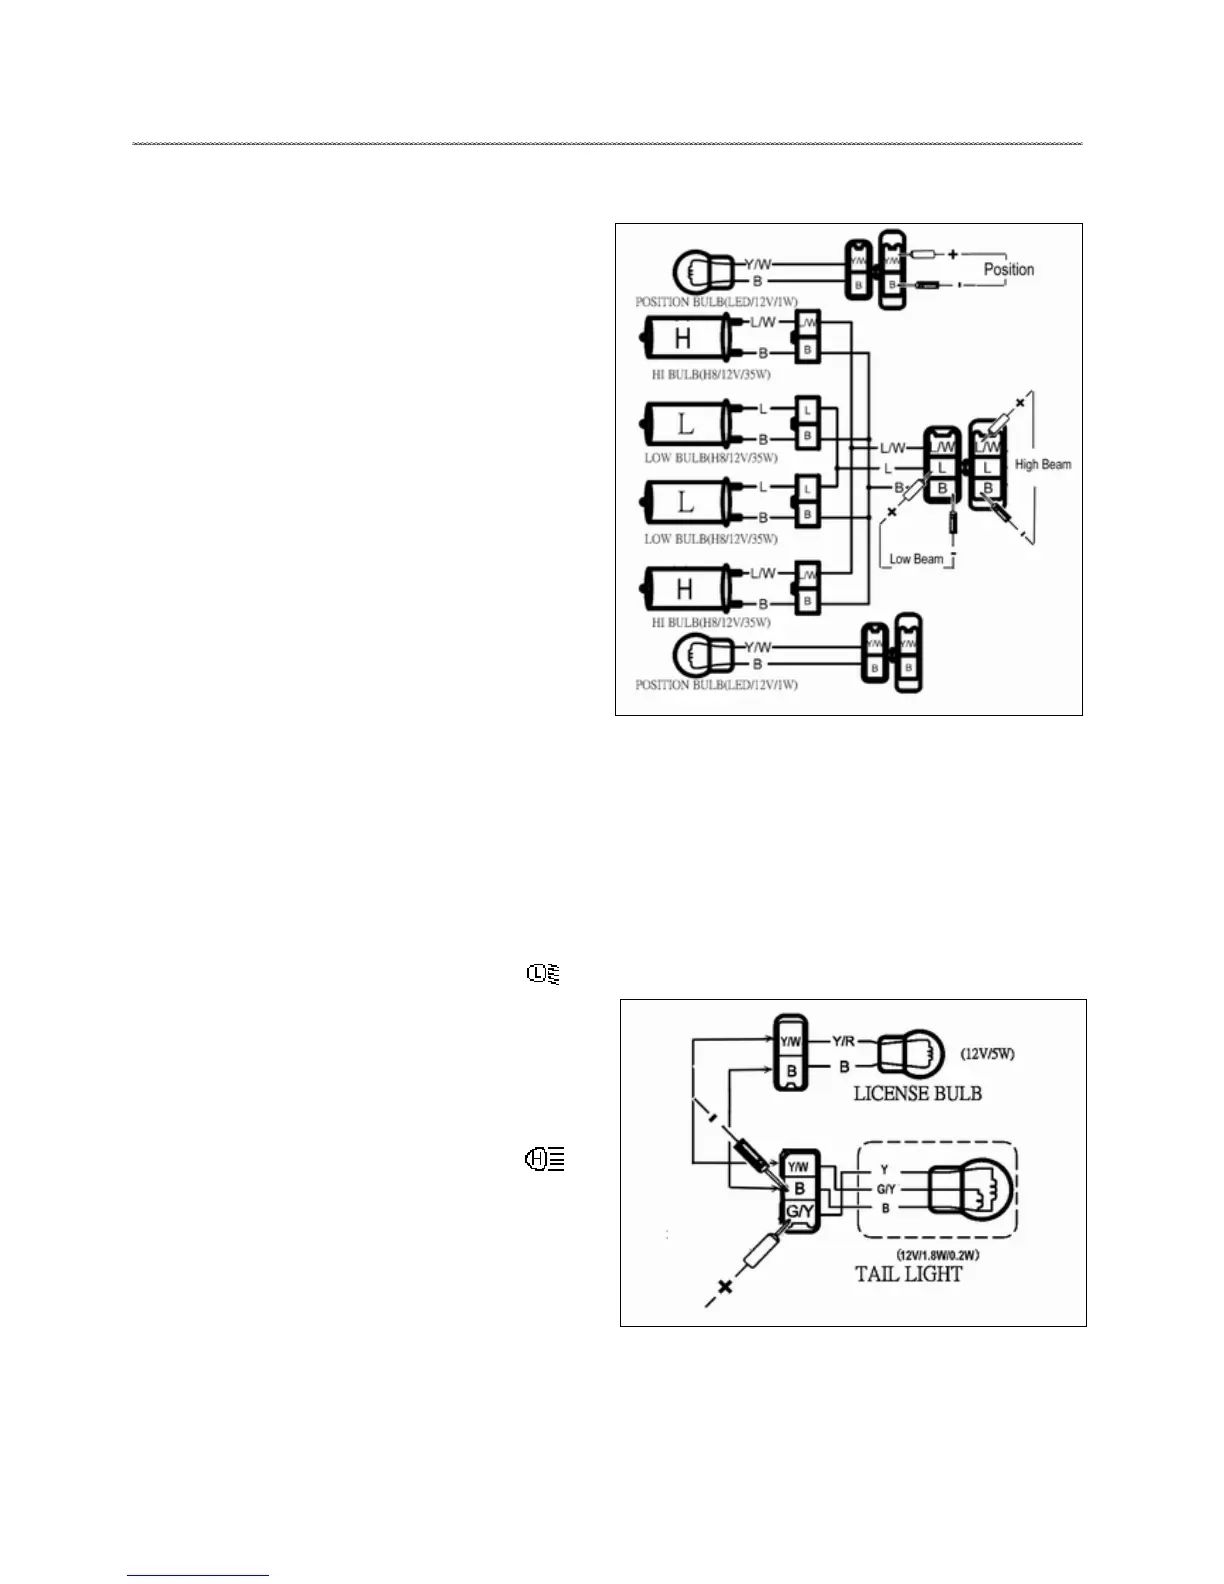
HEADLIGHT
1. Connect the multi-meter (DC 20 V) probe into the headlight
connector.
2. Turn the main switch” on” and beam switch on” ”.
Connect probe (+) into ”L” terminal and probe (-) into “B”
terminal. Both position and low beam bulb should come on.
3. Check the voltage (12 V) of the “W/L”
the bulb socket connector.
4. Turn the main switch” on” and beam switch on” ”.
Connect probe (+) into ”L/W” terminal and probe (-) into “B”
terminal. Both position and high beam bulb should come on.
5. Check the voltage (12 V) of the “L” and “B” terminals on
the bulb socket connector.
6. Turn the main switch” on” anyone beam switch. Connect
probe (+) into “Y/W” terminal and probe (-) into “B” terminal.
Both position and anyone beam bulb should come on.
7. If the wiring circuit from the main switch to the bulb socket
connector is faulty, repair or replace it.
TAILLIGHT AND LICENSE LAMP
1. Connect the multi-meter (DC 20 V) probe into the headlight
connector.
2. Turn the main switch” on” and connect probe (+) into ”G/Y”