BRAKE LIGHT SWITCH
Brake lever utilizes an electrical brake switch that sends voltage
to activate the brake light.
1. Locate the brake switches under the brake levers.
2. Disconnect wire harness from brake switch and connect an
ohmmeter across the two switch wires.
The reading should be infinite.
3. To act the brake lever and check for continuity between
switch contacts. Replace switch if there is no continuity or if the
resistance is greater than .5 ohms when the brake is applied with
slight pressure.
BULBS
Check each bulb and bulb socket for damage or wear, proper
connections, and also for continuity between the terminals.
Repair or replace the bulb, bulb socket or both. If they are
Damaged or worn.
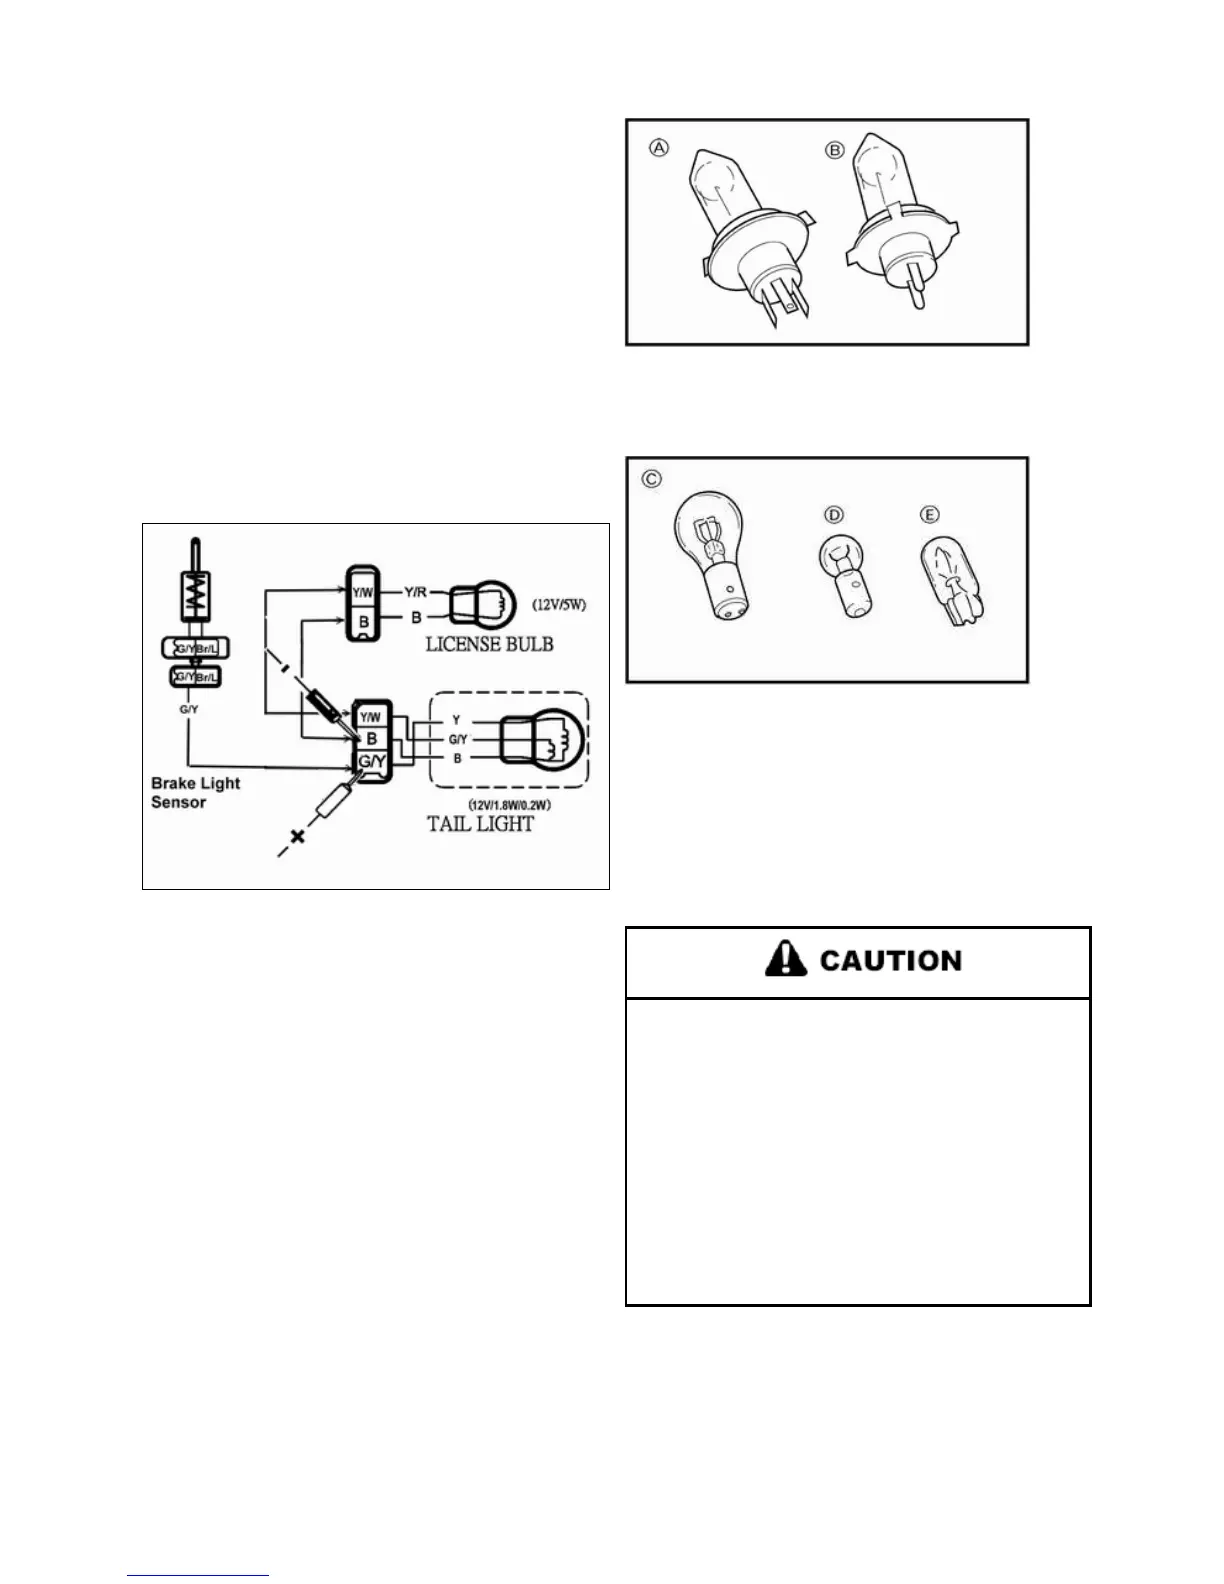
TYPES OF BULBS
The bulbs used on this scooter are shown in the illustration on
the left.
1. Bulbs A and B are used for headlights and usually use a bulb
holder which must be detached before removing the bulb. The
majority of these bulbs can be removed from their respective
socket by turning them counterclockwise.
2. Bulb C is used for turn signal and brake/tail lights and can be
removed from the socket by pushing and turning the bulb
counterclockwise.
3. Bulbs D and E are used for meter and indicator lights and can be
removed from their respective socket by carefully pulling them out.
BULB INSPECTION
The following procedure applies to all of the bulbs.
1. Remove bulb.
Be sure to hold the socket firmly when removing
the bulb. Never pull the lead; otherwise it may be
pulled out of the terminal in the coupler.
Avoid touching the glass part of the headlight bulb
to keep it free from oil, otherwise the transparency
of the glass, the life of the bulb and the luminous
flux will be adversely affected. If the headlight bulb
gets soiled, thoroughly clean it with a cloth
moistened with alcohol or lacquer thinner.