ENGINE
4-64
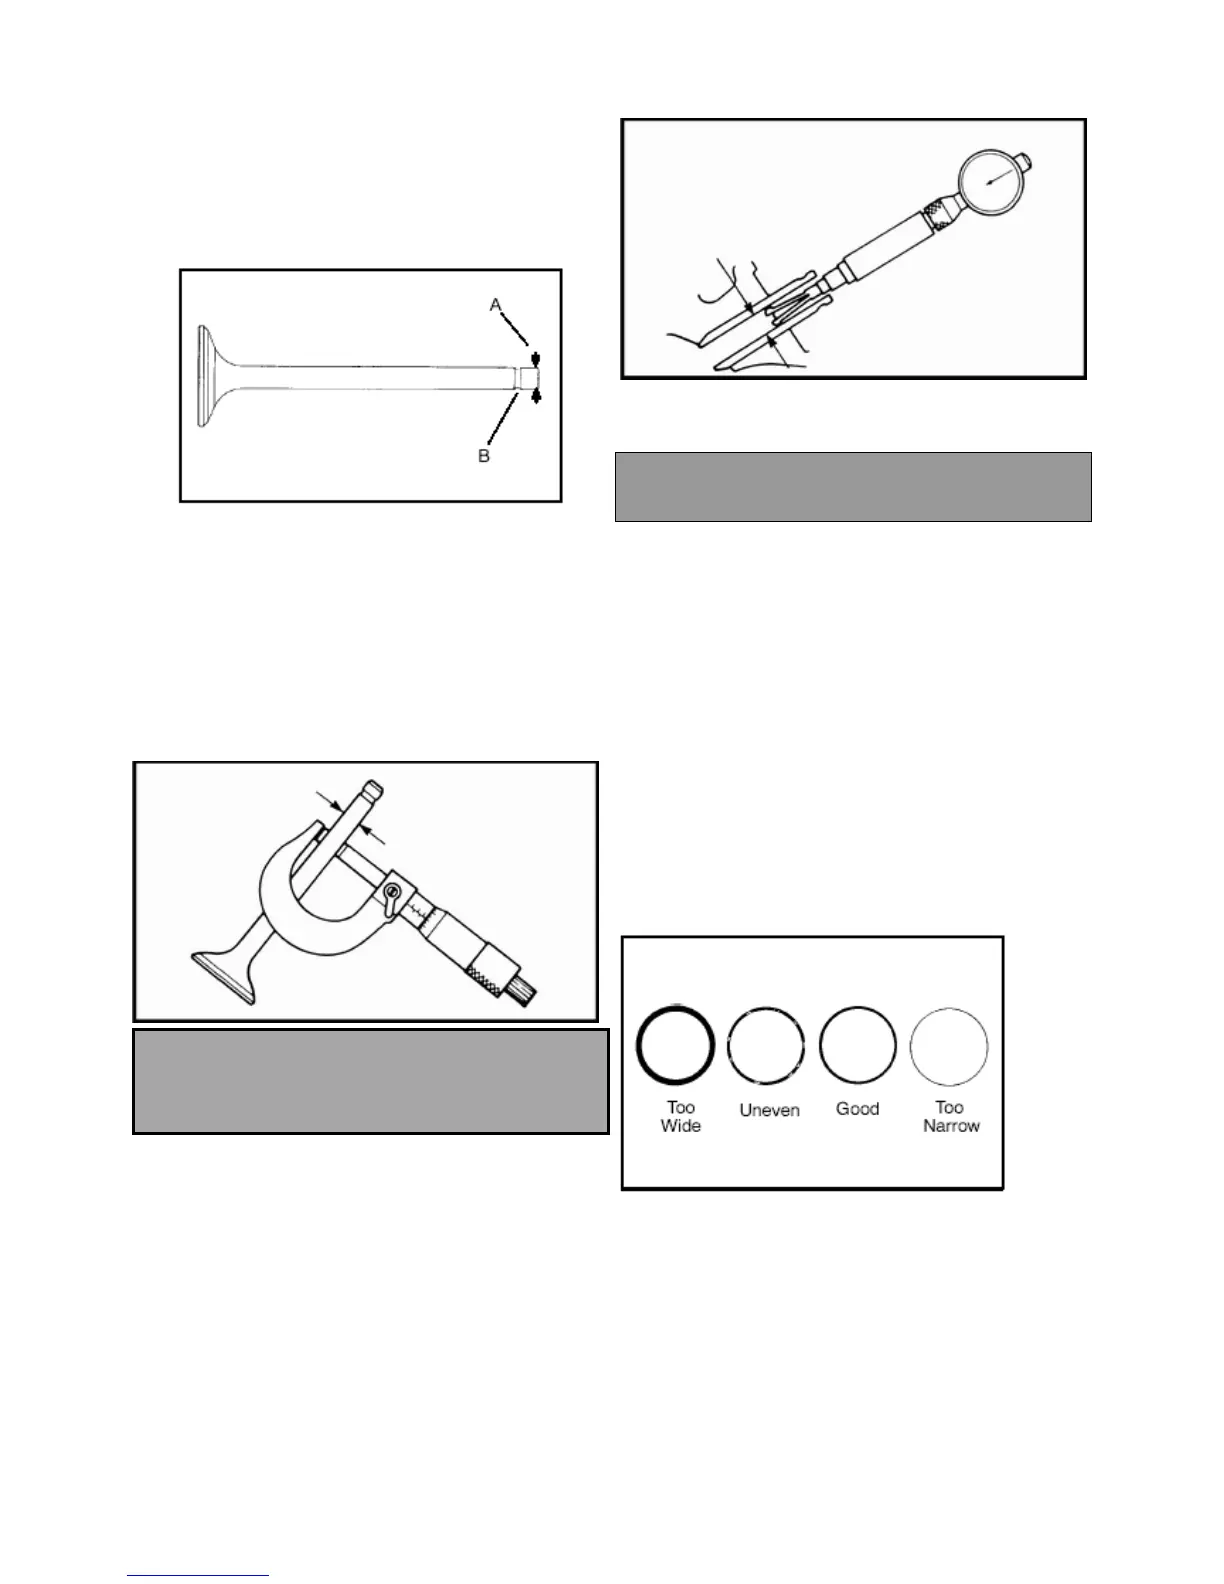
3. To check for bent valve stems, mount valve in a drill or use
“V” blocks and a dial indicator.
4. Check end of valve stem for flaring, pitting, wear or damage
(A).
5. Inspect split keeper groove for wear or flaring of the keeper
seat area (B).
NOTE: The valves cannot be re-faced or end ground.
They must be replaced if worn, bent, or damaged.
6. Measure diameter of valve stem with a micrometer in three
places and in two different directions (six measurements total).
Replace if excessive wear is evident.
Valve Stem OD LIMIT:
Intake Valve Limit: 4.975mm
Exhaust Valve Limit: 4.955mm
7. Measure valve guide inside diameter at the top middle and
end of the guide using a small-hole gauge and a micrometer.
Measure in two directions, front to back and side to side.
8. Subtract valve stem measurement to obtain stem to guide
clearance.
Stem-to-guide clearance
Limit >: 0.10mm
NOTE: Be sure to measure each guide and valve
combination individually.
9. Replace valve and/or guide if clearance is excessive.
NOTE: If valve guides are replaced, valve seats must
be reconditioned. Refer to Valve Seat Reconditioning
for procedure.
VALVE SEAT RECONDITIONING
Valve Seat Inspection
Inspect valve seat in cylinder head for pitting, burnt spots,
roughness, and uneven surface. If any of the above conditions
exist, the valve seat must be reconditioned. If the valve seat is
cracked the cylinder head must be replaced.
CYLINDER HEAD RECONDITIONING
NOTE: Servicing the valve guides and valve seats
requires special tools and a thorough knowledge of
reconditioning techniques. Follow the instructions
provided in the Valve Seat Reconditioning Kit.