Operating the System
Wallstand Examination Procedures
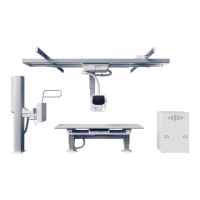
7. Press the button to indicate the lower limit. The button turns green.
Fig. 4-35 Lower limit indication
8. Rotate the x-ray tube in order for the upper edge of the collimator light field to indicate the
upper limit for the composite image.
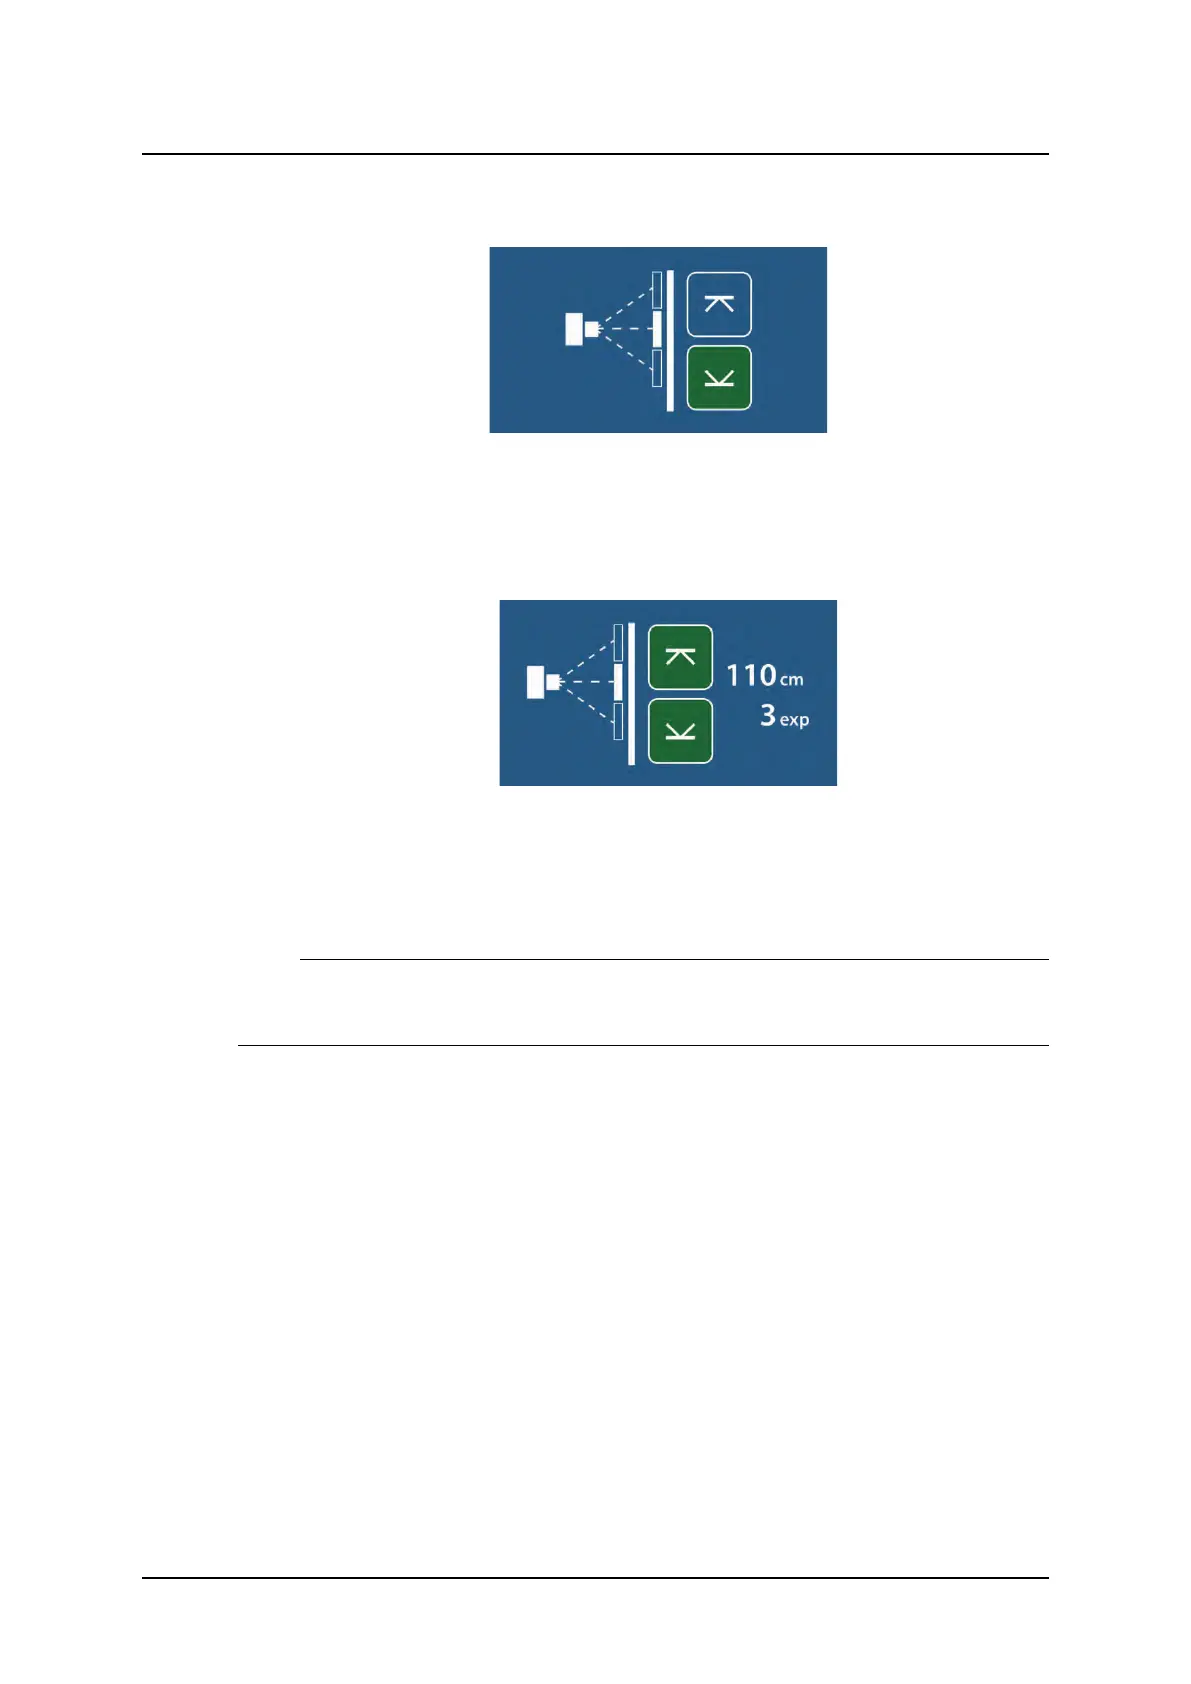
9. Press the button to indicate the upper limit.
• The button turns green to indicate that the limit is set.
Fig. 4-36 Stitching mode — upper and lower limit set
• When both limits have been defined the total length of the composite image and the
number of exposures will be shown.
• The servo mode indication light will be fixed.
10.Modify the exposure settings if necessary.
Note!
For a stitching procedure, a change of the patient size or change of exposure parameters for
the first image included in the sequence, is not kept for the following included images.
11. Activate the Exposure button and keep it activated during the procedure.
• The starting position is always at the top edge of the composite image. Activate the Expo-
sure button and keep it activated until the exposure procedure is completed.
• The System will move to the correct starting position.
• When the System is in the correct position for the first image, the first image is captured.
• After exposure, the System moves to the next, correct position and the second image will
be captured.
• This is repeated until all images for the composite image has been captured.
• The System will beep when the sequence is finished. Release the button.
4.10.4 AEC Technique Setup
For information about the AEC Technique setup, see the Generator Manual.
ARCOMA AB 1000-095-051-EN Rev. 1.1
Operation Manual
SWEDEN Page 120 2020-06-16