4-18
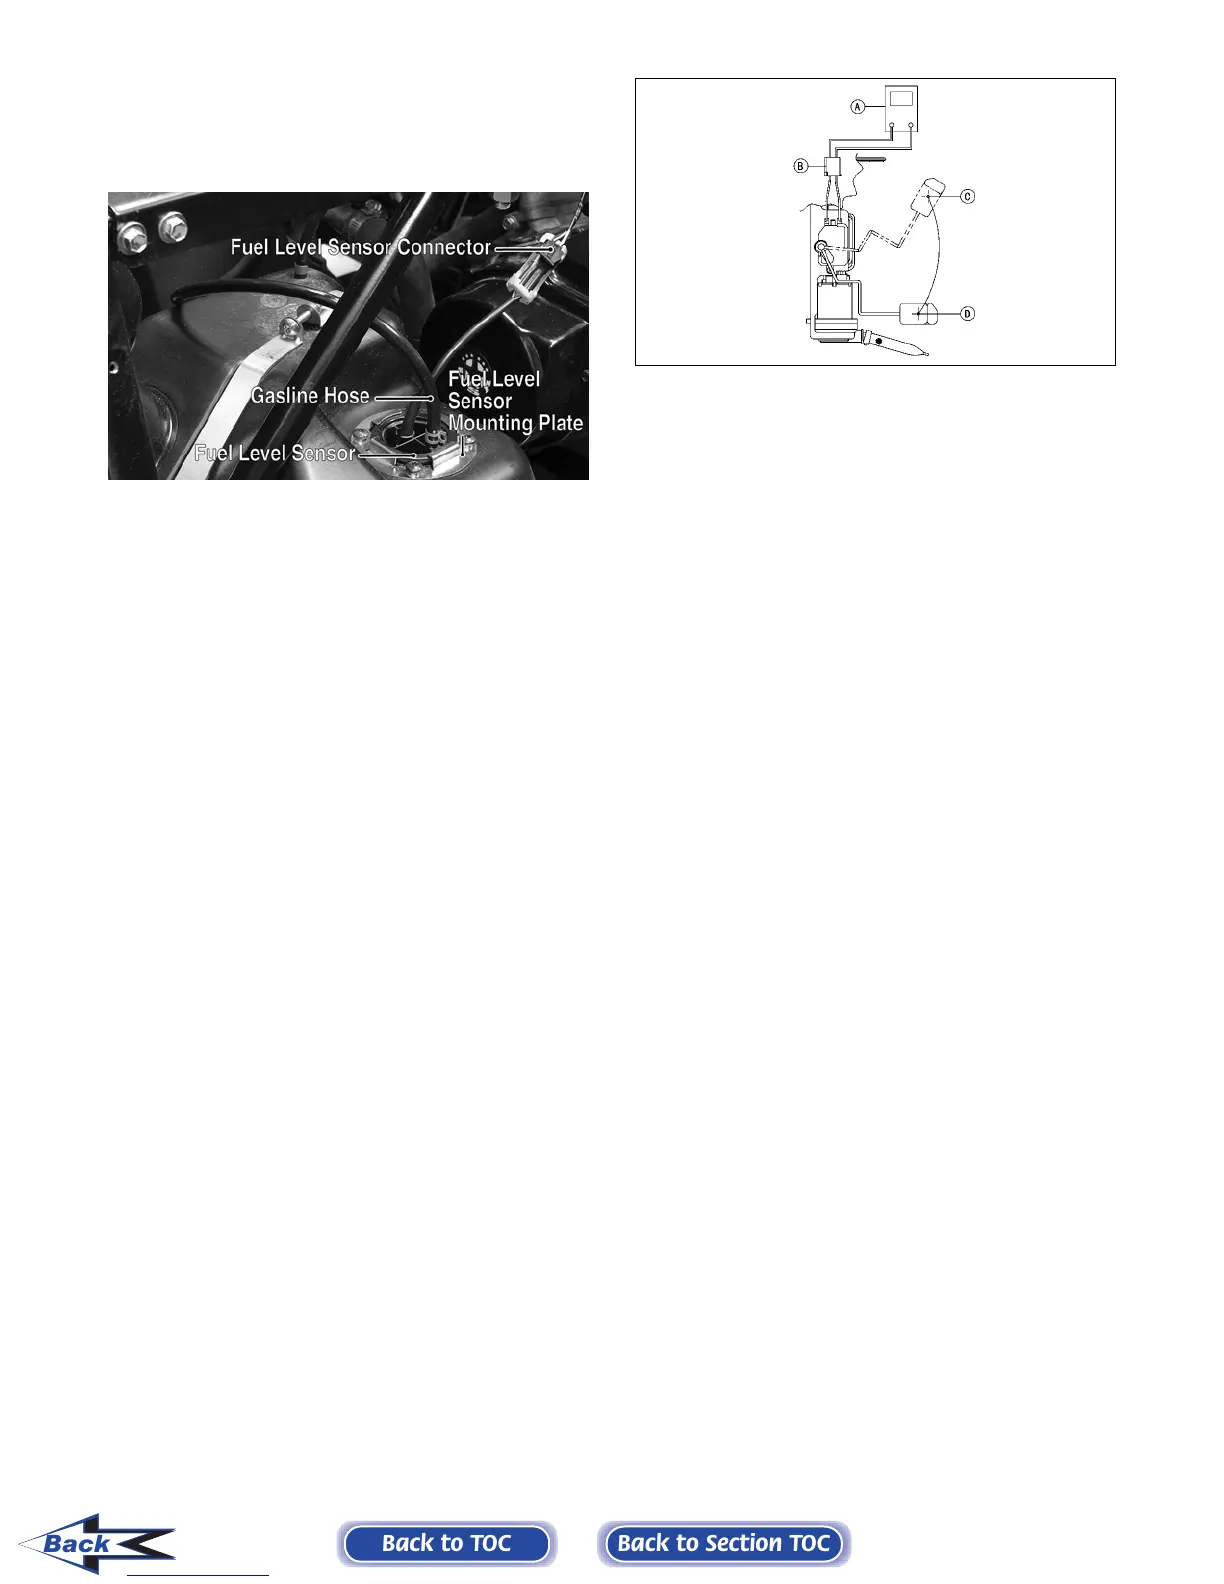
2. Remove the gasline hose and disconnect the fuel
level sensor connector; then remove four
torx-head machine screws and the fuel level sen-
sor mounting plate.
PR166C
3. Remove the fuel level sensor from the gas tank.
Account for a seal.
INSPECTING
1. Inspect the fuel screen and clean with low pres-
sure compressed air.
2. Move the float lever and check for free move-
ment. The float assembly should drop to the
“empty” position when the fuel level sensor is
held vertically. If there is binding or sticking,
replace the fuel level sensor.
3. Test the fuel level sensor by connecting a multi-
meter (A) to the fuel level sensor connector (B);
then select OHMS on the multimeter. The multi-
meter should read 5 ohms of resistance at “full
fuel” position (C) and 95 ohms at the “empty
fuel” position (D).
ATV2116
NOTE: If readings are erratic, clean the resistor
wiper and resistor with a clean cloth soaked with
alcohol and retest. If the readings shown are not
as specified, replace the fuel level sensor assem-
bly.
INSTALLING
1. Using a new seal, place the fuel level sensor into
position in the gas tank; then secure the fuel
level sensor mounting plate. Tighten the four
torx-head machine screws securely.
2. Connect the fuel level sensor connector to the
main harness; then install the gasline hose and
secure with the clamp.
3. Install the right-side seat base; then install the
center console and seats making sure the seats
lock securely into place.
Back to TOC
Back to Section TOC
Back
FOR ARCTIC CAT ATV DISCOUNT PARTS CALL 606-678-9623 OR 606-561-4983
www.mymowerparts.com