4-11
4
8. Install the left-side seat-base; then install the
center console and seats making sure the seats
lock securely.
NOTE: If the oil pressure is lower than specified,
check for an oil leak, damaged oil seal, defective
oil pump, or plugged oil cooler (see Checking Oil
Cooler Restriction in the Oil Cooler sub-section).
NOTE: If the oil pressure is higher than speci-
fied, check for too heavy engine oil weight (see
Section 2), clogged oil passage, clogged oil filter,
or improper installation of the oil filter.
REMOVING/DISASSEMBLING
NOTE: Prior to removing the oil pump due to a
low oil pressure reading, check for oil cooler
restrictions (see Checking Oil Cooler Restriction in
the Oil Cooler sub-section).
1. Remove the oil pump from the engine (see
Right-Side Components in Section 3).
2. Remove the Phillips-head screw on the back
side of the pump and separate the pump housing
and cover. Note the position of the inner and
outer rotors and alignment pin for assembly.
3. Remove oil pump components.
CLEANING AND INSPECTING
NOTE: Whenever a part is worn excessively,
cracked, or damaged in any way, replacement is
necessary.
1. Clean all oil-pump components.
2. Inspect the rotors for scoring and gouges.
3. Inspect the alignment pin, driveshaft, and driven
sprocket for damage.
4. Inspect the pump housing and cover for cracks
or damage.
ASSEMBLING/INSTALLING
1. Place the rotors into the pump housing making
sure the alignment pin is in the groove of the
rotor.
2. Place the cover onto the pump housing.
3. Secure the pump with the Phillips-head screw
coated with red Loctite #271.
4. Install the oil pump into the engine (see
Right-Side Components in Section 3).
Oil Cooler
CHECKING OIL COOLER
RESTRICTION
1. Remove the seats, center console, and left-side
seat-base; then remove the V-belt exhaust duct.
Tilt the cargo box back.
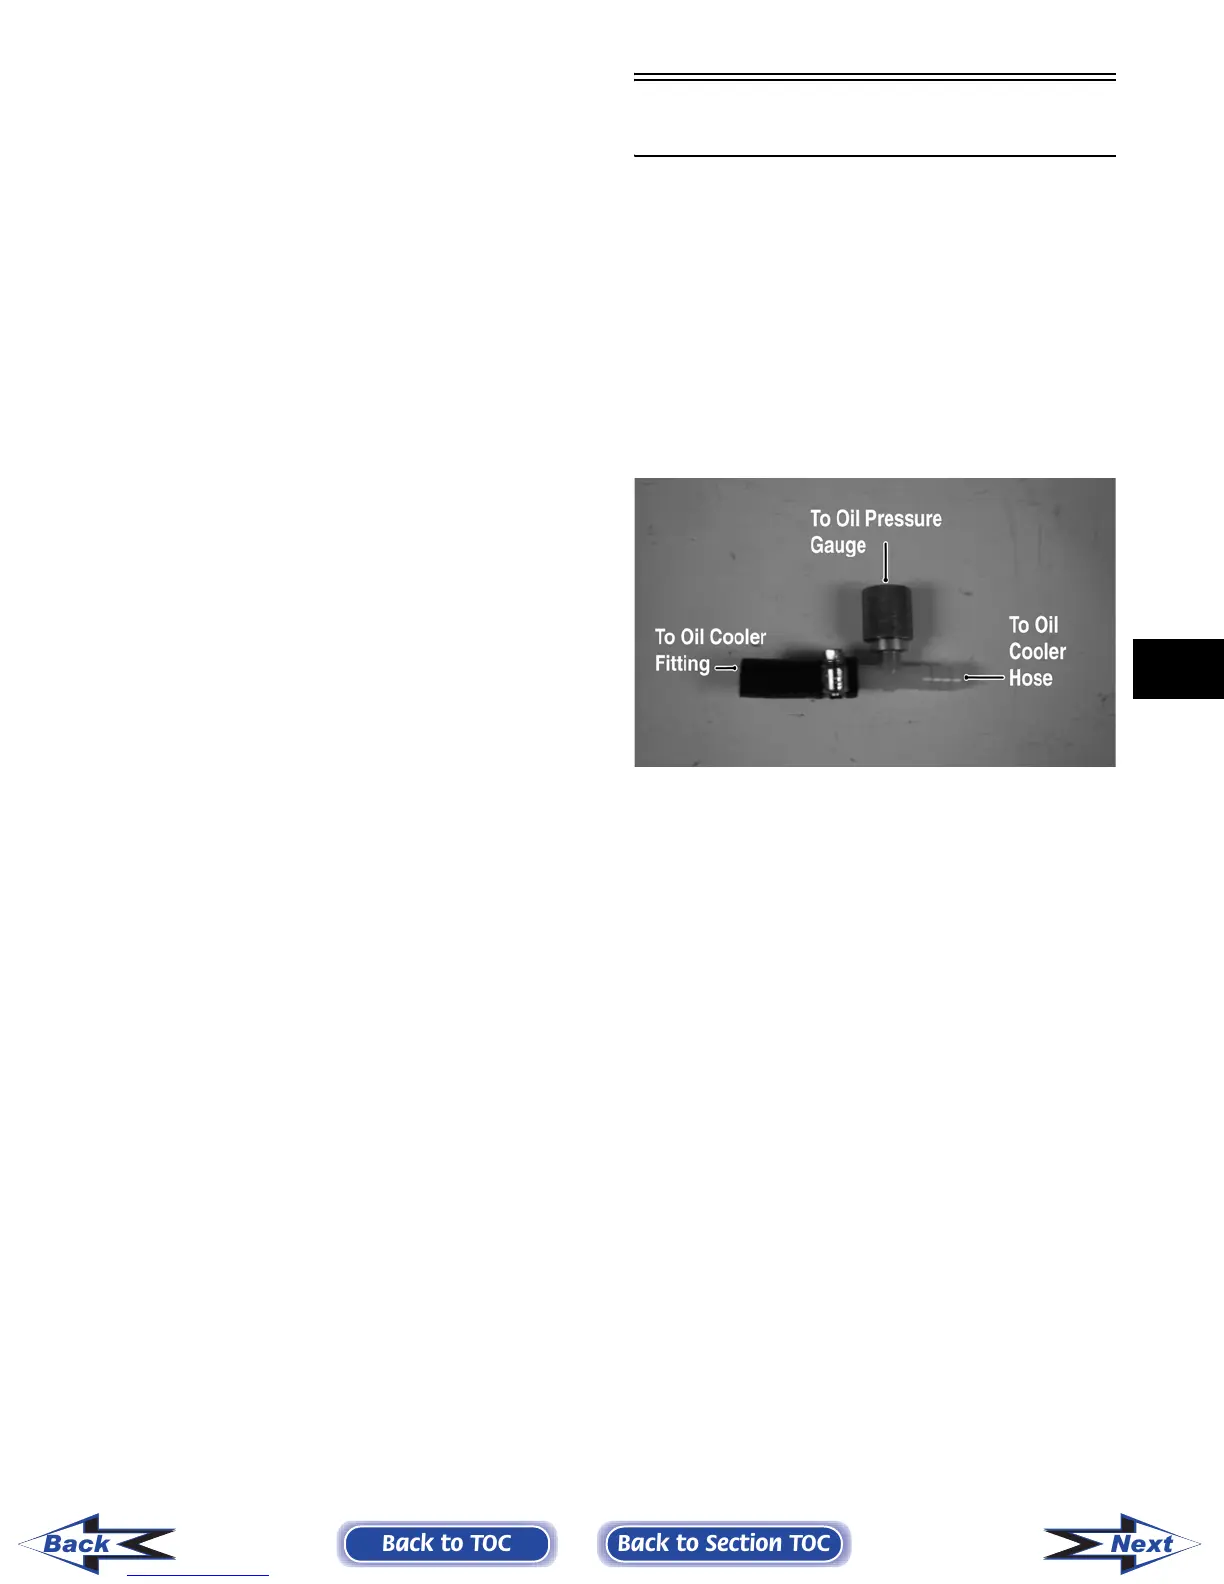
2. Disconnect the lower oil cooler hose; then using
an appropriate T-fitting and adapter, connect the
Oil Pressure Test Kit (p/n 0644-495) into the oil
cooler circuit.
PR267A
3. Set the parking brake and start the engine.
Allow the engine to warm up to operating tem-
perature (with cooling fan cycling).
4. Set the speedometer/tachometer to RPM (XT) or
connect a suitable tachometer (Prowler). With
the engine running at 2500 RPM, the pressure
gauge must show 4.2-5.6 kg/cm
2
(60-80 psi).
NOTE: If the gauge readings are normal but low
oil pressure was noted while testing the oil pump
pressure, the oil cooler is plugged and must be
replaced.
REMOVING OIL COOLER
NOTE: The oil cooler is attached to the rear of
the radiator and must be removed as an assembly
(see Radiator/Oil Cooler sub-section).
1. Disconnect the two-wire connector on the cool-
ing fan harness; then remove the machine screw
and wire clamp securing the cooling fan switch
wires.
Back to TOC
Back to Section TOC
Next
Back
FOR ARCTIC CAT ATV DISCOUNT PARTS CALL 606-678-9623 OR 606-561-4983
www.mymowerparts.com