8-6
Steering Shaft
Assembly
REMOVING
1. Remove the steering wheel (see Steering Wheel
in this section).
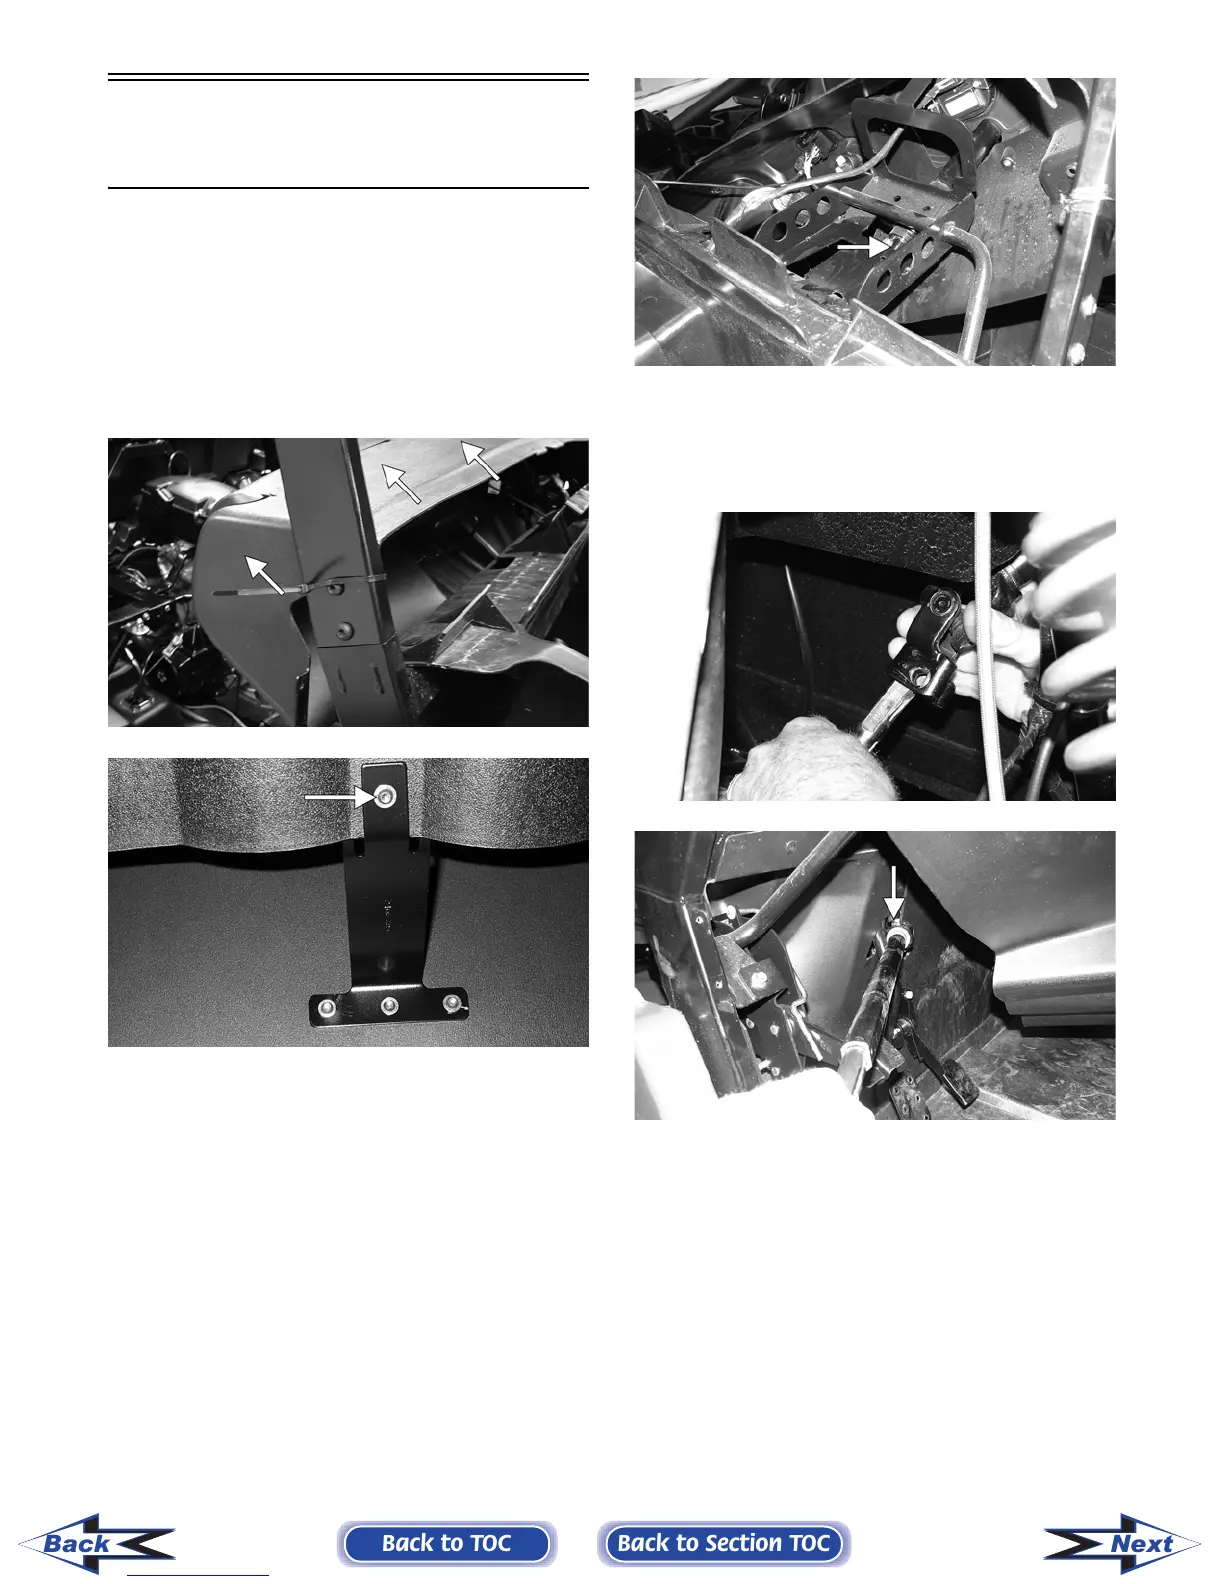
2. Remove the six torx-head screws securing the
dash panel to the frame and one cap screw and
nut from the center support.
PR181A
PR475A
3. Slide the dash panel rearward to access the
steering shaft joints; then match mark all con-
necting components for reassembling.
NOTE: Any time steering components are disas-
sembled, all connecting components should be
marked for proper alignment during reassembling.
4. Remove the cap screw securing the upper steer-
ing shaft joint to the steering wheel shaft; then
slide the steering wheel shaft free of the upper
steering shaft joint. Account for one flat thrust
washer.
PR313A
5. Remove the cap screw securing the lower steer-
ing shaft joint to the pinion shaft; then slide the
steering shaft assembly free and remove through
the opening in the splash panel.
PR304
PR314B
INSPECTING
NOTE: The steering shaft assembly is not repair-
able or rebuildable. If any damage or excessive
wear is detected, the assembly must be replaced.
1. Inspect the joints for excessive wear or loose-
ness.
2. Inspect welds and slip-joints for cracks.
3. Check for excessive wobble in the slip-joint.
Back to TOC
Back to Section TOC
Next
Back
FOR ARCTIC CAT ATV DISCOUNT PARTS CALL 606-678-9623 OR 606-561-4983
www.mymowerparts.com