4-17
4
PR132
3. Fill the engine/transmission with the proper
amount of recommended oil.
4. Fill the cooling system with the proper amount
of recommended coolant.
NOTE: While the cooling system is being filled,
air pockets may develop; therefore, run the engine
for five minutes after the initial fill, shut the engine
off, and then fill the cooling system.
5. Check the entire cooling system for leakage.
6. Install the right-side seat-base; then install the
center console and seats making sure the seats
lock securely.
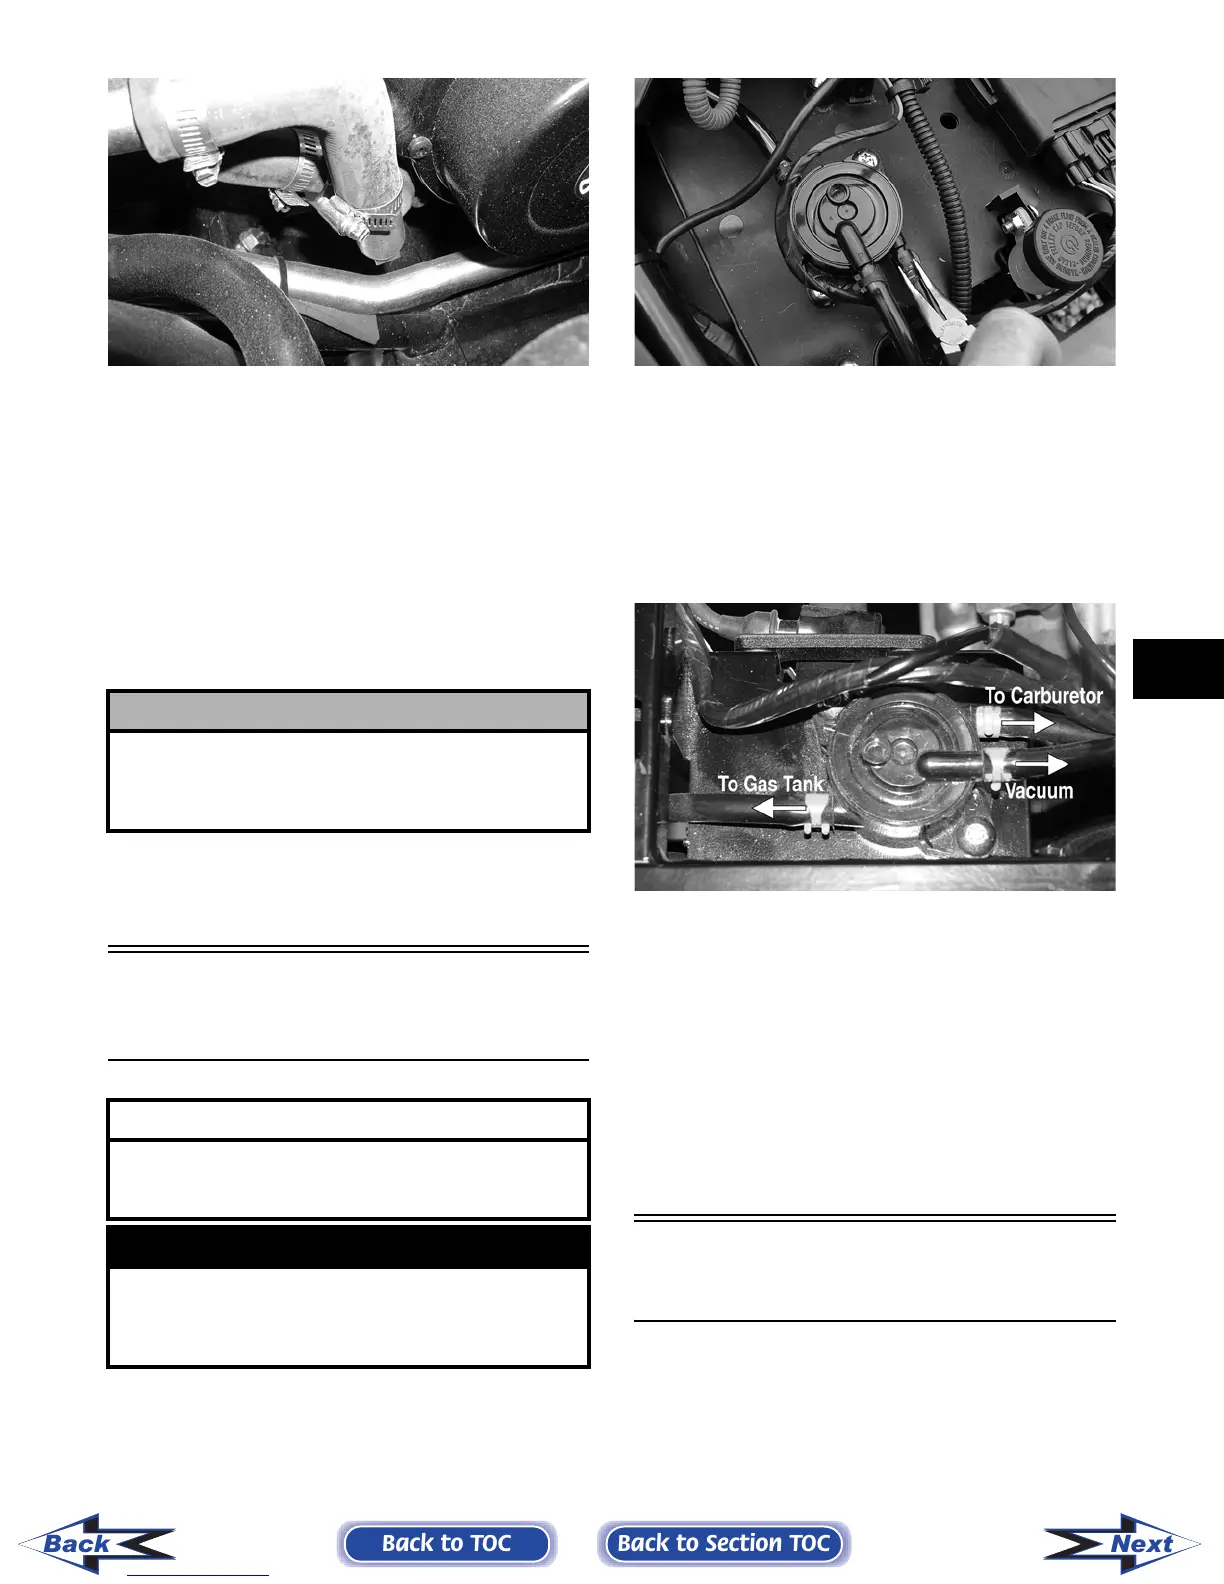
Vacuum Pulse
Fuel Pump
TESTING
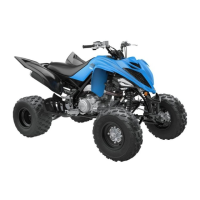
1. Disconnect the fuel pump/carburetor hose at the
fuel pump; then connect a hose and suitable
pressure gauge to the fuel pump output fitting.
CD815
2. Start the engine. Fuel pump pressure should
show 0.036-0.084 kg/cm
2
(0.5-1.2 psi).
REMOVING
1. Remove the right-side seat-base; then remove
the three clamps securing the gas hoses and vac-
uum hose and disconnect the hoses.
PR280A
2. Remove the two machine screws and flange nuts
securing the fuel pump to the electrical tray;
then remove the pump.
INSTALLING
1. Place the fuel pump into position on the electri-
cal tray; then secure with the machine screws
and flange nuts. Tighten securely.
2. Connect two gas hoses and one vacuum hose;
then secure with the clamps.
Fuel Level Sensor
(XT)
REMOVING
1. Remove the seats and the center console; then
remove the right-side seat base.
! CAUTION
After operating the vehicle for the initial 5-10 min-
utes, stop the engine, allow the engine to cool down,
and check the coolant level. Add coolant as neces-
sary.
AT THIS POINT
Prior to removing the vacuum pulse fuel pump, the
following test should be performed to determine that
removal is necessary.
! WARNING
Whenever any maintenance or inspection is made
on the fuel system during which there may be fuel
leakage, there should be no welding, smoking, open
flames, etc., in the area.
Back to TOC
Back to Section TOC
Next
Back
FOR ARCTIC CAT ATV DISCOUNT PARTS CALL 606-678-9623 OR 606-561-4983
www.mymowerparts.com