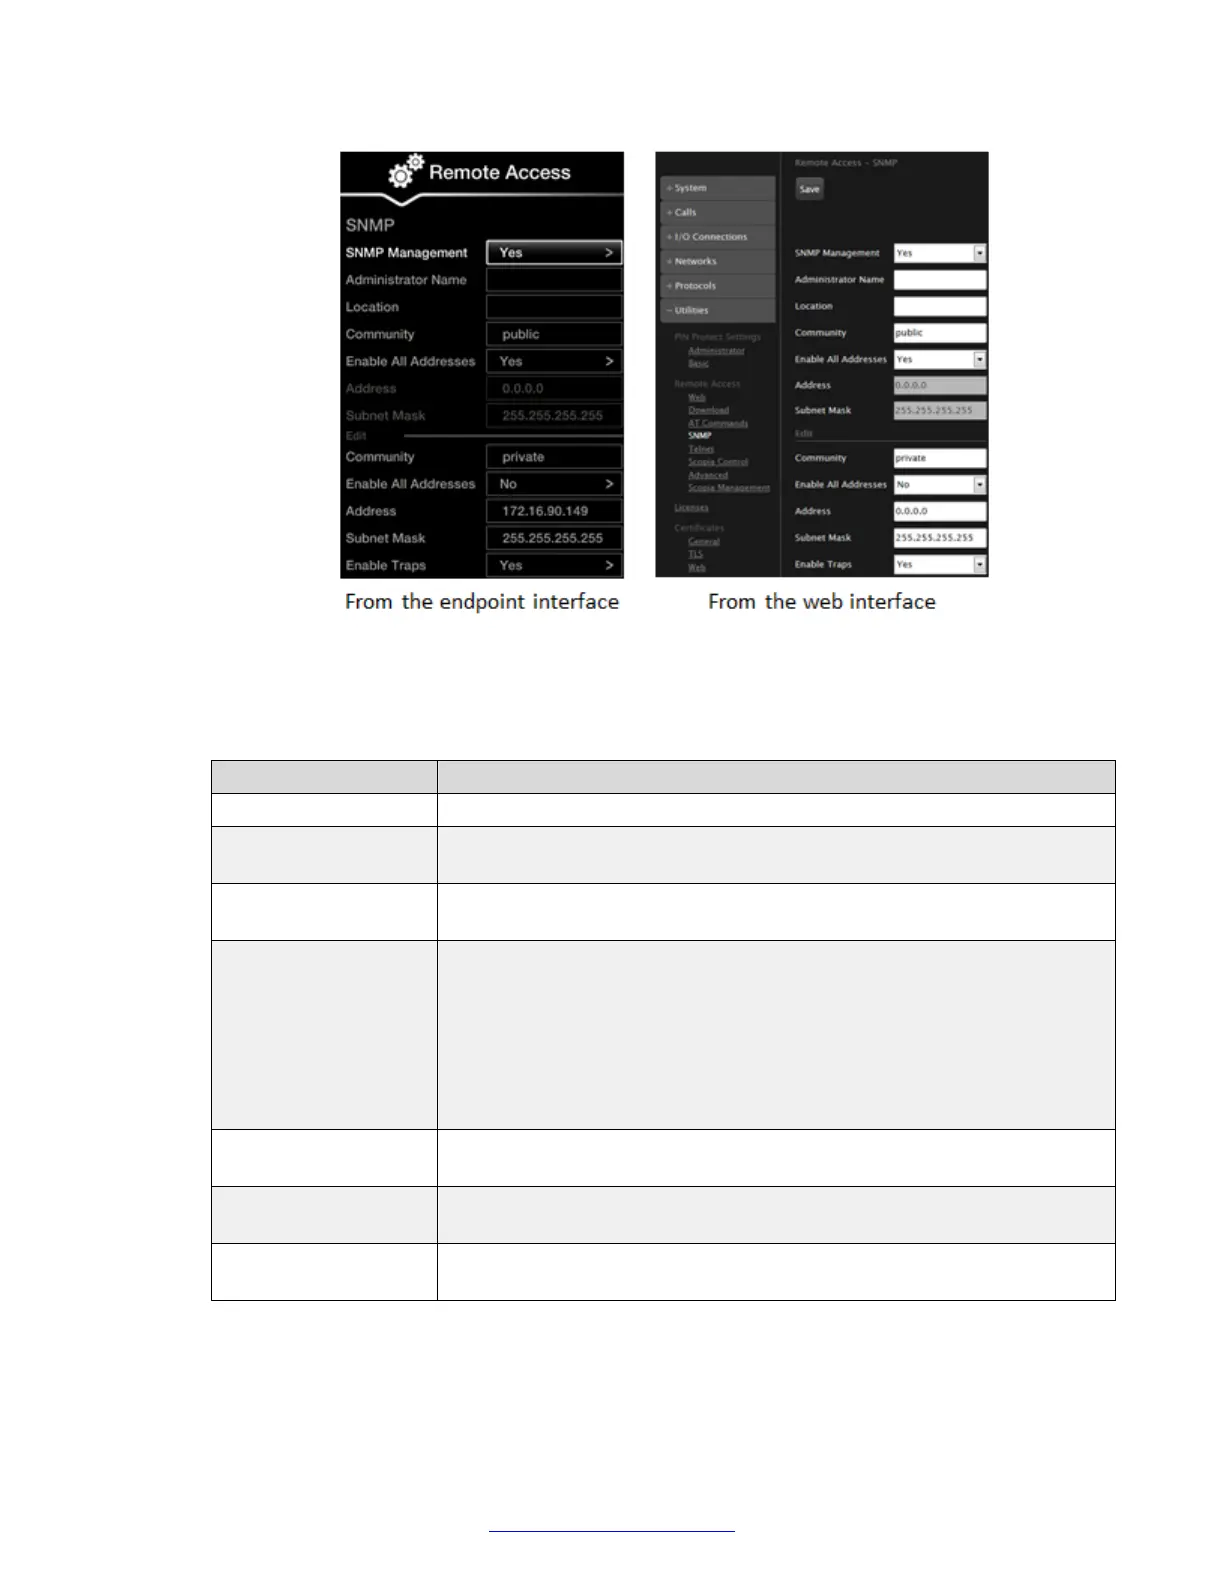
Figure 106: Configuring SNMP settings
2. Set the fields as required.
Table 47: Configuring SNMP settings
Field Name Description
SNMP management Select Yes to enable sending of SNMP messages to an SNMP server.
Administrator name (Optional) Enter a contact name for this device which would appear in an
SNMP browser.
Location (Optional) Enter the location of the device, which would appear in an
SNMP browser.
Community Enter the name of the SNMP community that supports the read and write
operations of SNMP management. Scopia
®
Management requires the
name to communicate with the gateway in the SNMP Get/Set Community
fields.
The community values are case-sensitive. Typically there is a separate
community for read (GET) called public and a community for write (SET)
called private.
Enable all addresses Select No to restrict AT remote access to specific computers in the range
of the Address and Subnet Mask fields below.
Address Enter the IP address of computers allowed to remotely control the unit with
AT commands.
Subnet mask Enter the Subnet mask to modify the Address field into a range of
addresses allowed to send the unit AT commands.
3. From the web interface only, select Save.
Related Links
Advanced Configuration of the XT Series
152 Avaya Scopia
®
XT Series Deployment Guide April 2015
Comments? infodev@avaya.com

 Loading...


