Figure 63: Configuring screen saver settings
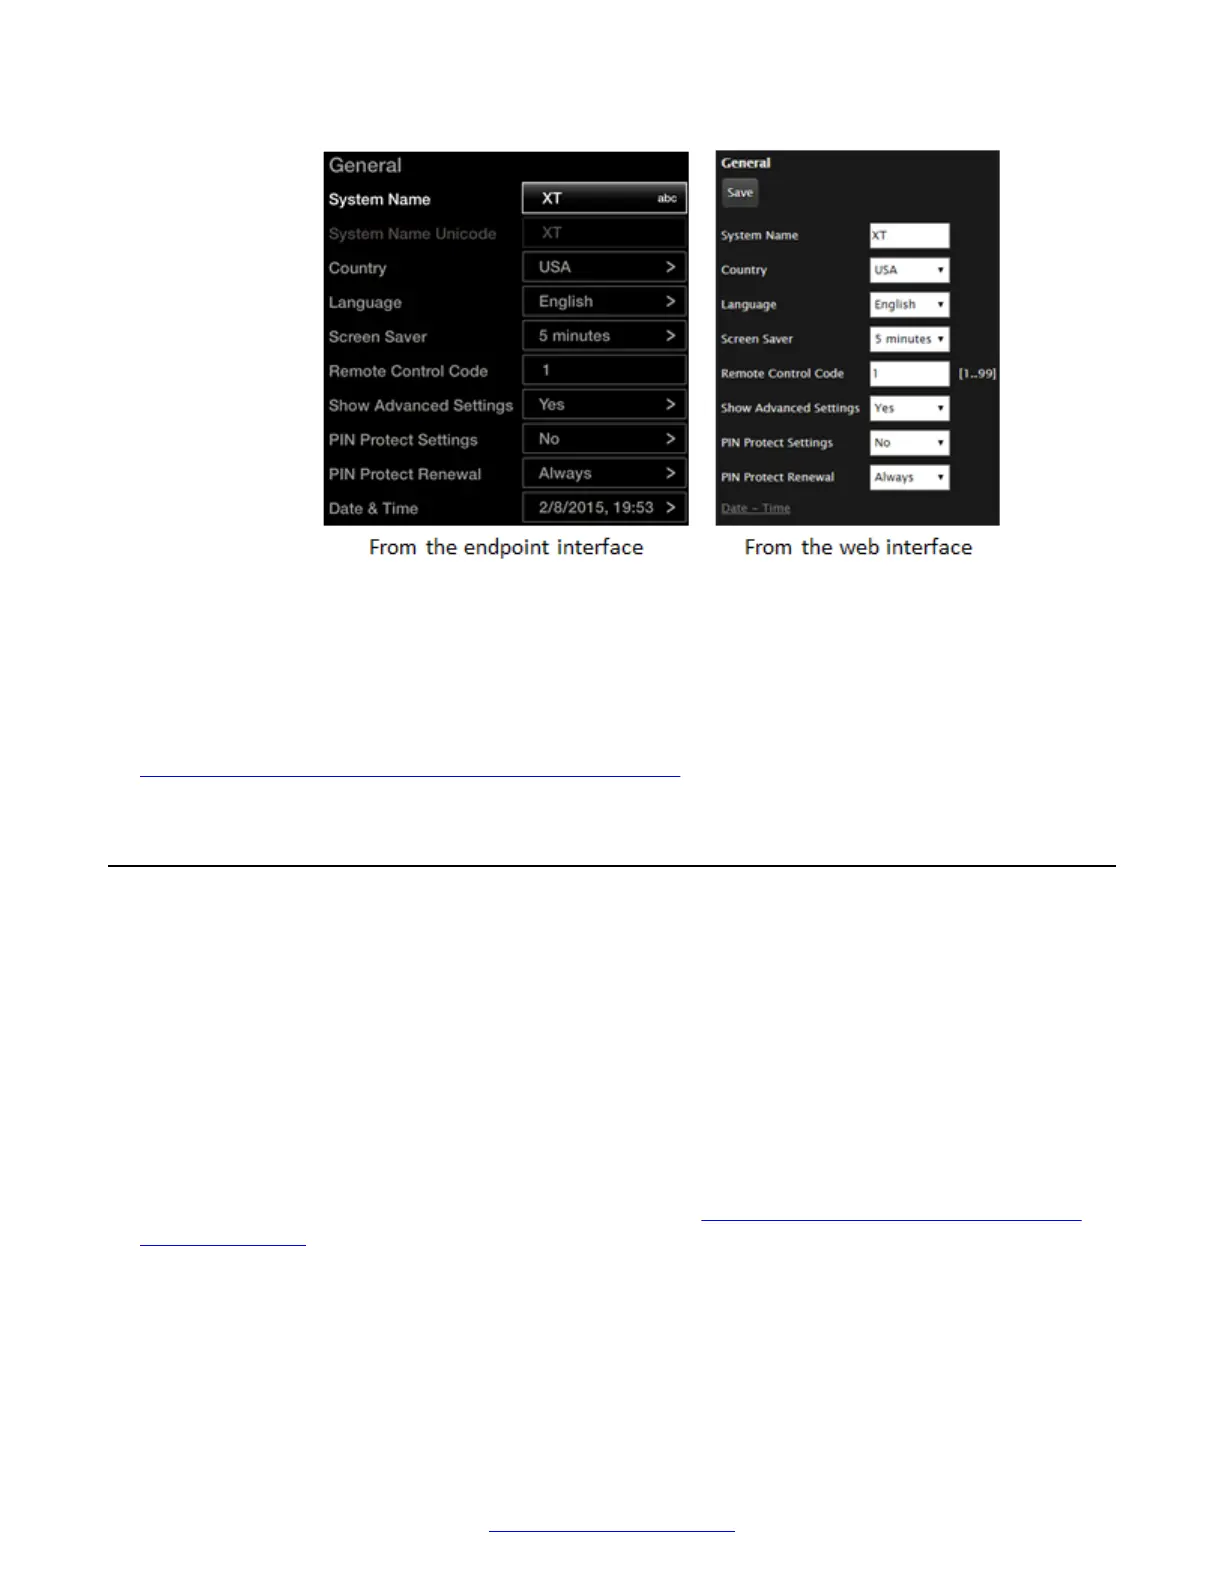
2. Set the time after which the screen saver automatically starts on the display in the Screen
Saver field.
3. From the web interface only, select Save.
Related Links
Configuring Basic Settings with the Quick Setup Wizard on page 83
Configuring Monitors
About this task
After you connect one or two monitors to the HDMI ports on the Avaya Scopia
®
XT Series, you can
configure the number of monitors, their resolutions, and the allowed video layouts. However, the
Scopia
®
XT Executive only works with its own single monitor at a fixed resolution of 1080p.
For the XT4300, the additional monitor is available on a license.
Video layouts often require overlapping images when there are more video streams than available
monitors. For example, when your endpoint is disconnected, there is just local video stream which
fills the screen. If you call another endpoint with no presentation, there are two streams: the local
and the remote video. If you add a presentation, there are now three streams.
The available layouts depend on the number of monitors.
Figure 64: Single monitor video layouts
with presentation on page 97 shows the layouts for a single monitor. The PiP (Picture In Picture)
view shows a video image in the main screen, with an additional smaller image overlapping in the
corner. The PaP (Picture and Picture) view shows up to three images of the same size. The PoP
(Picture out Picture) view shows up to three images of different size, presented side by side, where
the image on the left is larger than the two smaller images on the right. For more information about
video layouts, see Avaya Scopia
®
XT Series User Guide.
Initial Configuration of the XT Series
96 Avaya Scopia
®
XT Series Deployment Guide April 2015
Comments? infodev@avaya.com

 Loading...


