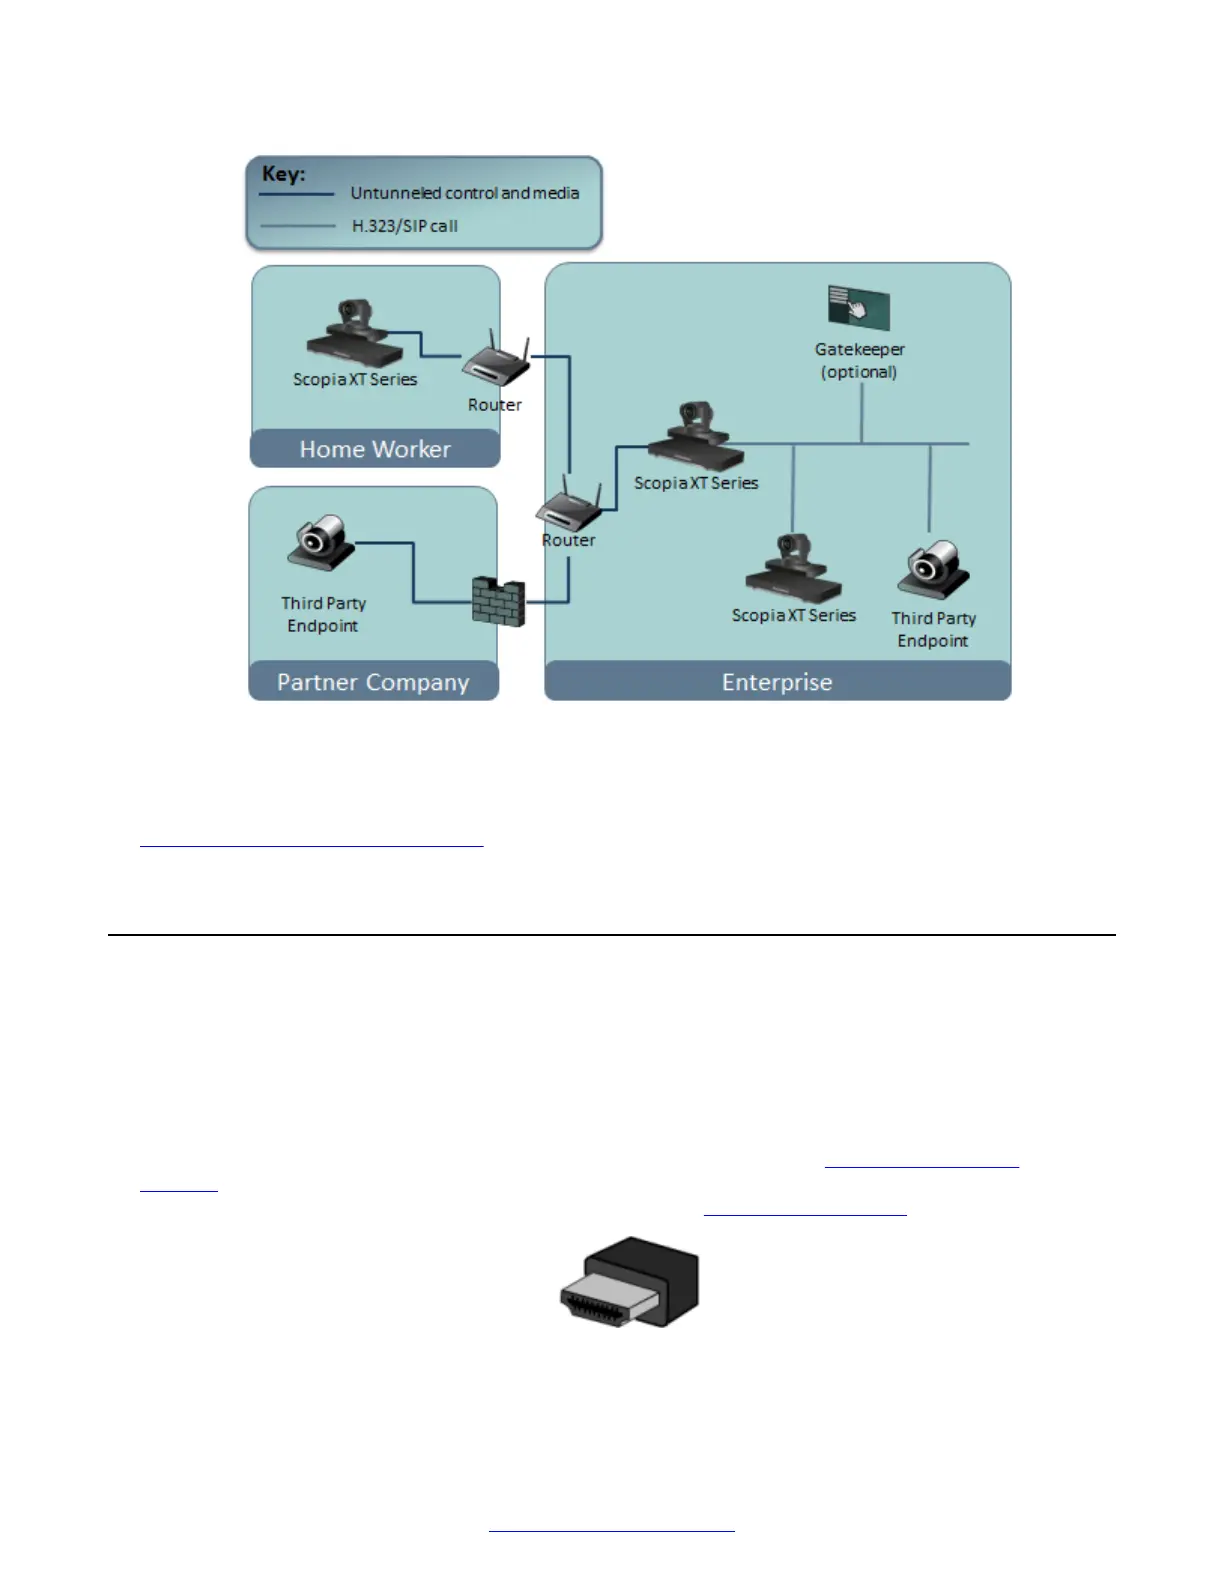
Figure 23: Small business topology using both network ports to connect to a private and public
network
Related Links
Setting Up the XT Series Hardware on page 42
Connecting Monitors to the XT Series
About this task
Connect one or two monitors to the Avaya Scopia
®
XT Series to use it as a videoconferencing
endpoint, and to view the interface (menus) of the endpoint itself. Use the XT Remote Control Unit
to navigate these menus.
Each monitor is connected with an HDMI cable which can transmit both video and audio. You can
calibrate the monitor image position using the quick setup wizard (see
Adjusting the Image
Position on page 86). To configure the advanced monitor settings like the resolution of one or two
monitors and the video layouts of embedded images, see
Configuring Monitors on page 96.
Figure 24: HDMI cable
Connecting Monitors to the XT Series
April 2015 Avaya Scopia
®
XT Series Deployment Guide 47
Comments? infodev@avaya.com

 Loading...


