The endpoint's sound is routed to one of the monitor's loudspeakers. You can customize the sound
with amplifiers and speakers (see Connecting Headphones or an Amplifier with Loudspeakers on
page 64).
Before you begin
To connect two monitors on the Avaya Scopia
®
XT4300, you need to first enable the license for a
second monitor (see
Connecting Monitors to the on page 47).
Procedure
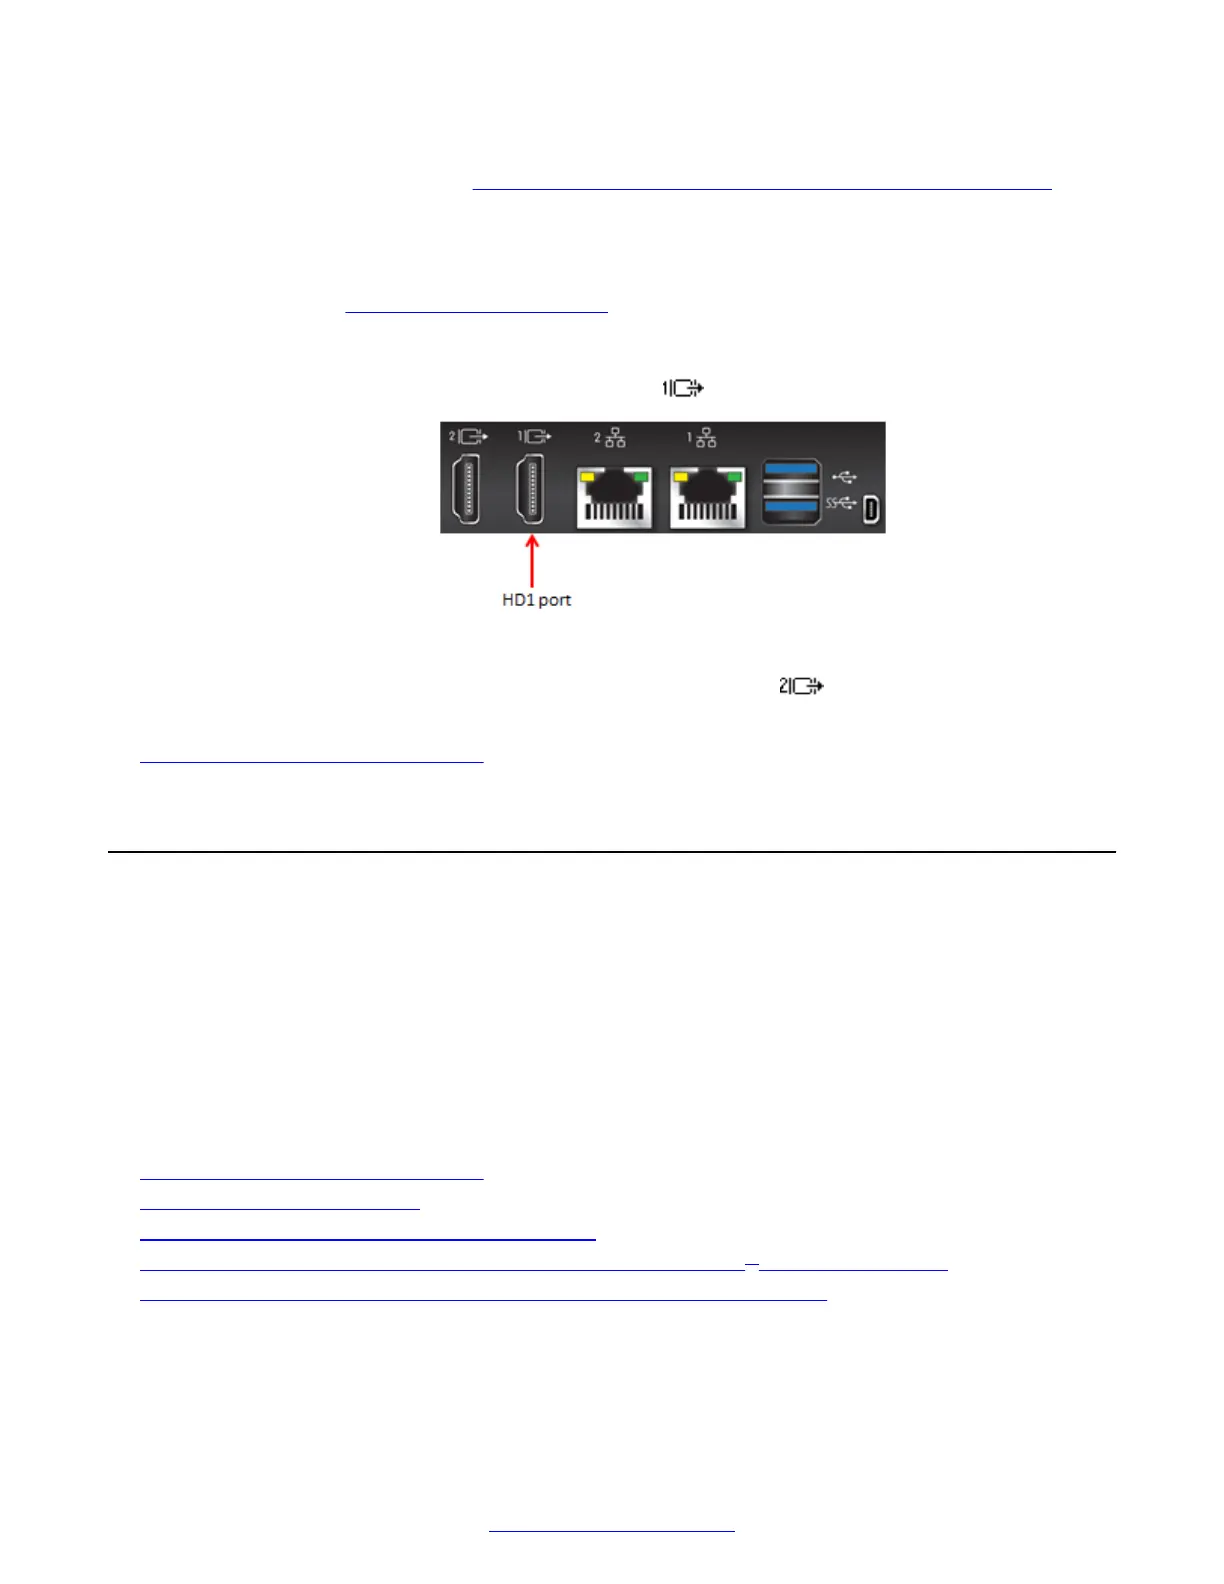
1.
Connect the monitor's HDMI cable to the HD1 port on the XT Codec Unit:
Figure 25: Connecting a monitor to the XT Series
2.
(Optional) Connect the second monitor's cable to the HD2 port on the XT Codec Unit.
Related Links
Setting Up the XT Series Hardware on page 42
Connecting Cameras or DVD players
You can connect one or more PTZ (pan, tilt, zoom) cameras directly to the Avaya Scopia
®
XT
Series, and also connect a DVD player or media player to the DVI port. On the XT7000 Series and
XT5000 Series, you can also connect multiple cameras and HDMI devices via the Scopia
®
XT
Camera Switch.
You can also connect a USB camera, like the Logitech C290 Webcam, to the upper USB port on the
XT Series. The Scopia
®
XT Executive already has a built-in USB camera, and you can connect a
PTZ camera to use instead of the USB camera.
Related Links
Setting Up the XT Series Hardware on page 42
Connecting the PTZ Camera on page 49
Connecting an Additional PTZ Camera Directly on page 51
Connecting Multiple HDMI Devices or Cameras via the Scopia
®
XT Camera Switch on page 54
Connecting a DVD or Blu-ray Player or Other Analog Video Equipment on page 58
Setting Up the XT Series Hardware
48 Avaya Scopia
®
XT Series Deployment Guide April 2015
Comments? infodev@avaya.com

 Loading...


